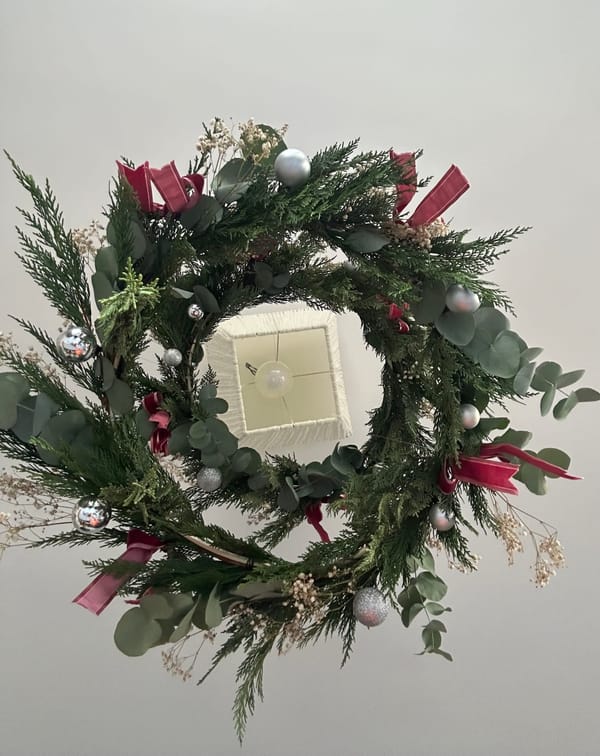
October for me is when my mind gets even more creative as Autumn is approaching, Halloween is commencing and Christmas is not too far away! I have kickstarted this season by making my own Autumn wreath from scratch! Last year I purchased one online and it was a complete disaster and this year I thought why not give it a go myself!
Now that the wreath is finished and I’m super happy with the results and I’ve learnt a lot along the way I wanted to share with you my experience and how I approached making a wreath from scratch in only 2 steps.
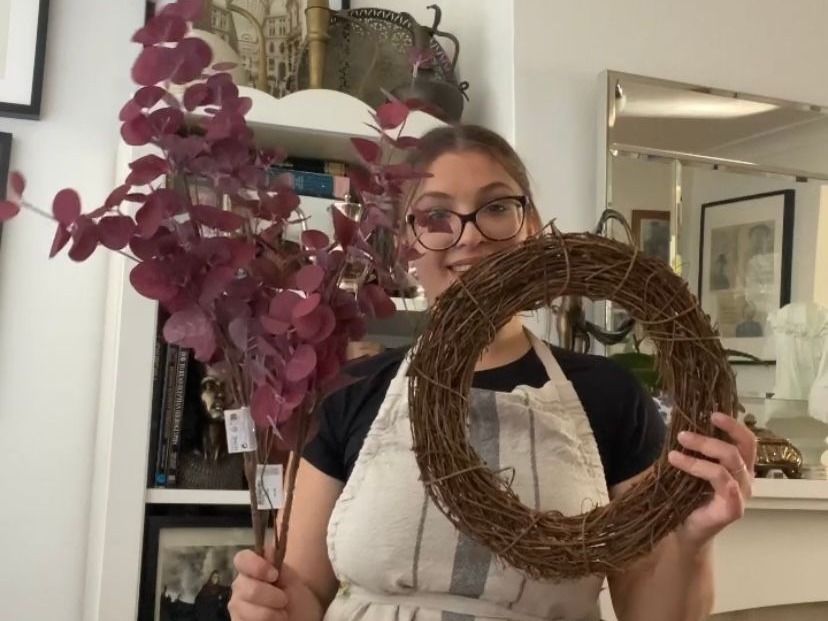
What you’re Going to Need:
- 30.5cm Rattan Grapevine Wreath (Hobbycraft)
- Your choice of faux flowers (this blog uses dark reddish purple eucalyptus stems from Primark Home)
- Bolt Cutters (Amazon)
- Metal Craft Wire (Local DIY Store)
- Hot Glue Gun and Glue Sticks (Hobbycraft)
- And Goulish Snacks!
Step 1: Cutting The Stems
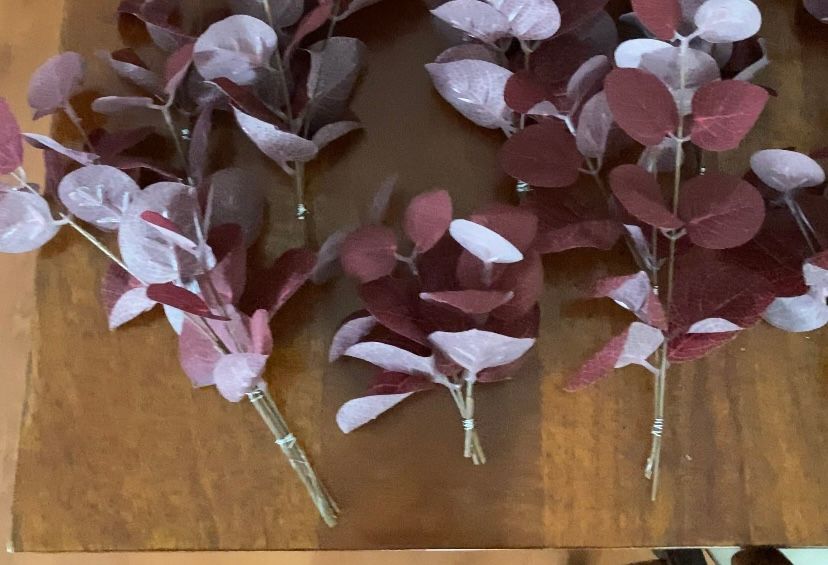
I started by cutting 12 large eucalyptus stems that I purchased from Primark Home into smaller stems by chopping all the eucalyptus branches from the main stem. I started by using kitchen scissors but it was a nightmare cutting the branches so I switched out to Bolt Cutters which cut the stems like a breeze. I highly recommend for you to use a Bolt Cutters too!
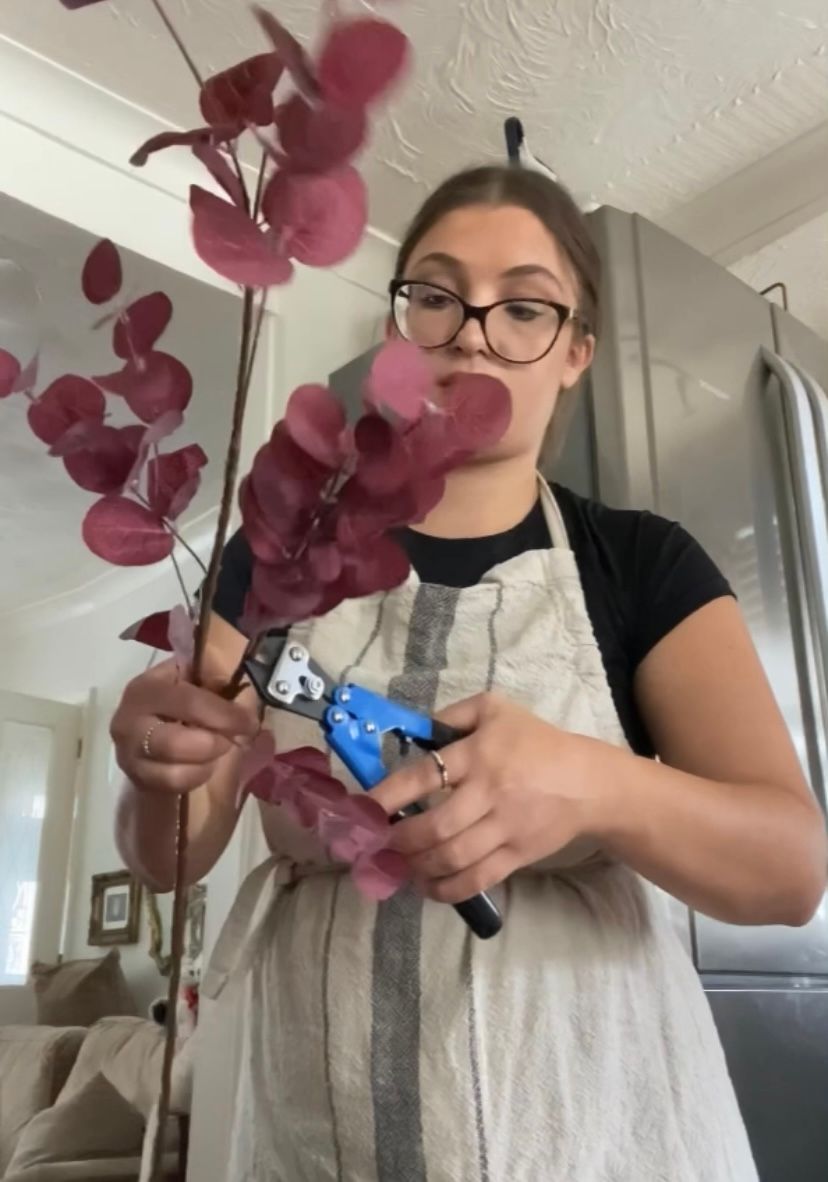
When cutting the larger stem into smaller stems, I cut them in all different sizes. I then grouped the smaller stems into 2s, 3s, or 4s and then using metal craft wire to secure in place to create different thicknesses as well as different lengths and widths. I wanted to create a variety of sizes so that when I go to secure the stems onto the wreath later on, I can create a natural realistic layering look.
Step 2: Applying the Stems onto the Wreath
Once your happy with your smaller stem bunches its time to apply them onto the wreath. This Is where you will need your hot glue gun and metal craft wire on standby. Each stem needs to curve around the wreath. I started from the top middle and worked clockwise around the wreath. With each stem pack, I checked where I wanted to place it on the wreath and once I was happy with the placement, I then secured the stems with the hot glue gun.
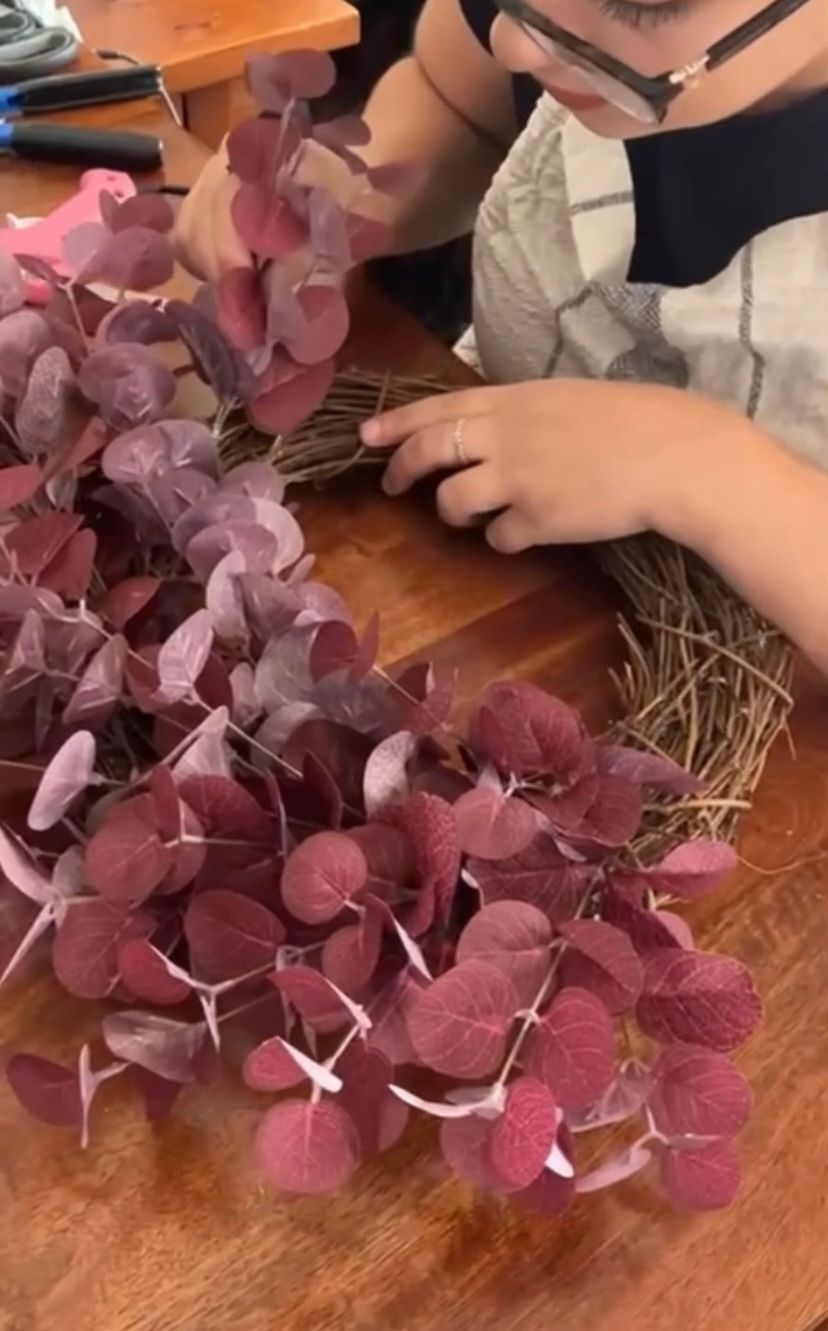
I found pushing the stems so they weave under the wreath twigs and branches helps with the stems being extra secure and look more natural. This also helps to hide the metal craft wire which will disappear under the branches.
Once you have gone round the entire twig wreath with your chosen floral stems, with any remaining stems you have, you can look for any gaps to fill which will make the wreath look fuller.
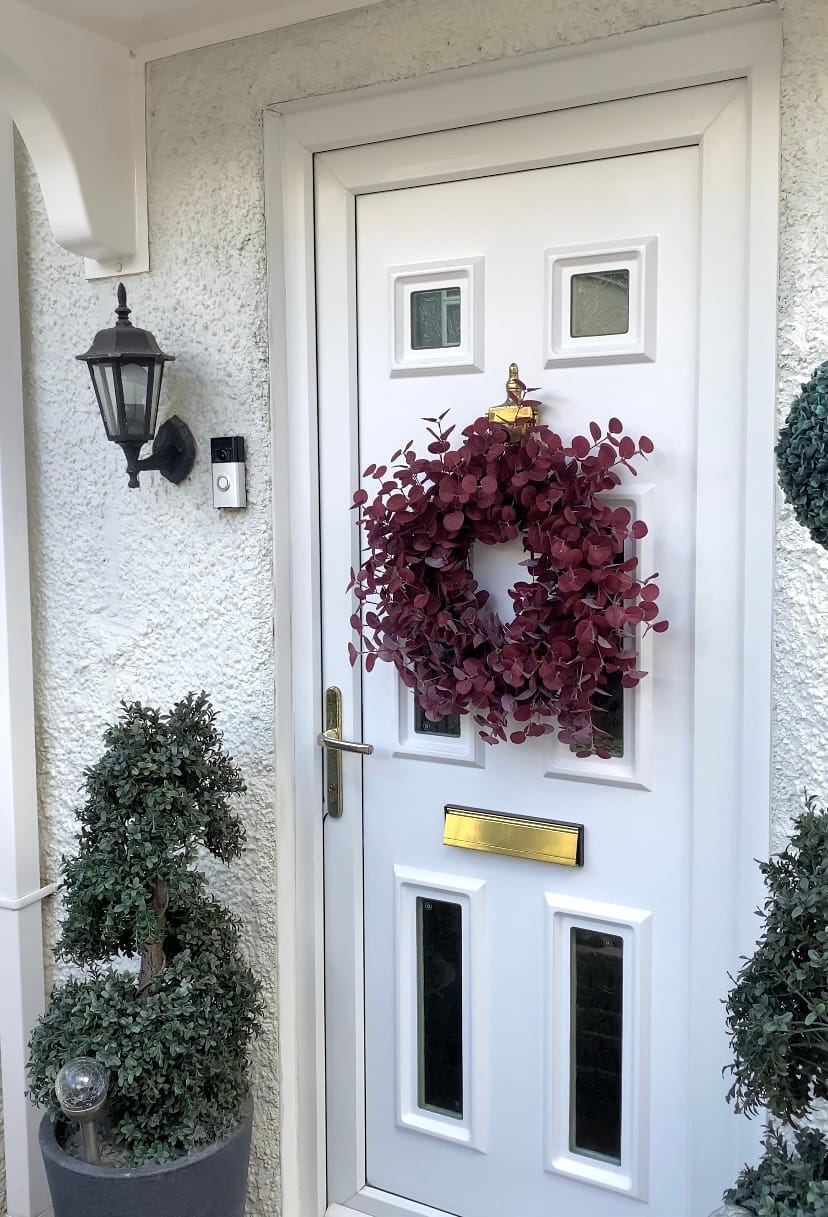
Once you’re happy with your finished wreath, give it one last shake to check everything is secure and now it Is time to display your hard work on your front door!
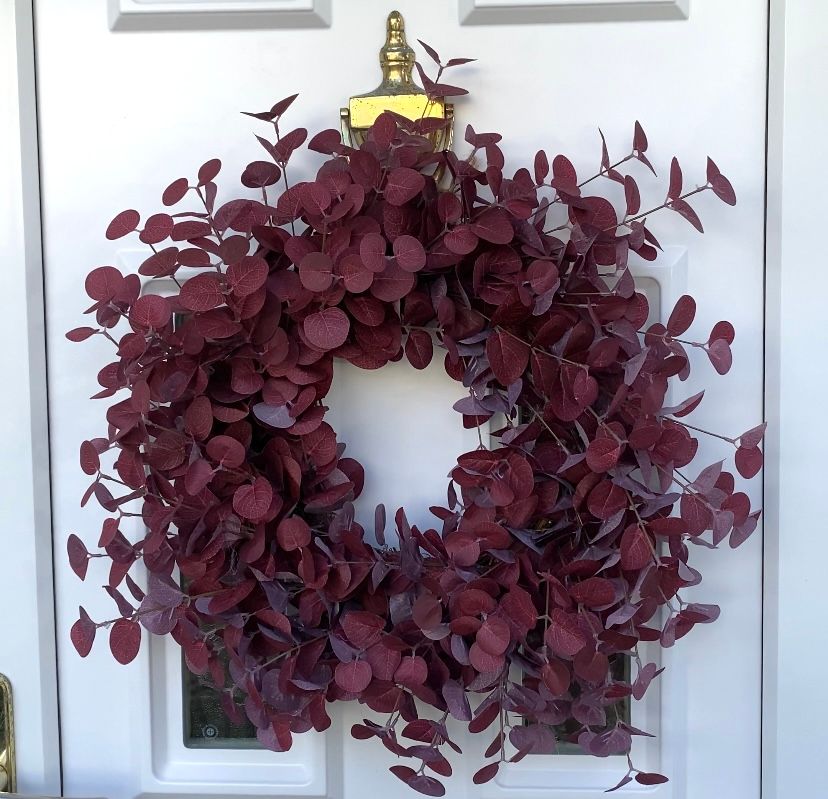
This is a Super Fun DIY project to kickstart autumn and something you can look forward to every time you get home!

I have linked everything I have used in my Amazon Storefront which is linked just below
Be-Leaf In Yourself!