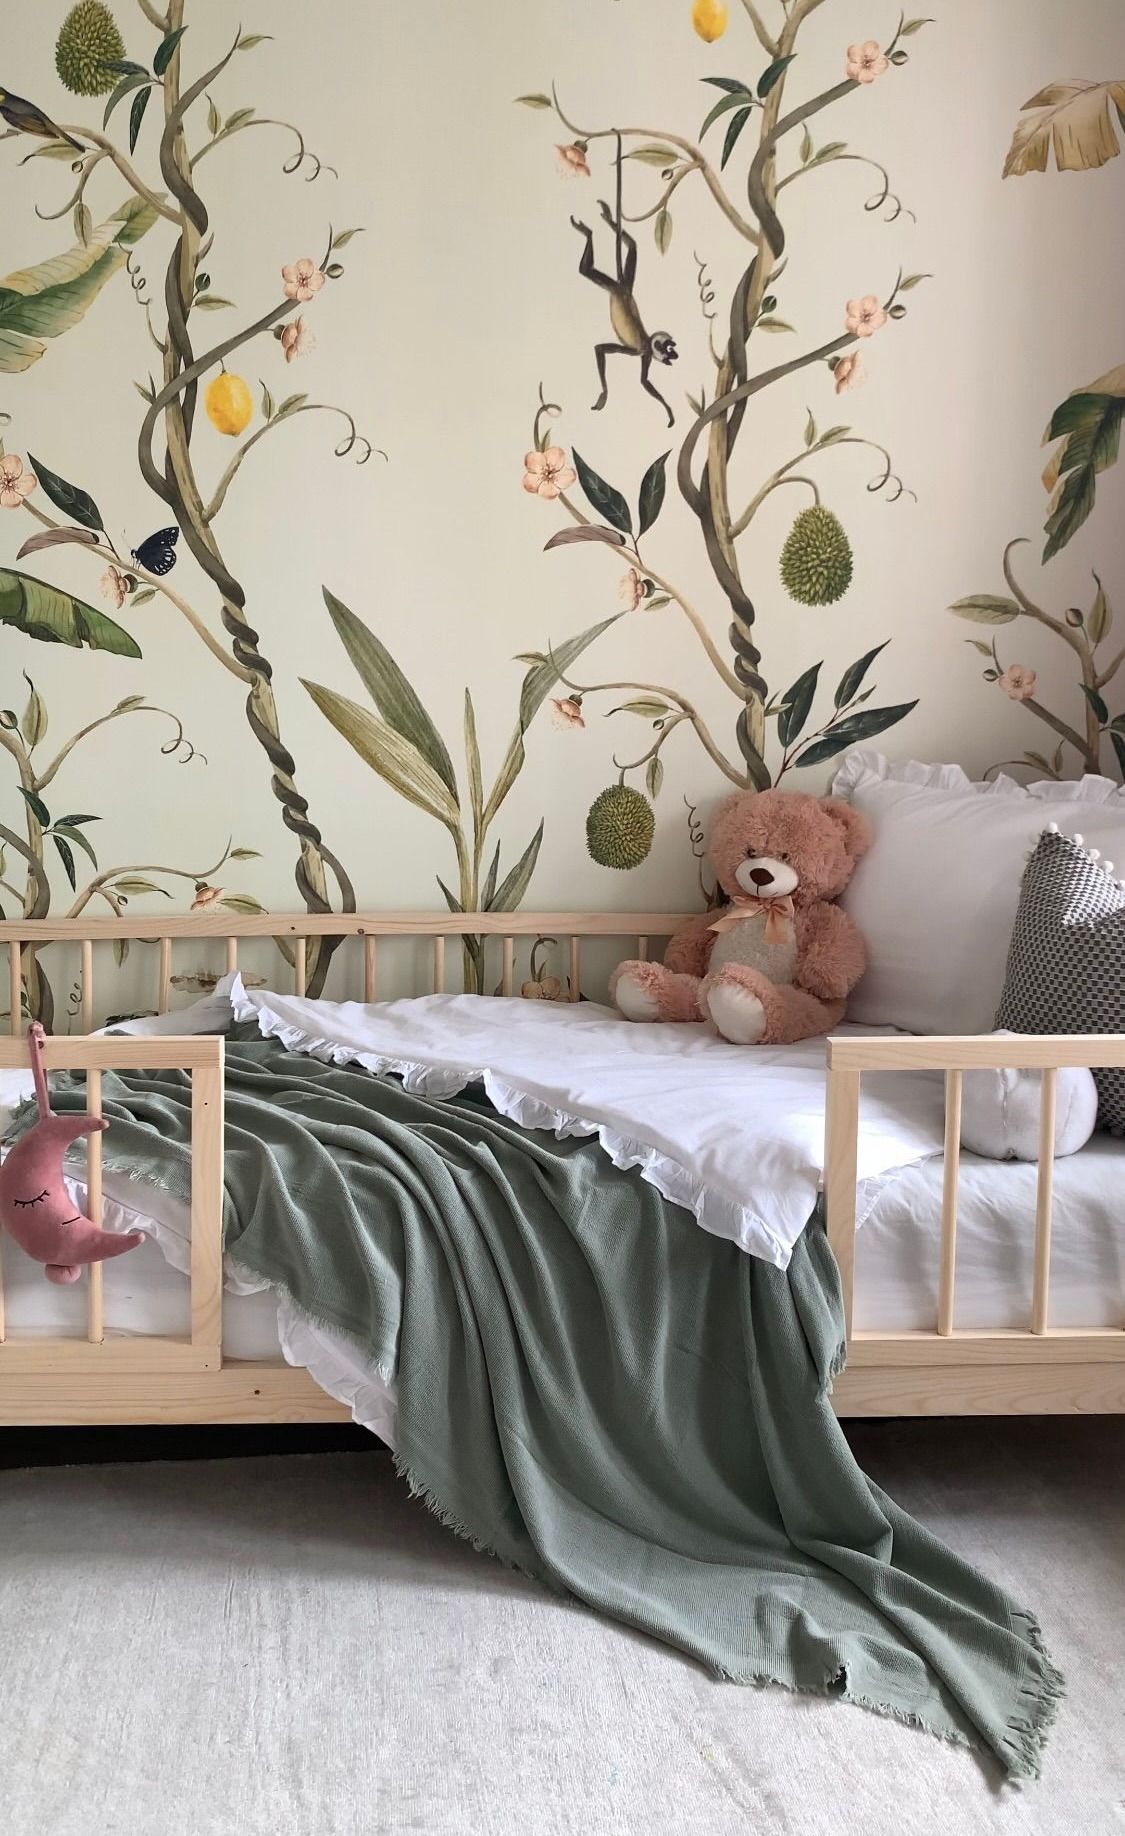
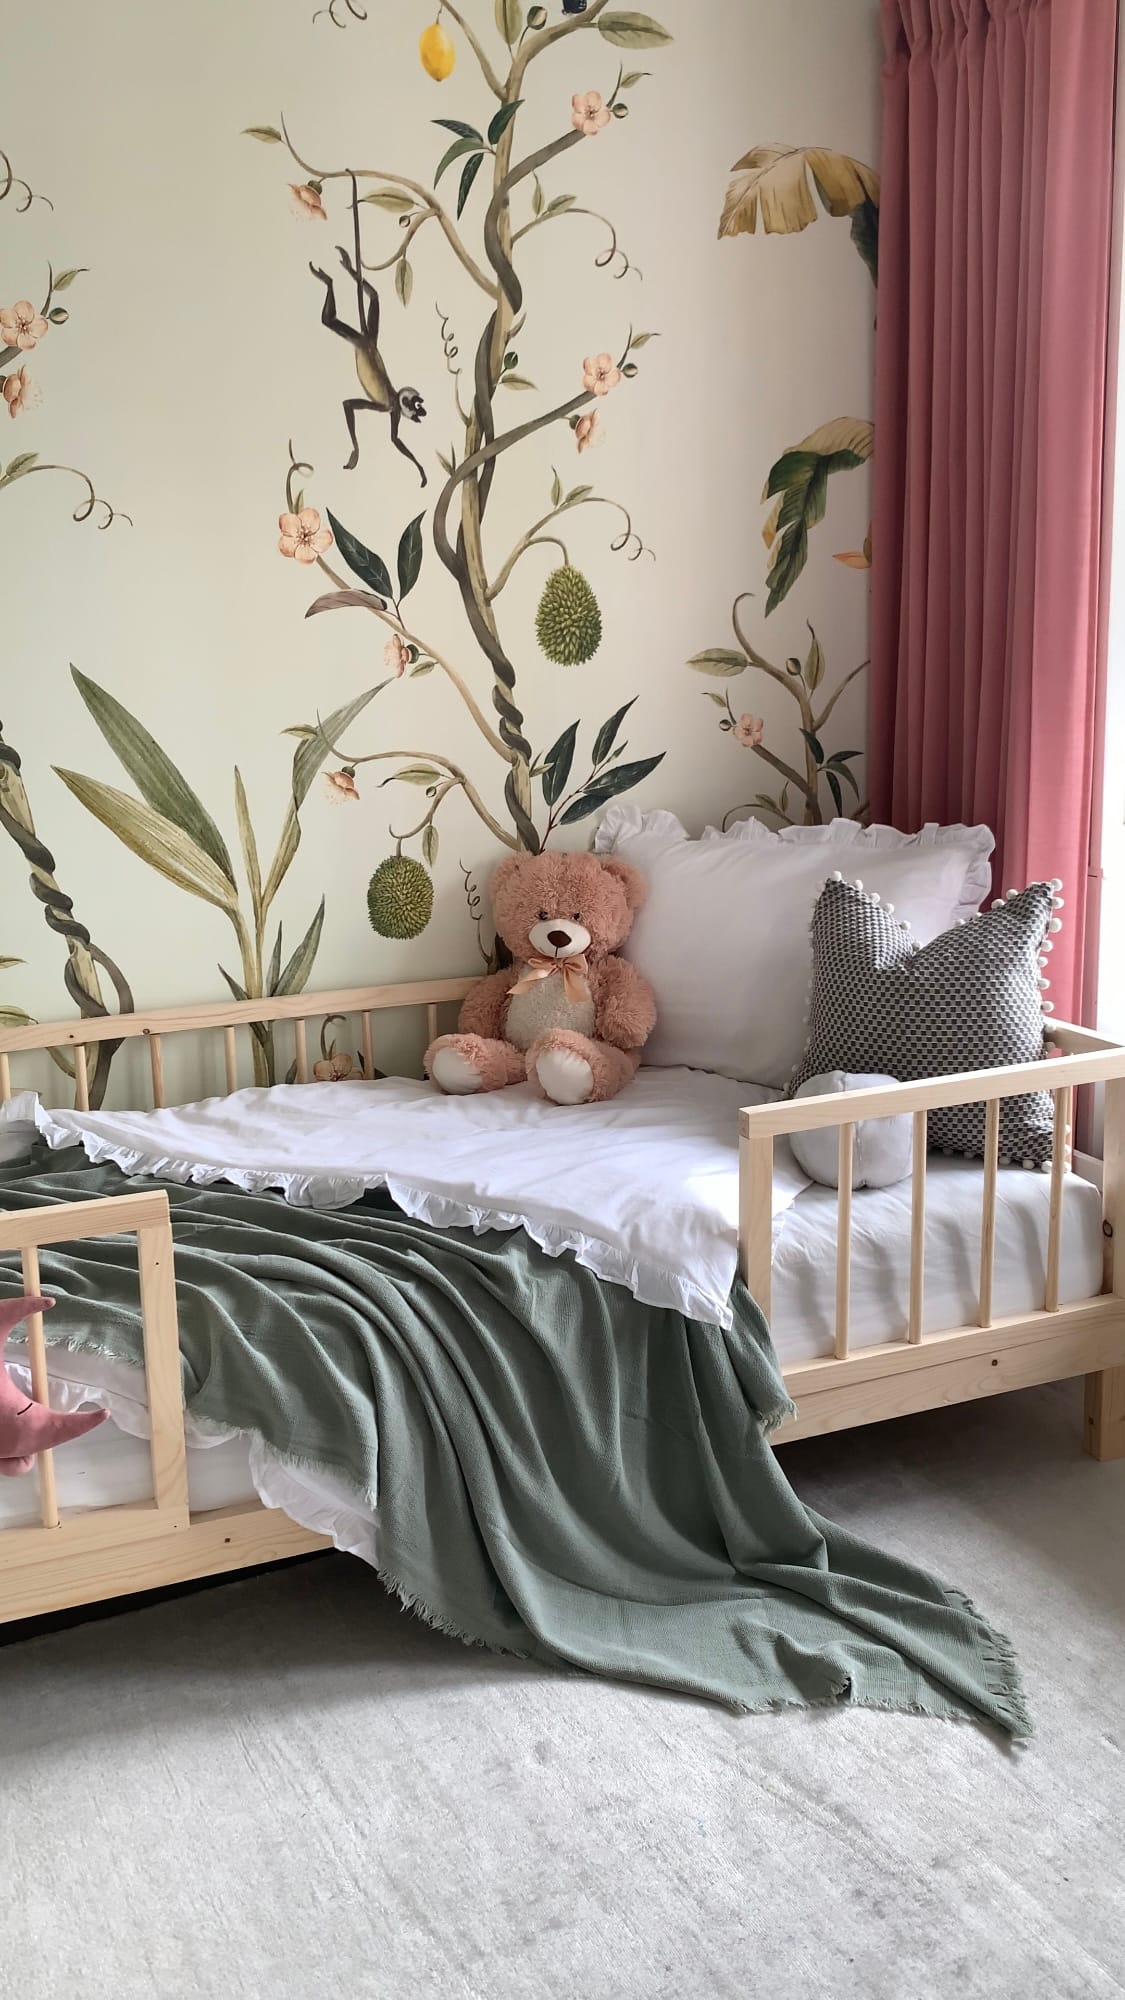
This was a very emotional DIY for me, seeing my daughter grow up so fast and saying goodbye to her crib... but it was also a very fun project to do because my daughter helped me build her own bed and we had a lot of fun.
Why this DIY
What I definitely didn't want was having to buy a new bed every few years. Not only because of the costs but also because I'm trying to minimalize my consumption. So when I was looking for a toddler bed I wanted something durable but I just couldn't find what I was looking for or I didn't like the price tag. So me being me I thought why not build one myself?!
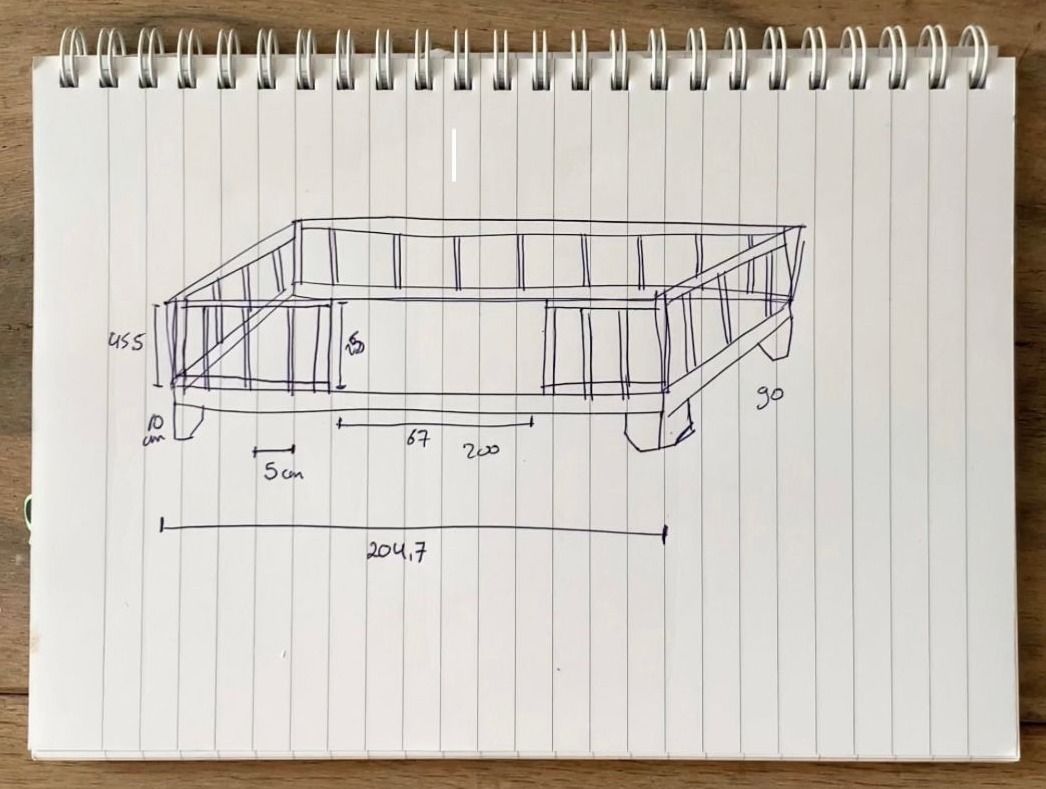
I based the dimensions of the bed on the measurement of a standard single mattress (90 cm x 200 cm).
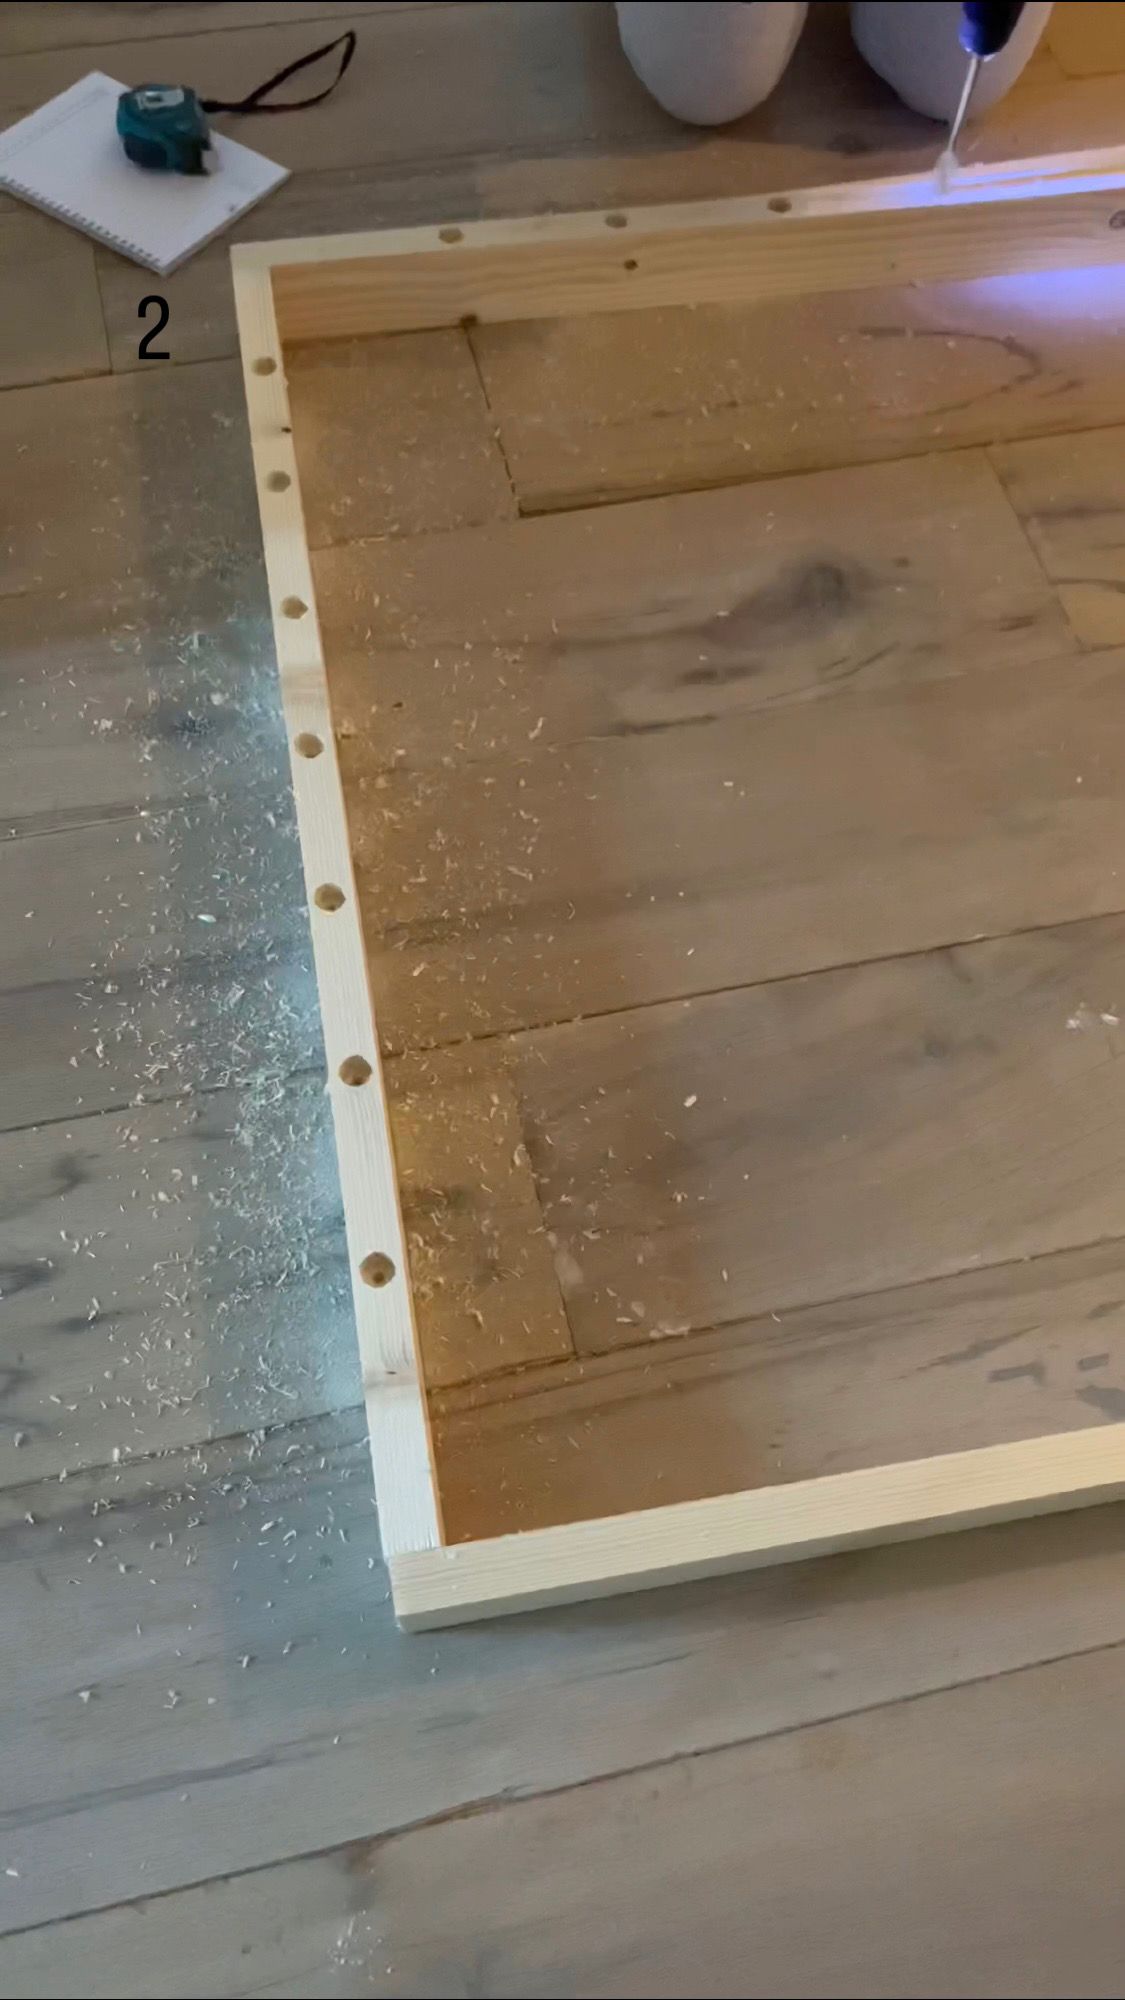
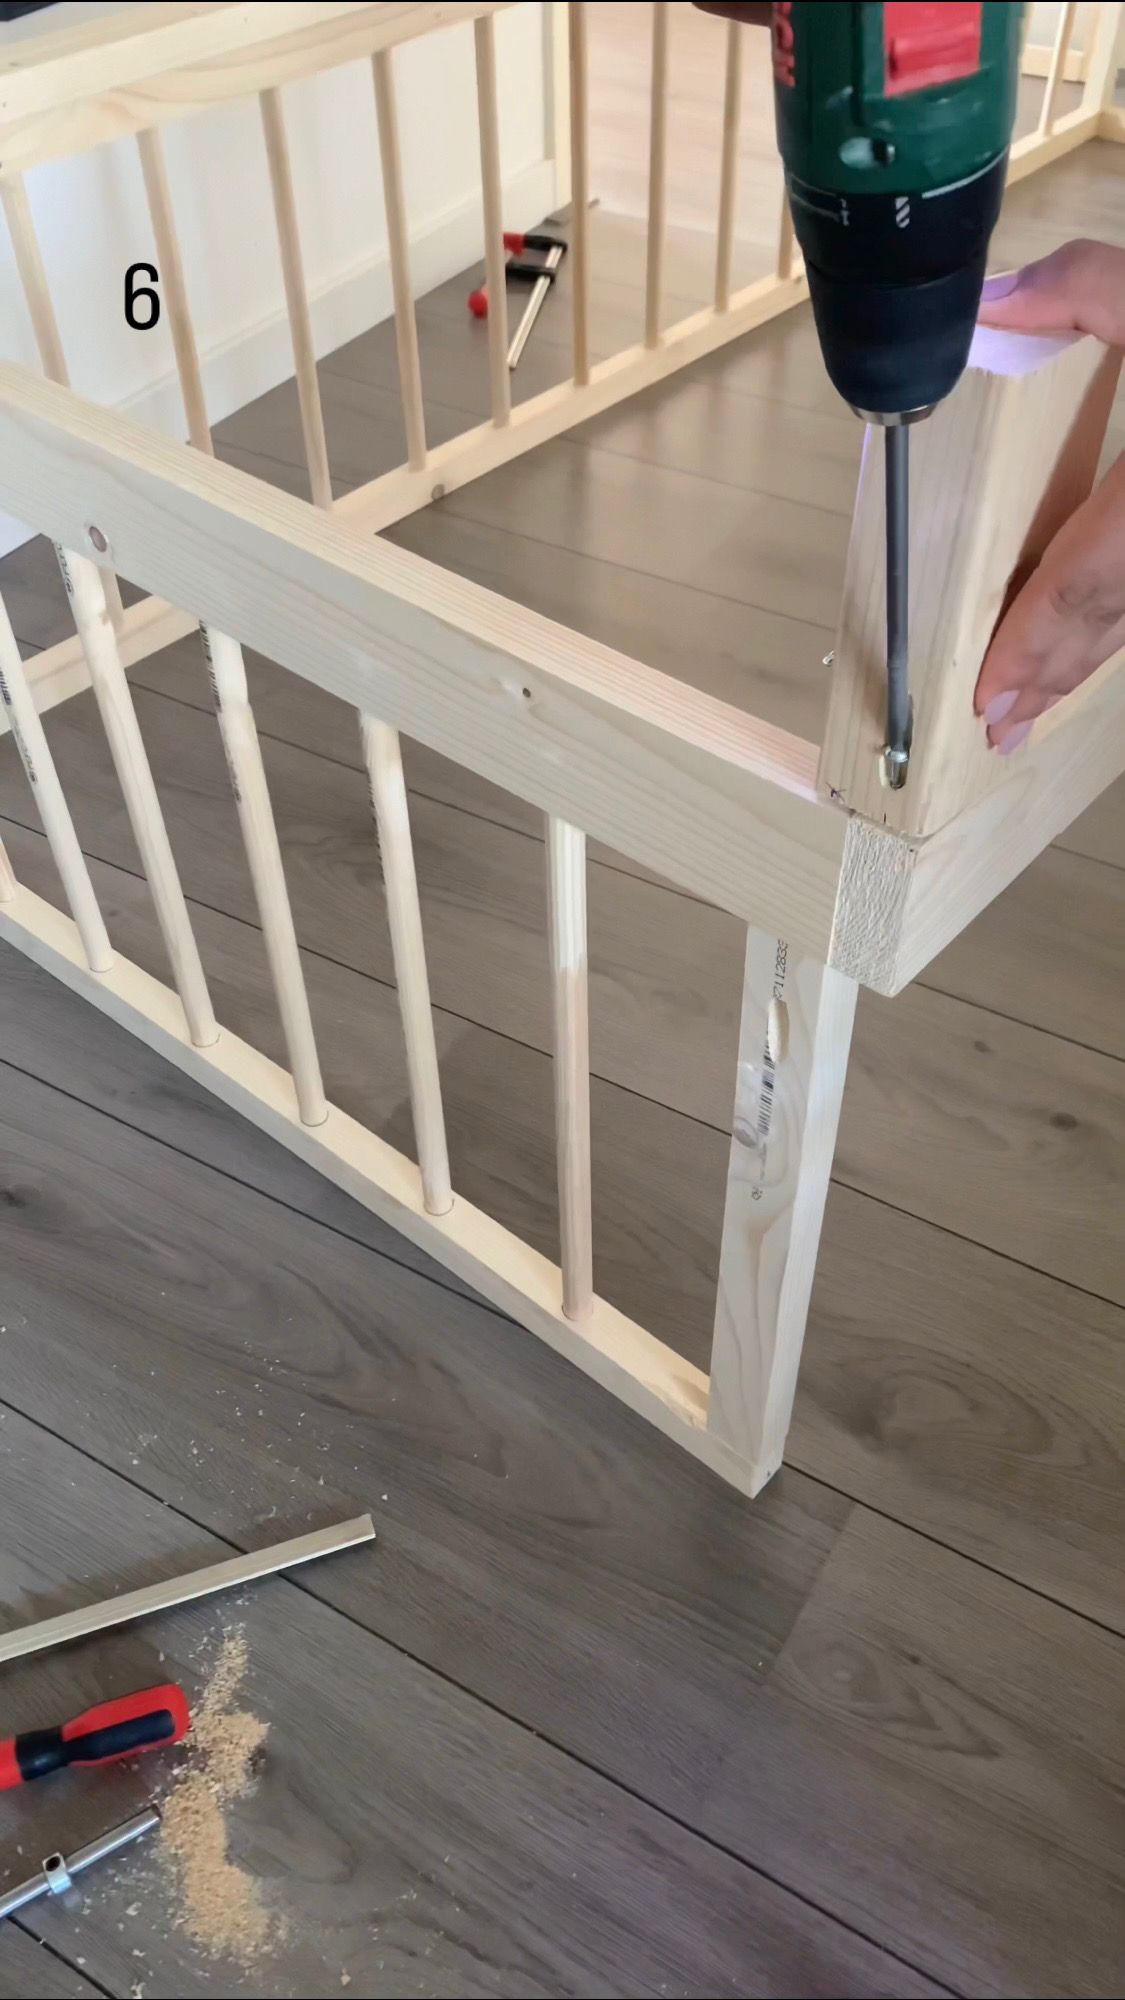
When drilling holes using the pocket-hole jig make sure the holes are faced to the back or inwards so they’re not visible after assembling the bed.
What you need
Tools:
- mitre saw
- pocket-hole jig
- drill
- 18 mm spade drill bit
- wood glue
- clamps
- optional: nail gun, paint/wood stain
Base frame:
- 2 pieces of 70 mm wide x 27 mm thick x 207.3 cm long standard pine
- 2 pieces of 70 mm wide x 27 mm thick x 91 cm long standard pine
- 2 pieces of supporting slats of 27 mm wide x 27 mm thick x 198 cm long standard pine
- 4 pieces of 68 mm wide x 45 mm thick x 15 cm long standard pine for the legs
- base slats; I bought one from Ikea, but of course you can make it yourself
Guard rails (sides and back):
- 2 pieces of 35 mm wide x 27 mm thick x 91 cm long standard pine for the sides
- 1 piece of 35 mm wide x 27 mm thick x 198 cm long standard pine for the back
- 4 pieces of 35 mm wide x 27 mm thick x 38 cm long standard pine for the vertical support on each corner of the base frame
- 29 rods of 18 mm diameter x 41 cm long
Removable guard rails (front):
- 4 pieces of 35 mm wide x 27 mm thick x 66,5 cm long standard pine
- 4 pieces of 35 mm wide x 27 mm thick x 34,5 cm long standard pine
- 8 rods of 18 mm diameter x 37 cm long
How to
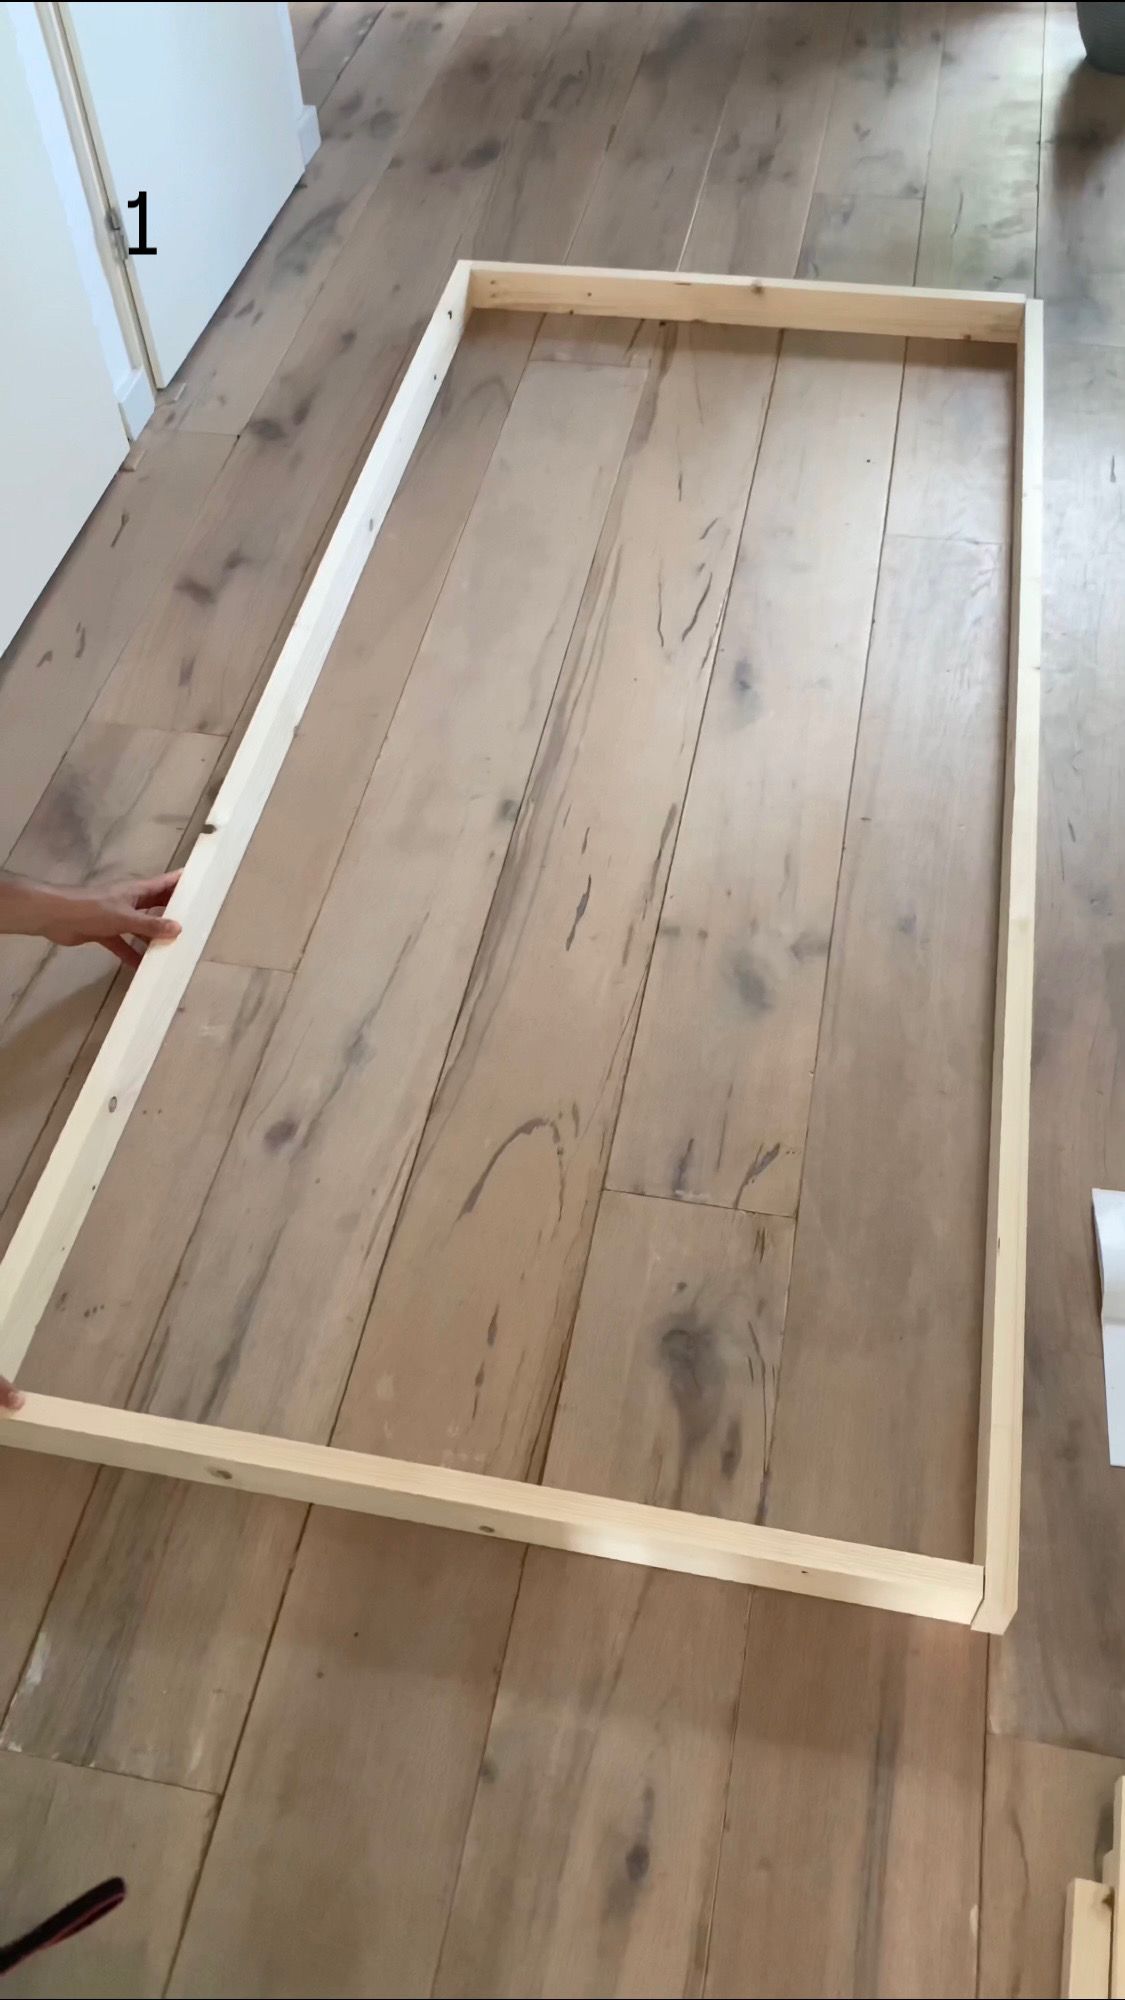
- build the base framework using the pocket-hole jig
- drill 29 holes 1/2 into the base frame on the sides and the back (not the front!) using the 18 mm spade drill bit
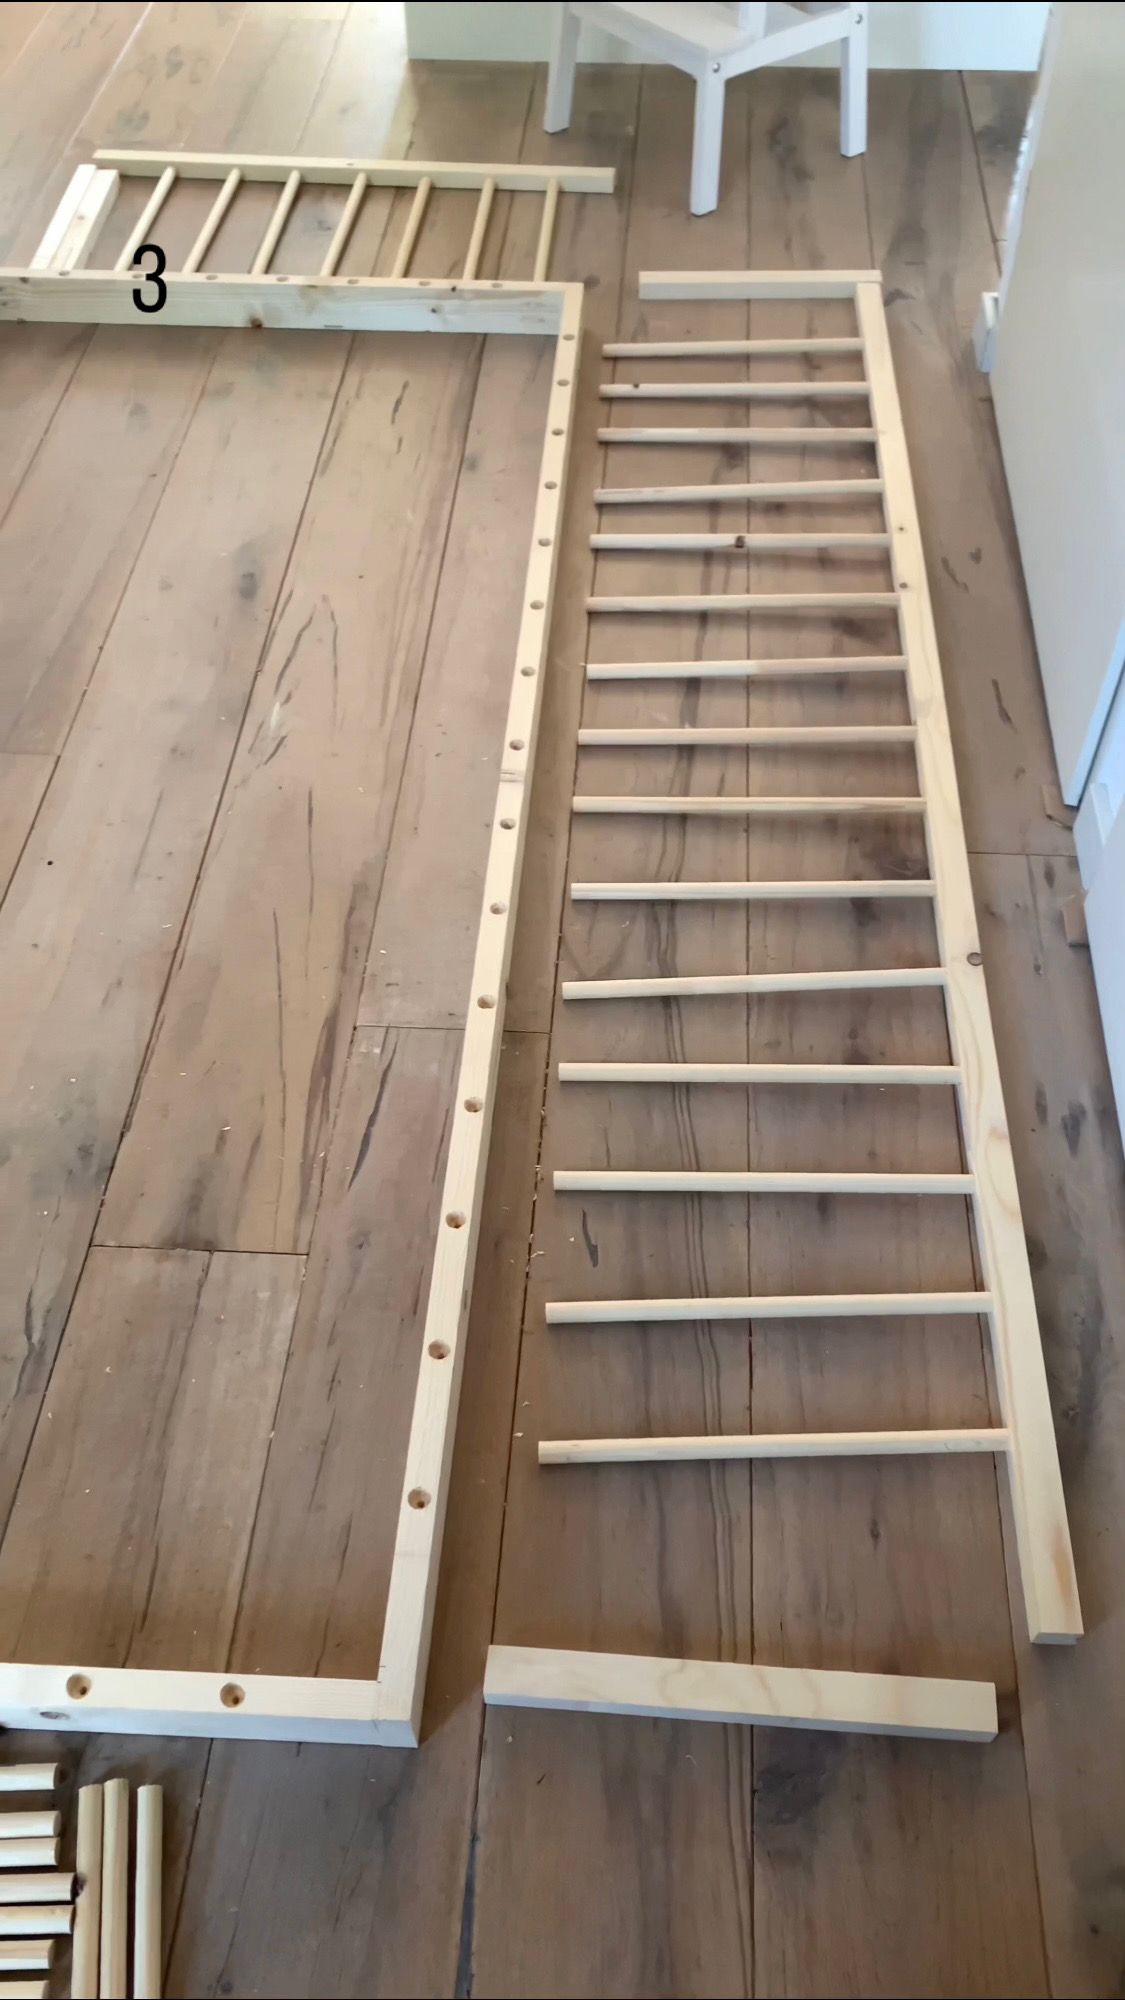
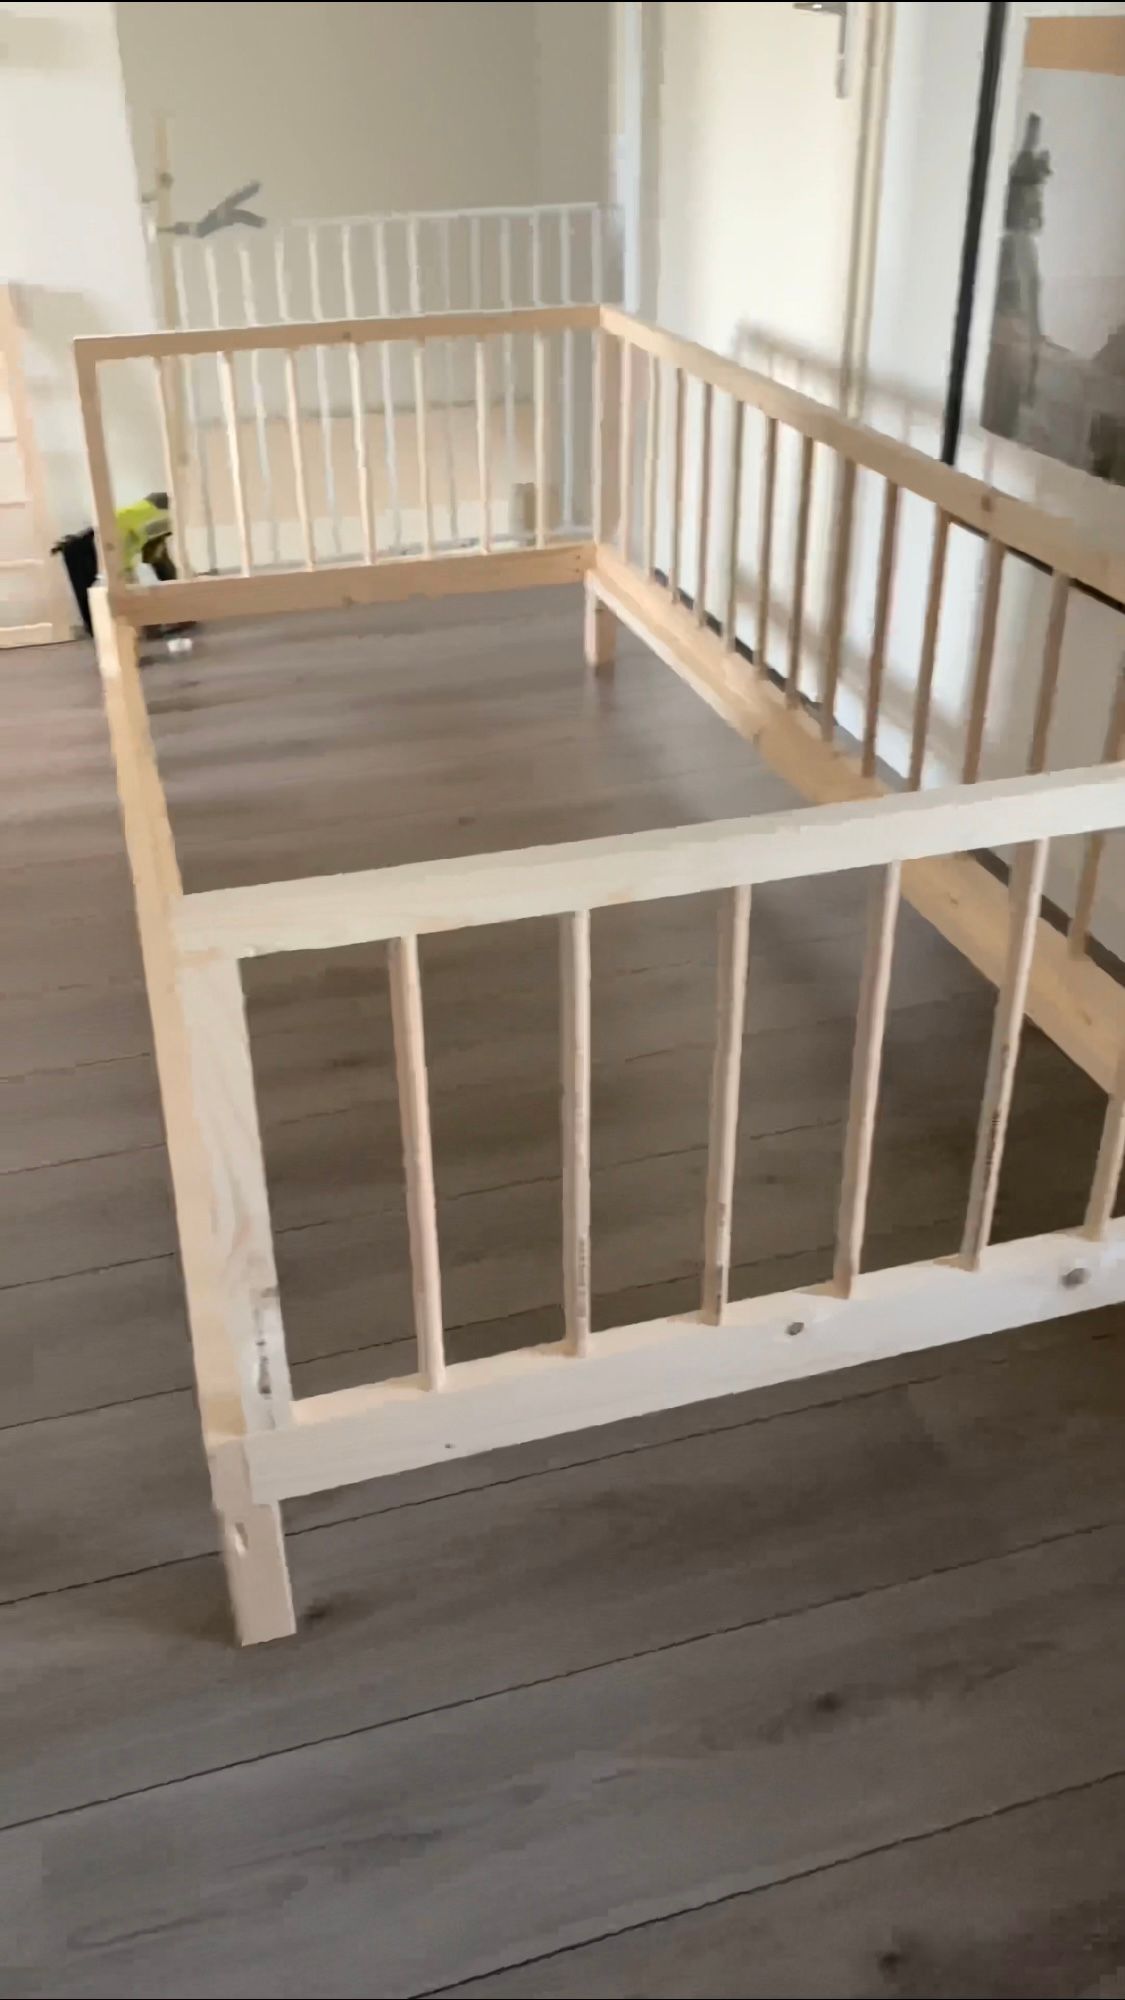
- assemble the guard rails (back and sides) and mount them into the base frame using wood glue (rods) and screws (for the vertical supports)
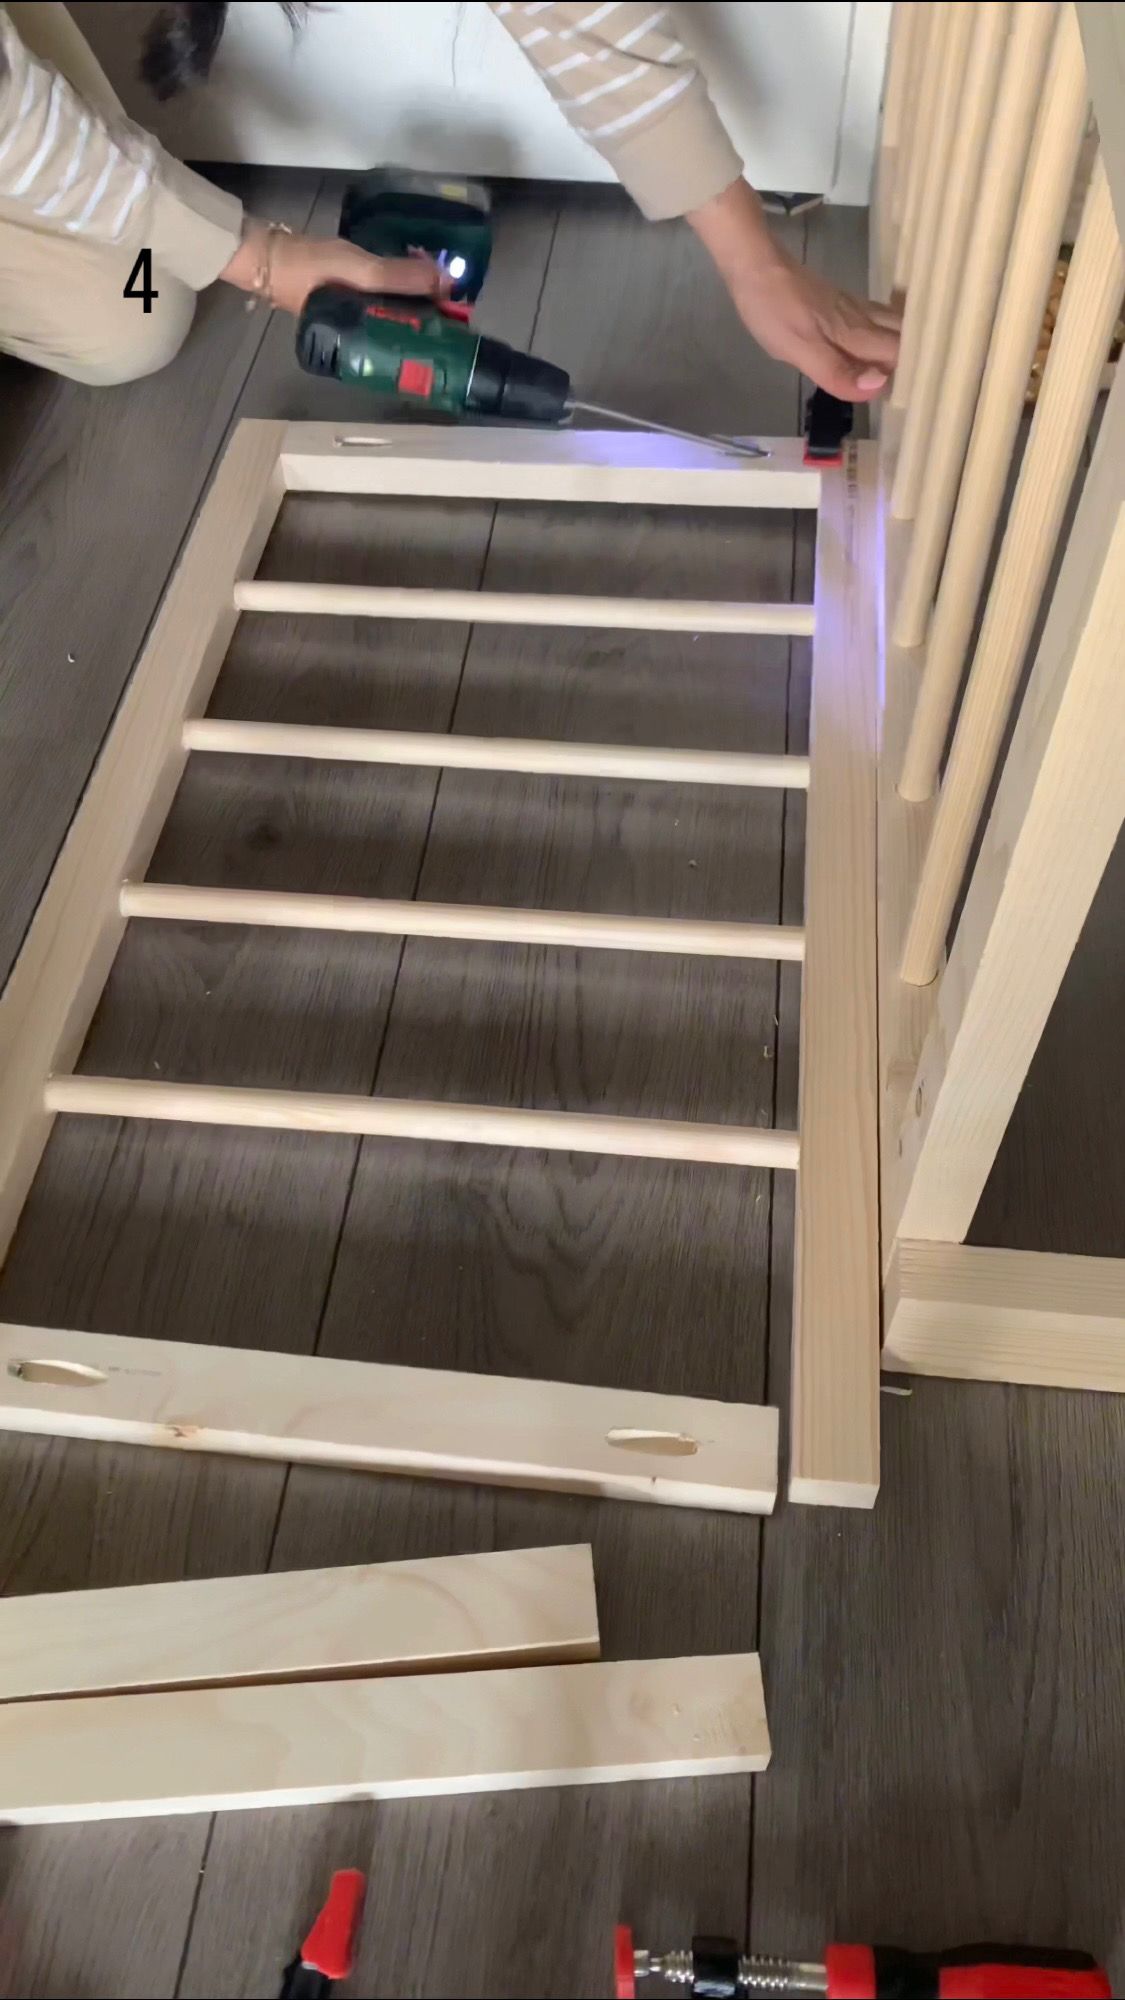
- assemble the front guard rails just like the side and back guard rails
- attach the 2 supporting slats on either sides using screws or a nail gun
- attach the legs
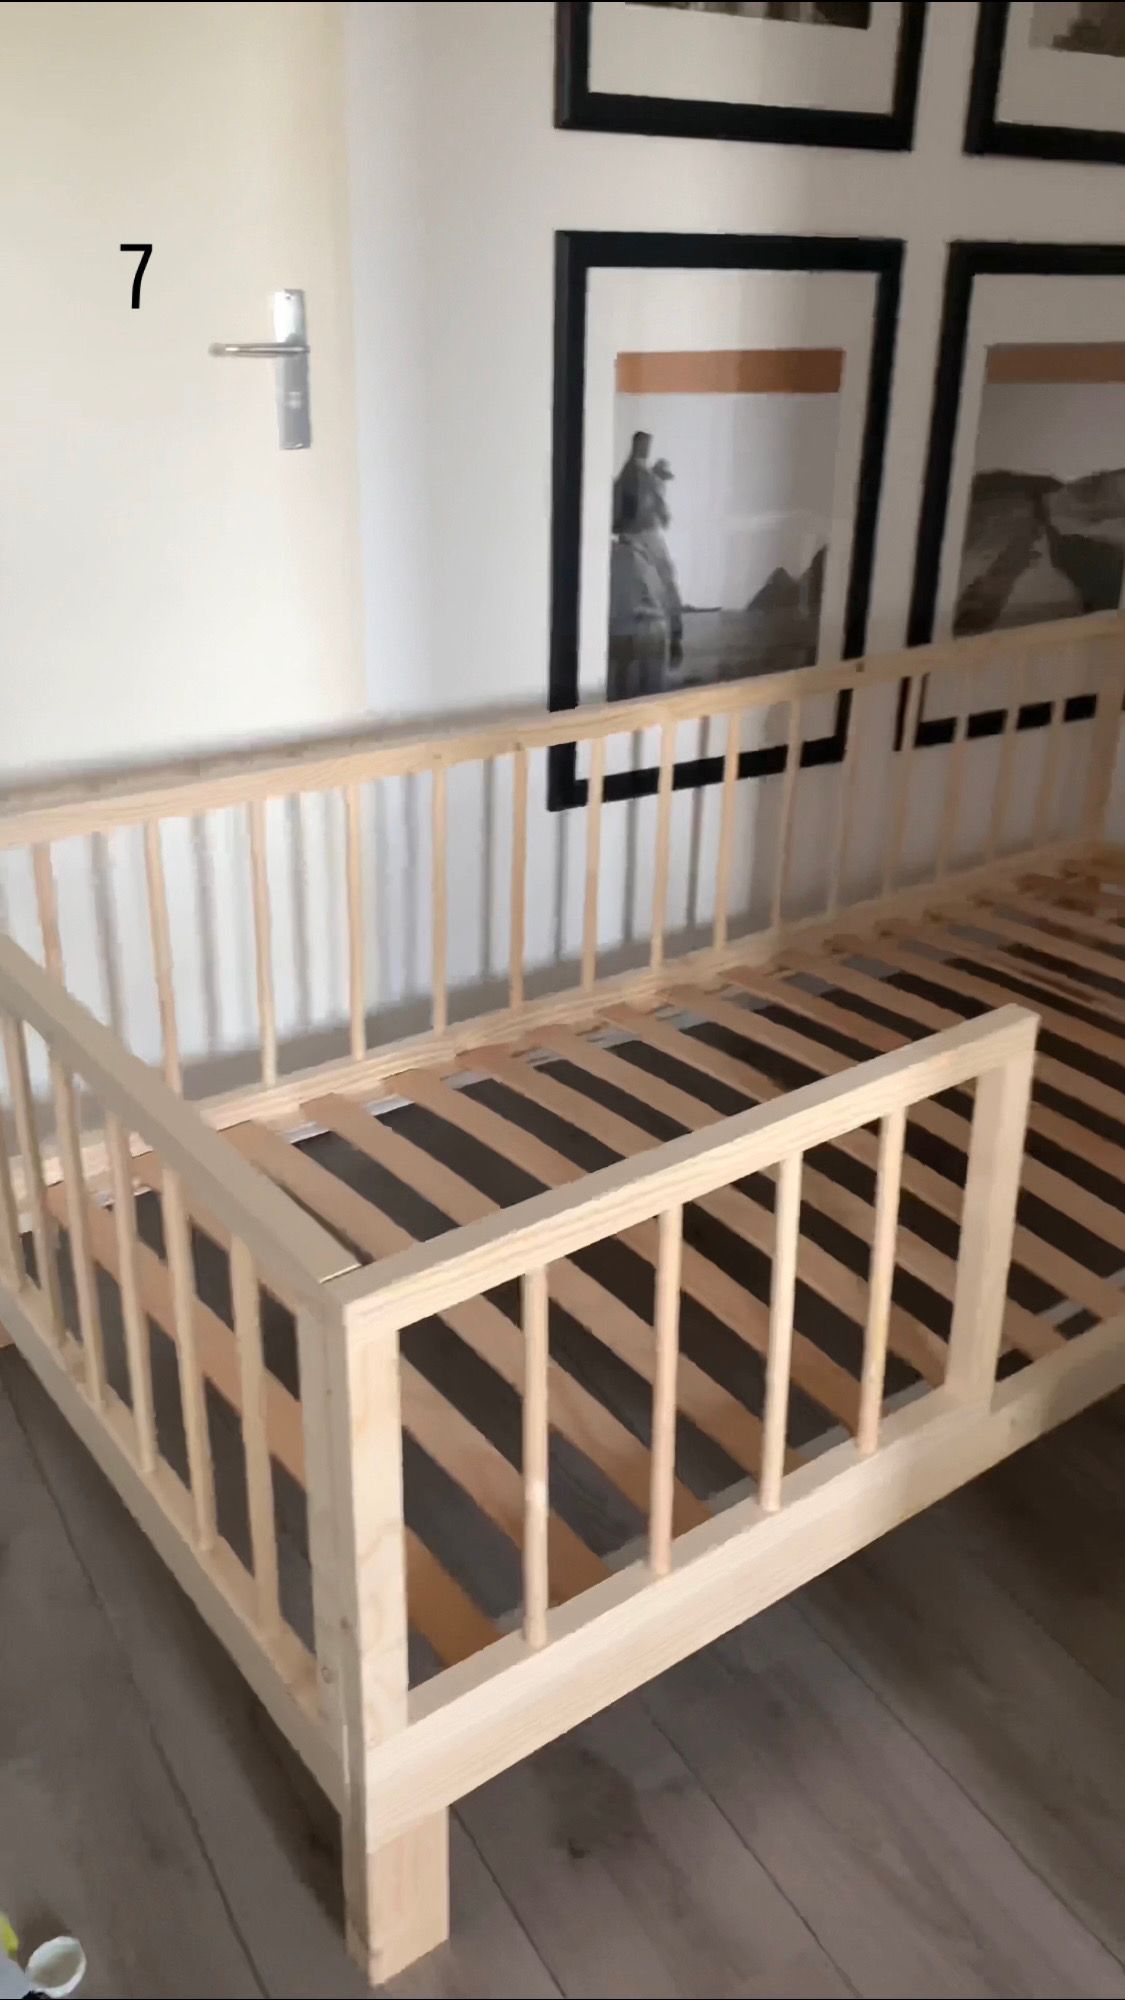
- attach the front guard rails on both sides; these will be removable
- Sand it using a fine grid
- I love the look and feel of the natural wood but you can paint it or stain it
images numbered with corresponding steps:


Visit my instagram page for the tutorial video and more details.
I hope I have inspired you to build one and if you do please do tag me. I would love to see it!
Love,
Mina (@home.by.mi)