If you find this post useful, pop over & give me a follow on Instagram or Tiktok where I share all the behind-the-scenes info about the projects I'm working on, DIY tips, tricks and money-saving techniques for creative home styling!
You won't believe these are the same wardrobes & the great news is this budget DIY is one you can easily copy for £200 for five.


*Contains affiliate links
You will need
Drill
Saw
Sander with variable grit pads
Panel pins are handy if you have them
Filler
Primer
Paint - I colour-matched to F&B Pigeon
Clamps
Hinges - I used surface mount for ease
Door close fittings - these were brilliant
Handles
Paint brush
Paint roller and tray
Skirting board - I chose a pre-primed one from Wickes
Nails (for the skirting board)
Grab adhesive - this is a staple in my toolkit
MDF or plyboard - I chose this one from B&Q
Measuring up

Pulling back carpet and removing the gripper rods to measure from floor level
The carcass of the fitted wardrobes was already installed, so I used its width and height to take my measurements. For the height, I knew I wanted to have a skirting board trim at the base of the wardrobes. Therefore, I deducted the height of the skirting and added a few millimeters for clearance. To take this measurement, I pulled back the old carpet in front of the wardrobes and removed the gripper rods that were directly in front. Once they were gone, I could measure from the actual floorboards on which the skirting would sit. As for the width, I planned to add a shaker-style detailing around the edges of the doors. Therefore, I deducted a couple of millimeters from the width of the doors to ensure they wouldn't be too tight. I knew I'd be able to lay the shaker panel slightly over the edge of the door to line up perfectly with the next. Although this step might not be approved by a professional, I was worried that the frames might be slightly out because they are so old and I didn't want the doors to jam.

Plyboard sheet in place on the cutting saw
Cutting Guide - I drew a cutting guide for each door (the doors for the LHS wardrobe came up slightly narrower than those on the RHS so it was important not to get them mixed up) and marked it out for each sheet of plyboard. Because there were five doors I knew I'd need a third sheet and would have huge offcuts leftover so I included the cuts needed to make a small bookcase out of this sheet to save wasting money. You can read that tutorial here... Note: When putting a cutting guide together, allow for the saw width on each cut as thicker blades will reduce the available width of the sheet. In B&Q their saw is about 3 or 4mm thick so if you plan to get say three vertical cuts in a sheet for example then you need to reduce the overall width of the sheet by around 12mm. Not such a big deal on the sheets for the doors, but it does have an impact when you come to cut the shaker panels as these are thin so you have lots of vertical cuts on a sheet.
Sourcing the wood for the doors

After I took measurements, I went to B&Q to buy MDF sheets, but they didn't have the size I needed (12mm thick 1.22m x 2.44m). This was frustrating, so I opted for hardwood plyboard instead, which was available and within my budget. B&Q offered a free cutting service, so I bought one sheet and got two doors cut from it. I brought them home to test and was pleasantly surprised at the strength of the plyboard. It was definitely more durable than my usual MDF, although rougher, and had a lot of splinters. As a result, it required handling with gloves (which I found out the hard way).
I used thinner sheets of ply for the shaker-style panels which were 5mm thick. Each shaker panel was 100mm wide and fitted the height and width of the doors.
Fitting the skirting to the base of the wardrobes

I decided to replace the skirting for the entire room at once, so I purchased these long pieces from Wickes as they were good value and came primed. To achieve a continuous look around the wardrobe, I extended the skirting along the side of the left-hand side wardrobe with an internal and external corner. Next, I reinstalled the carpet gripper rods in front of the new skirting, as I plan to install a new carpet soon. Finally, I rolled back the underlay.
Preparing the plywood doors

After fixing the skirting, I double-checked the heights of each door and made some slight adjustments to a couple of them using my new jigsaw, which was much quicker than sawing by hand like I usually do. Next, I prepared the plywood for painting, which was in good condition except for one sheet at the bottom of the pile. I stored this bent sheet at the bottom of the pile of five and tried to flatten it by dampening it down and leaving it out in the hot sun during the heatwave. This helped to straighten it out before storing it back at the bottom of the pile again.

I sanded the edges of all the doors and decorative panels to make sure they were smooth and straight. I then applied three coats of primer with a roller to every piece. I laid all the doors and panels out flat while they were being primed to ensure they did bow. As the weather was good, the coats dried quickly which helped speed up the process.
Fitting the surface-mount hinges

I wanted to make sure this DIY was easy to replicate and I know that using a jig to cut the blind holes for concealed door hinges really puts a lot of people off so I challenged myself to find an easy-to-use alternative. If you want to know how to drill the holes for concealed hinges don't worry I have a tutorial coming soon.
I found these super easy to use and good value surface mounted hinges on Amazon and would recommend them if you don't want to fit concealed hinges, although the downside is that they are not as easily adjustable once they are attached so it's more important to get them in exactly the right place to start with. I fitted four hinges to each door which sounds like a lot, but the doors were over 2m long.

Before fitting any hinges, I held a door up in place and using a spirit level to ensure it was straight and marked where the hinge should be positioned (a second pair of hands if helpful here so you ideally need a helper). I tested that the door could move the full 90 degrees and tested different depths for where the carcass side of the hinge would be fitted. Once I was happy I'd found the optimum position, I measured the distance from the outer edge of the wardrobe carcass and marked that exact point for the remaining three hinge locations. It's important to ensure that each hinge is fitted at exactly the same depth at both ends otherwise the door will be wonky.
Adding the shaker-style decorative door panels

Before fitting them to the wardrobe, professional carpenters typically fit the shaker panels on the doors first. However, in my case, I was concerned about the doors not appearing perfect since they were cut from sheets of ply using the B&Q saw. This was my first attempt on this scale, so I decided to cheat a bit by fitting the doors first. This way, I could cover any minor imperfections on the long sides of the doors by slightly overlapping the shaker panels if required. Fortunately, the doors turned out to be pretty good, so I didn't need to do this after all (phew!).

I used grab adhesive (suitable for wood) and panel pins to attached the panels and also held them in place at the top and bottom with clamps to be extra sure they wouldn't move at all. I attached the long sides first and used the spirit level to ensure that they were on straight. Once the long sides had dried, I measure each individual small gap at the top and bottom of the doors and cut a horizontal panel to fit, attaching it in the same way. Once these had dried, it was time to fill the gaps between the door and the panel all the way round the inside and outside of the doors, then allow to dry. For the inside edges, I used a damp cloth to wipe off any excess filled and I sanded the outer edges once dry to give a smooth finish.
Paint the doors

Once the shaker panels had been filled and wiped or sanded, it was time to start painting. I used a colour-match paint to save money and it was matched to one of my faves, Farrow and Ball's 'Pigeon'. First, I cut in around the edges of the shaker panels with a paint brush and then gave the rest of the doors a coat with a roller.
I gave the doors two coats and then touched up some areas with a third.
Adding the handles

Once the doors had completely dried, I measured and marked where I wanted the tall handles to go. I used a spirit level to ensure that they would all be perfectly straight. I drilled holes where I'd marked and pushed the screws through from behind the door and using a screwdriver into the back of the handle fitting.
Note: The KEPLER closet bars that I fitted to the doors were part of a paid collaboration over on Instagram.
Finishing touches

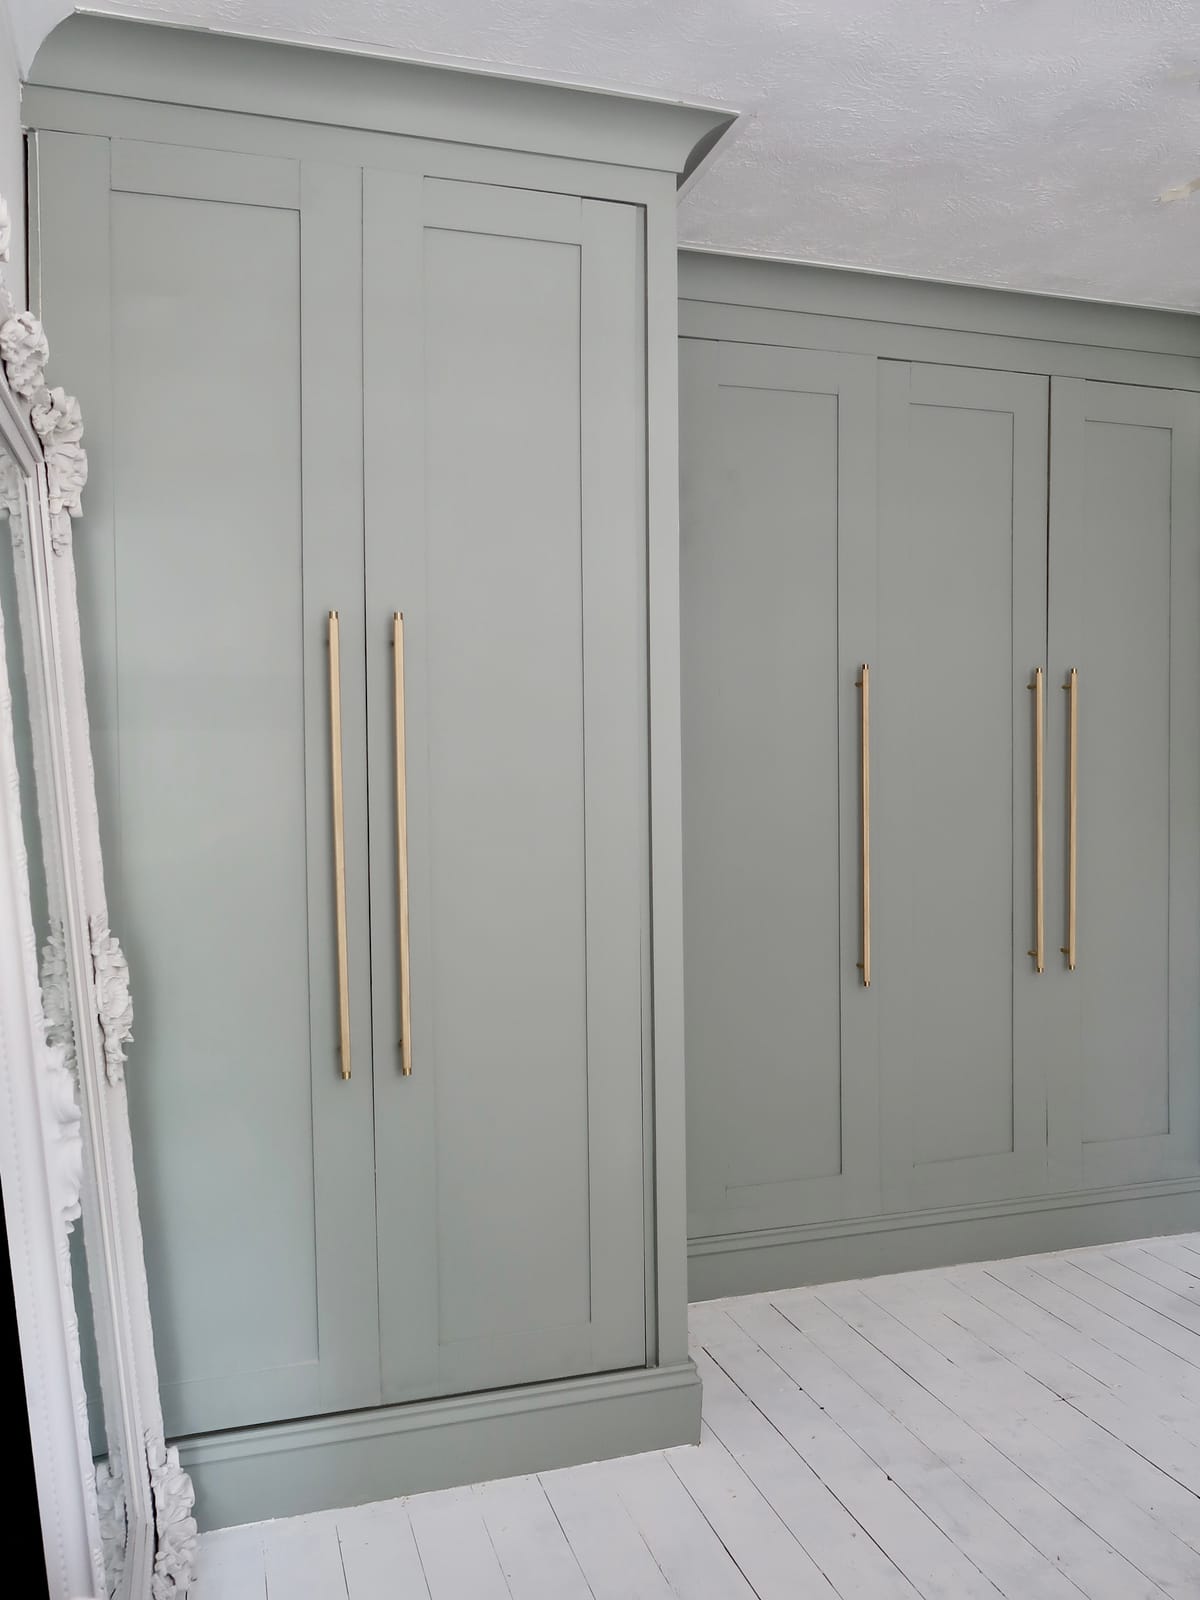
Ta-Dah!

Here are the 'after' pics. I'm really happy with the results of this project. It took a few days from start to finish and was a fair amount of effort, but totally worth it now I have fancy doors and quite a saving compared to buying bespoke.

What I spent...
The 12mm thick plywood sheets were £37 each and you could get two doors out of each so in theory I should've used three sheets but B&Q ran out so I used one sheet of 9mm thick for a pair of the doors which was slightly cheaper at £32. I made a book case out of the offcuts from the single door sheet so am only attributing £17 of the cost to the wardrobes. I used 1 x 5mm sheet for the panels (£26).
Plywood total- £37 + £32 + £17 + £26 = £112
Grab adhesive - 2 x 2 tubes at £2.50 = £5.00
Paint - £35
Primer - £20
Handles - PR products
Hinges - 2 packs of 12 at £10.99 each = £21.98
Door closing catches - 1 pack at £6.09
Tube of filler - £2.00
Skirting board - 1 piece at £17.73.
Sub-total £219.80
Regular B&Q customers get sent money off vouchers for future purchases, I used the following across multiple transactions 3 x £3.00 off vouchers and 1 x £10 off voucher - total discount £19.
Total £219.80 - £19 = £200.80

Wardrobe Door Handle Suggestions
The above total doesn't include a cost for handles as they were included as part of my payment for the content I created for the brand. I wanted to suggest some options that you could use on your project and as people's budgets vary so much I thought I'd suggest a selection of products across a wide range of price points including the exact model on mine. Click the links below to see the product details in each case.
Super low budget - £7.59 each 320mm length
Mid-range - £21.48 each 700mm hole centres
Investment - £89.95 each 760mm length.