
A Simple DIY Guide in 4 Steps
Transforming wooden dowels into beautiful and functional hooks is an easy and affordable DIY project that can add a touch of rustic charm to any room. In just four simple steps, you can turn basic wooden dowels into stylish and practical hooks that are perfect for hanging coats, bags, and more.
Here's what you'll need:
- Wooden dowels
- No More Nails adhesive
- Stain (such as Colron Beeswax in Medium Oak)
- Hooks
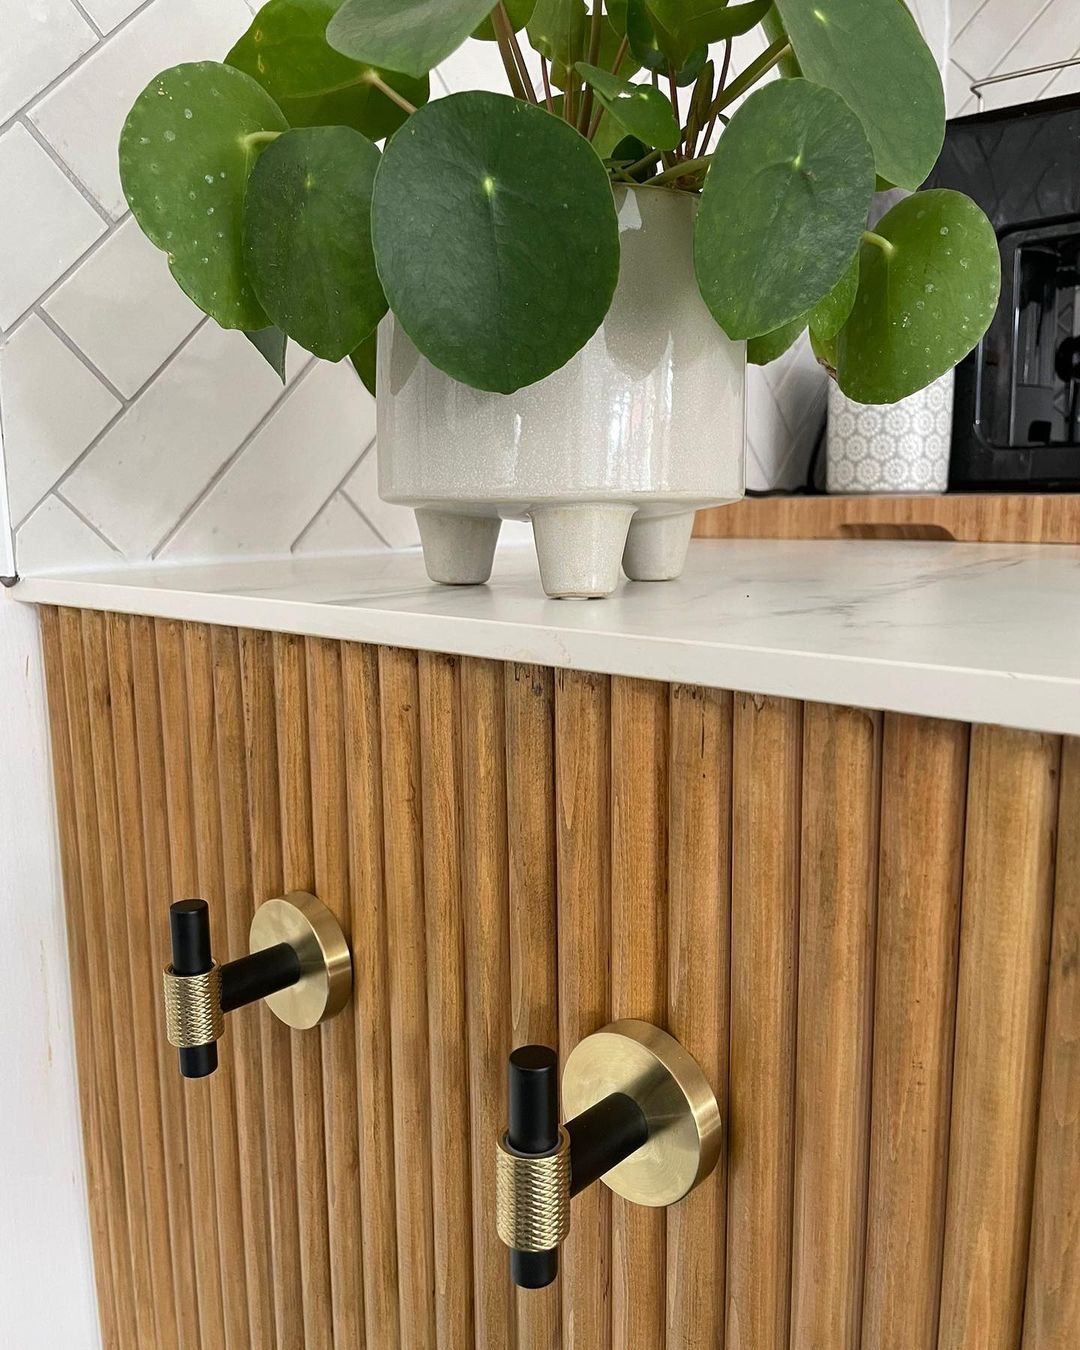
Step 1: Cut the wooden dowels to size
You can easily find wooden dowels at your local wood yard or hardware store. Cut the dowels to the desired length using a saw. In this case, half-round dowels were used, which adds a unique look to the final product.
Step 2: Attach the dowels with No More Nails adhesive
Apply a small amount of No More Nails adhesive to the back of each wooden dowel and press firmly onto the surface you wish to attach them to. It's important to ensure they are level and evenly spaced for a neat finish.
Step 3: Stain the wooden dowels
Use a stain of your choice to add color and depth to the wooden dowels. In this project, Colron Beeswax in Medium Oak was used to tie in with the existing decor. Apply the stain with a brush or cloth, following the manufacturer's instructions, and allow to dry completely.
Step 4: Add hooks
Finally, attach your chosen hooks to the wooden dowels. These robe hooks from The Qualis Collection add a touch of elegance to the rustic look of the wooden dowels.
And that's it! With just four simple steps, you can create beautiful and practical wooden dowel hooks to adorn your walls. This project is perfect for beginners and can be completed in no time. So why not give it a try and add some rustic charm to your home?
CREATOR: Ash

Instagram: @montyroadabode