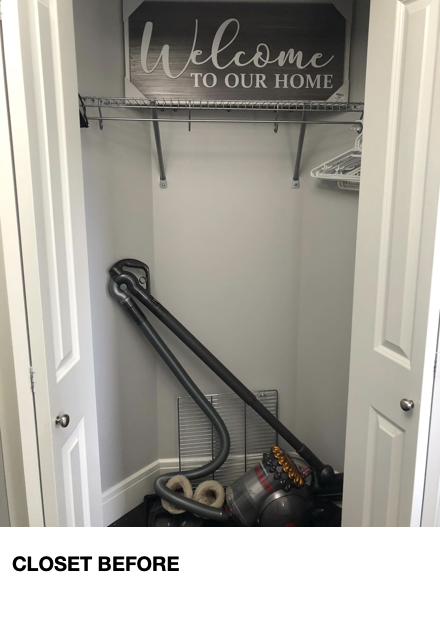
Do you have an awkwardly shaped closet that doesn’t seem to serve its purpose well? Are you looking for a solution that can be both functional and aesthetically pleasing?
Then look no further! This post will walk you through step-by-step instructions on how I converted my closet, and you can do it too!
Now, I will start by saying that the decision to convert my closet was based on my family’s specific needs. The first step in any project is to identify what it is YOU want to gain out of the space.
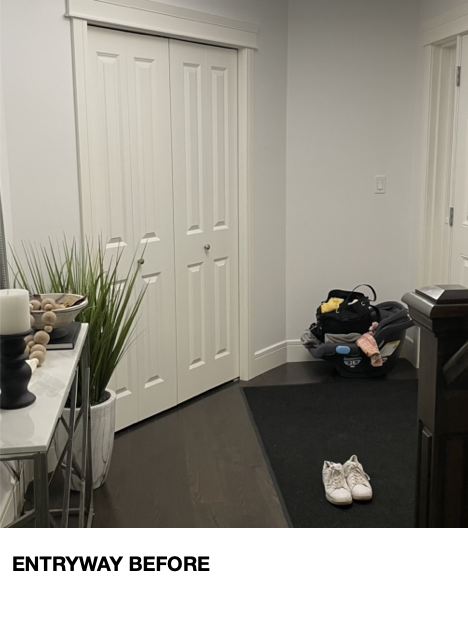
For years we struggled with our entryway closet because its shape and size restricted our ability to store outerwear. We also have a larger closet by our garage door and store most of our coats & footwear there since we enter and exit from the garage.
Based on that information, I decided that we could convert the entryway closet into a drop zone.

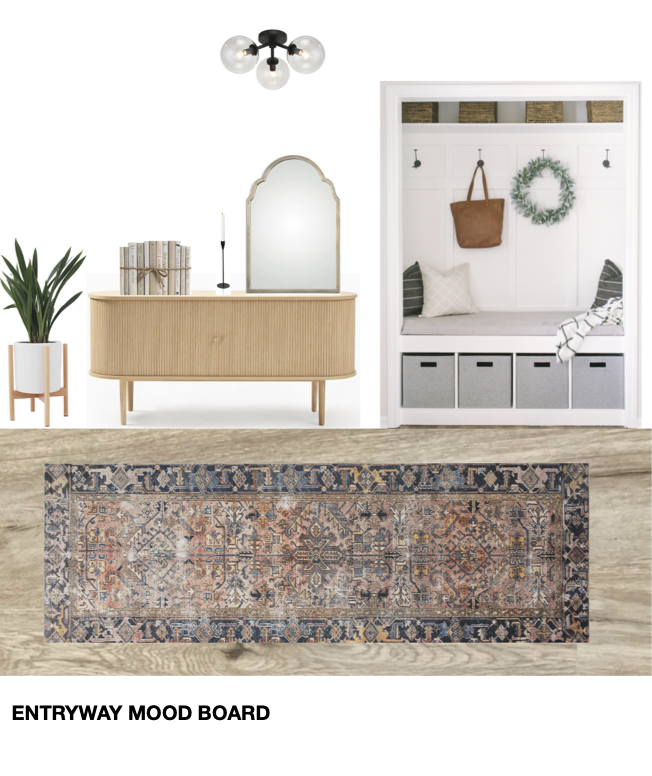
Step 1: Create a mood board/sketch of your plan
My goal was to make my entryway feel more inviting as well as open up the space so I created a mood board to reflect that. I highly recommend making a mood board or a sketch so you can visualize your ideas and solidify your decisions. I use the free Canva app to make mine
Step 2: Remove the existing closet system and doors
This step is difficult for people to commit to because most of us are accustomed to having doors to hide everything behind. I had to adjust my mindset to see this project through and let me tell you,
I have zero regrets!
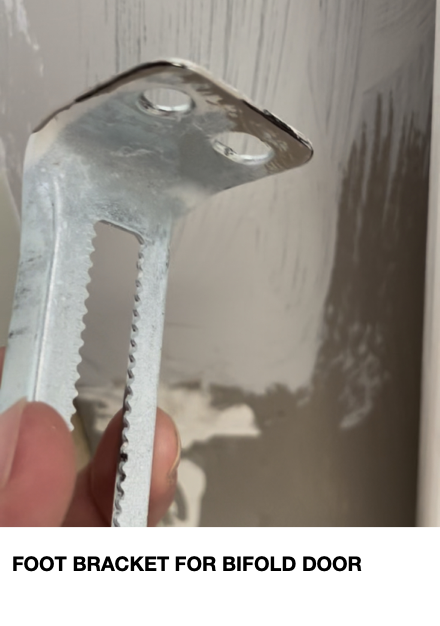
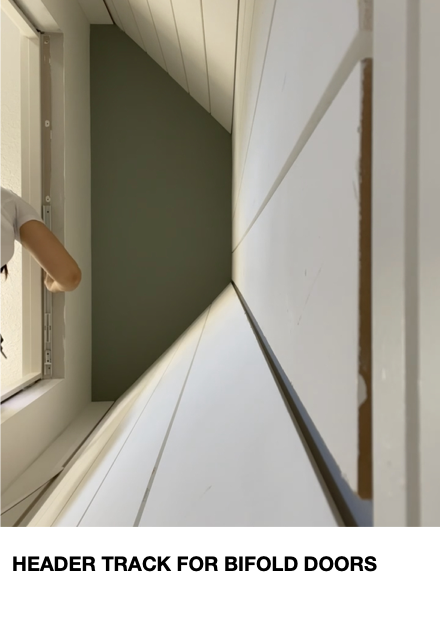
Removing the bi-fold doors was very straightforward. All you’ll need to remove them is a drill or screwdriver. There is a header track on top of the door and a foot bracket on the bottom. Use the drill/screwdriver to remove the screws and the door will come right off.
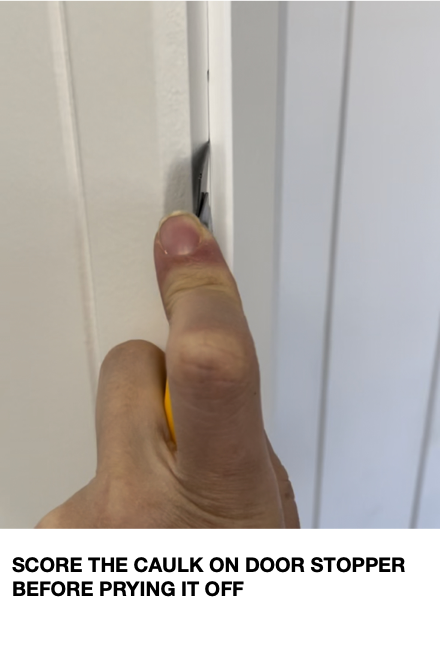
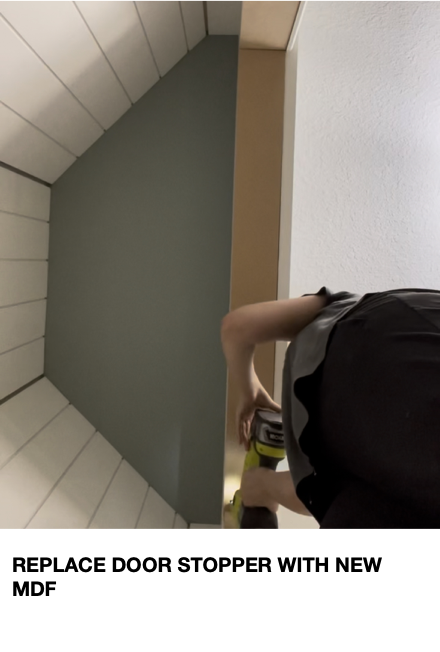
There is also a door stopper usually installed around the door frame that is no longer required. You can choose to keep it intact, but I decided to remove mine and replace it with new MDF pieces that fit the door frame.
To remove them, Use a Xacto knife on the whole perimeter of them, place your pryer under the edge of it and with a bit of a pull, they’ll come right off!
Once you get your measurements and cut your MDF to size, use a brad nailer to attach them as the new trims on the door frame (see photos below)
***I only had one wired shelf to remove which is easily done by prying the anchors out of the wall and patching up all the holes. I usually use the Dap Spackle product to patch up small areas.
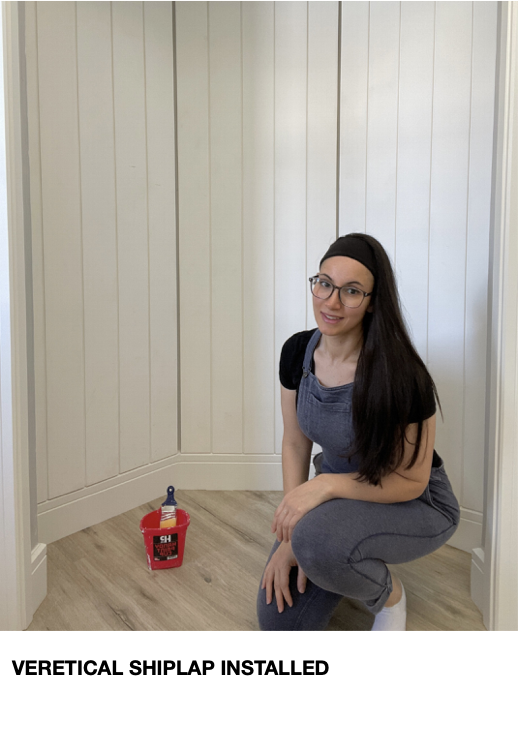
Step 3: Install Shiplap
I decided to use shiplap boards for this space because it's cohesive in my home. If you prefer wallpaper or a fresh coat of paint, you can use those options instead. For the purpose of this tutorial ill be sharing tips on installing vertical shiplap.
First, you need to measure the space from the top of your baseboard to the ceiling. That is the height you want to cut your pieces of shiplap.
Installing the first piece is key in order to make sure that all your following pieces are straight. Once you hold up your piece, always use a level to confirm that it's nice and straight and use a Brad nailer to nail it to the wall.
Shiplap boards are “tongue and groove” boards which means they interlock with each other to create that space in between each board.
I left a gap in my corners to add quarter-round trims because my table saw has limitations on bevel cuts. This way it will still have a nice clean look!
Step 4: Framing
This is where the 2x4’ and 2x2’ pieces come in! Framing the bench, side walls and top shelf! I'll break this down into 3 parts for you guys.
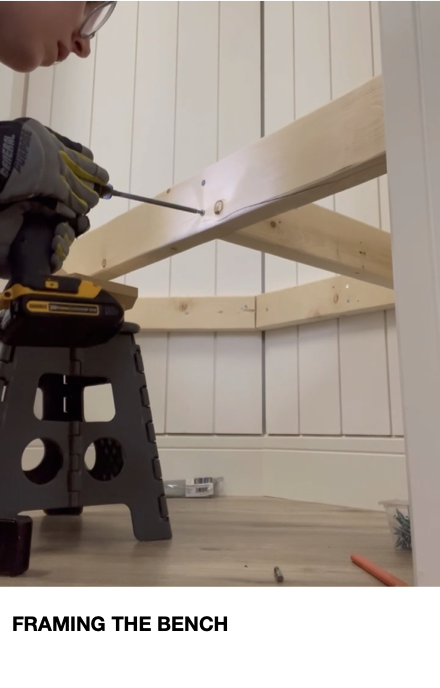
Part 1: Framing the bench
I started by cutting my pieces (using a miter saw) to the measurements of the walls and framed the perimeter of the bench. I researched the standard height of benches online, 18-20 inches from the ground, and set mine at 19 inches.
Next, I used an angle finder where the walls change directions in order to figure out what angle to cut the pieces. How do you know where to put the nails? By using a stud finder! Studs are supports in the wall that you want to attach your framing to in order to support the weight on the bench. ALWAYS remember to check the level and make sure your framing is nice and straight.
Once the perimeter was framed, I added a couple of support pieces in the middle of the bench and attached them with screws. Click here to see more of the framing process!
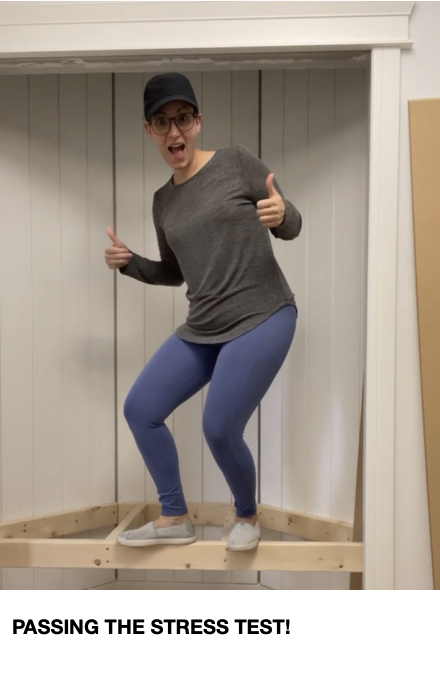
After you put it all together, its time for the stress test! Mine was able to handle me jumping on it without any concerns so I decided to move on to the next part!
Part 2: Framing the side walls
Note: This step is optional!
I made the decision to frame mine based on the shape of my closet. I felt that the corners were very constricted and I wanted the closet design to appear more built-in so I framed the side walls to be flush with the doorway. I also used 2x4’ pieces for the framing. Click to see the side panels framed.
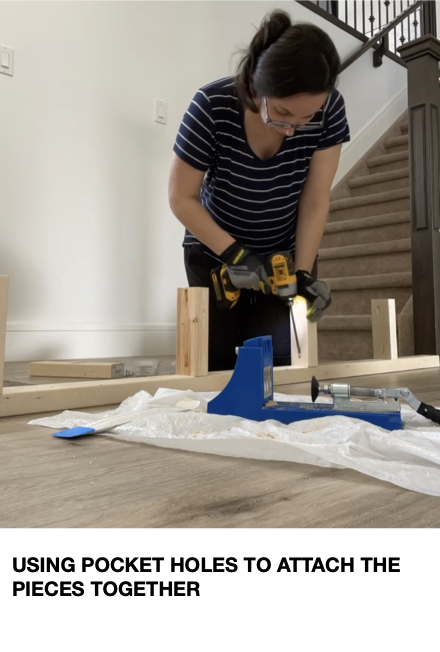
After figuring out all my measurements and using a miter saw for all the cuts, I used my Kreg jig to attach the pieces together with pocket screws and then mounted the pieces to the studs in the walls. Click here for more about the framing process
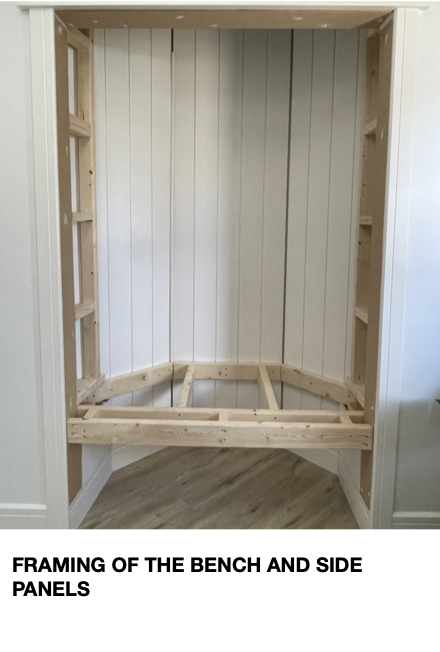
Part 3: Framing the top shelf
To frame the shelf, I used the same process as framing the bench to obtain the angles and cut my pieces. I used 2x2’ pieces for the framing because I wanted the shelf to be smaller than the bench. Again, Use your stud finder and mark where they are to attach your pieces to them. Level to confirm that your pieces are straight and then into the studs they go! I also used painter's tape to decide how high I wanted to frame it. Since it's in a closet I needed to ensure that there was enough clearance to access the top shelf.
Step 5: Lets cover up all the framing!
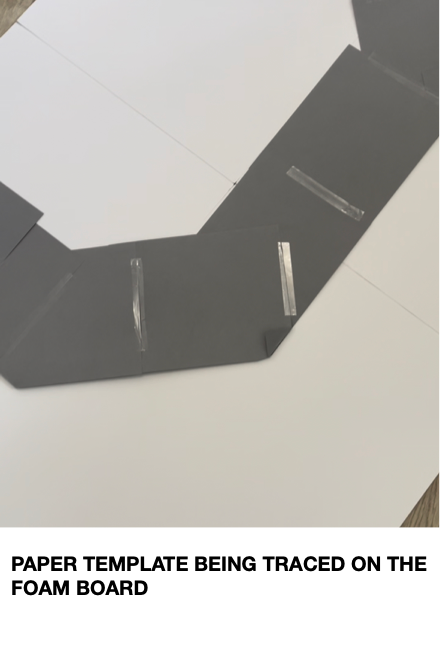
This is where things start to take shape! Now that the structural framing is done, we can start dressing it up with the finishing pieces! As always with awkward shaped closets, things can be tricky when trying to cut your pieces to fit. This is why I made a template for the bench and top shelf! Let me explain…
First, I used paper and folded the angles to match the angles of the framing and taped them together. I also taped a few foam boards from Dollar Store and traced the shape from the paper template onto it for more support. Now this is where is gets interesting!
After cutting the shape out on the foam board, I used it to trace the template on the 5/8’ MDF board to create the top of the bench and the 1/4’ thick MDF board for the top shelf. I used a jigsaw to cut the MDF pieces. Next, I measured the face of the bench and top shelf and attached everything to the framing using my Brad nailer. Here is a video to show how I did this! Click here to see the template!
***Although I already installed the shiplap, I still needed to add a few pieces to each side panel. I did it this way because framing the side panels was an afterthought so I added them afterwards using the same process as mentioned earlier.
Step 6: All the finishing work
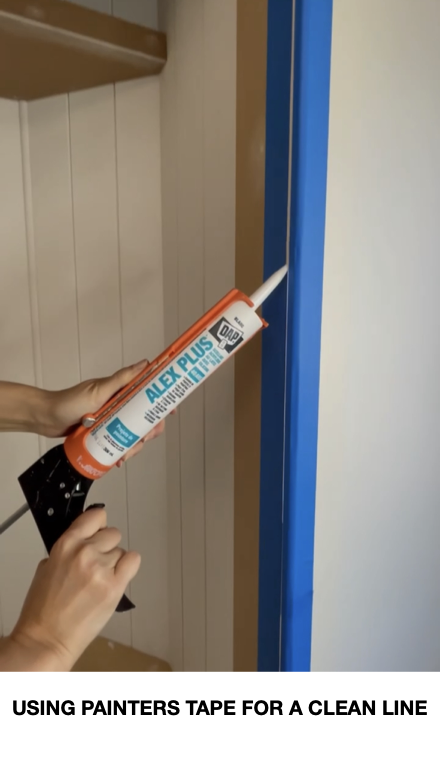
This step should never be skipped if you want that profession to look finished. Here is where we would fill, caulk, and paint!
If you’re not familiar with these things, I'll break it all down for you! You use wood filler wherever you used your brad nailer to fill those holes. Caulk is used to seal the gaps between where two surfaces meet. For example, between the bench top and the shiplap.
A method I used to smooth out the caulk is using a baby wipe or using my finger. I also use painter's tape to get a nice clean line. Click here to see the finishing work.
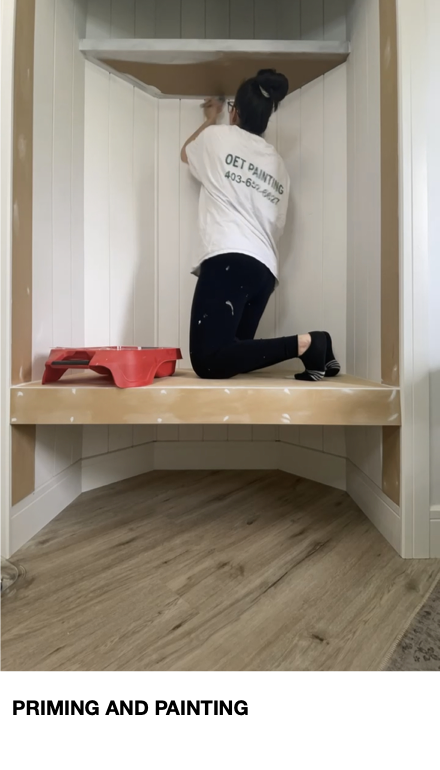
Once everything dries, Lightly sand your wood filler and you’re ready to prime and paint!
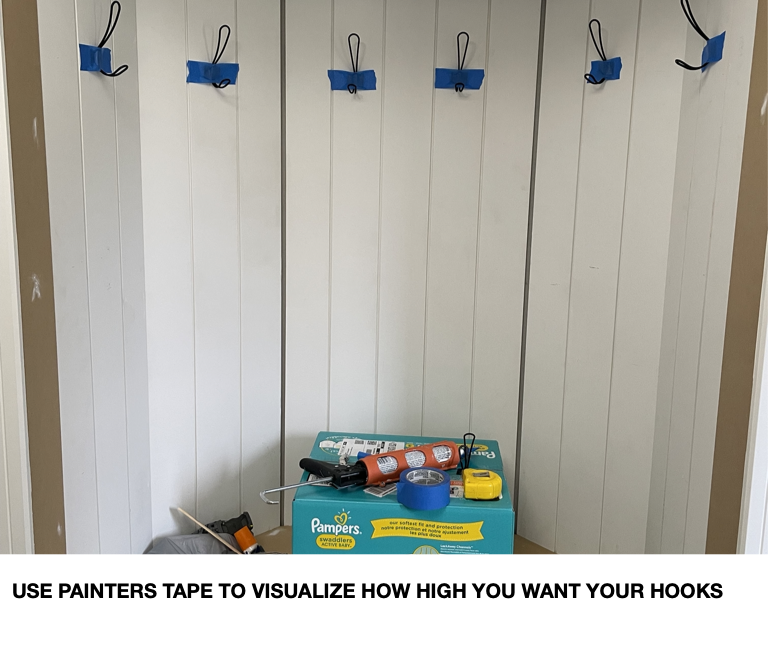
Step 7: Adding hooks
We’re so close to the finish line! Once you’ve picked out your hooks, you need to decide how high/low you want to hang them.
I used painter's tape to visualize this because I wanted them high enough that the coats wouldn’t pool on the bench top.
Once you figure out your spacing, use a drill to mount the screws on the wall. You don’t need to use a laser level for this step but if you have one you could use it to help get all your hooks aligned.
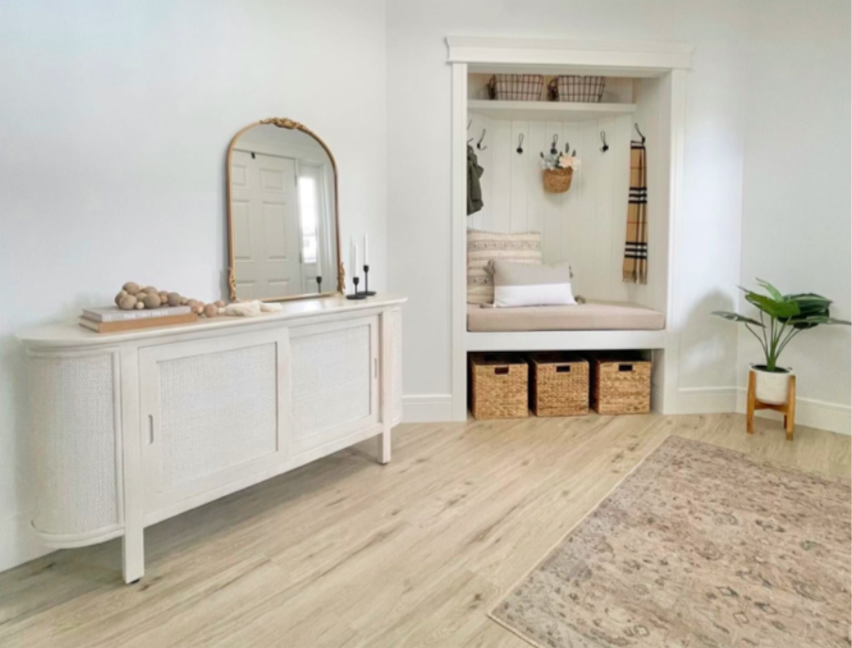
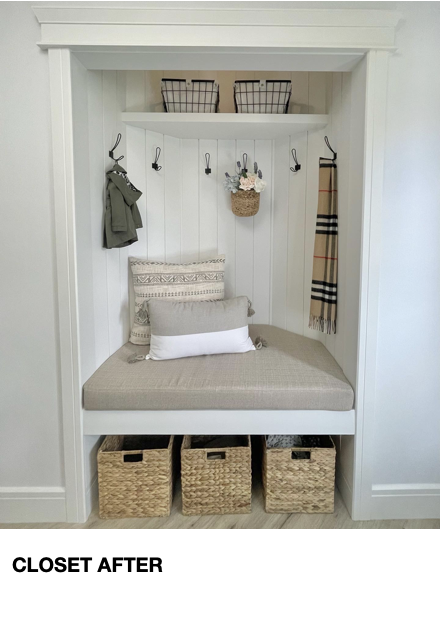
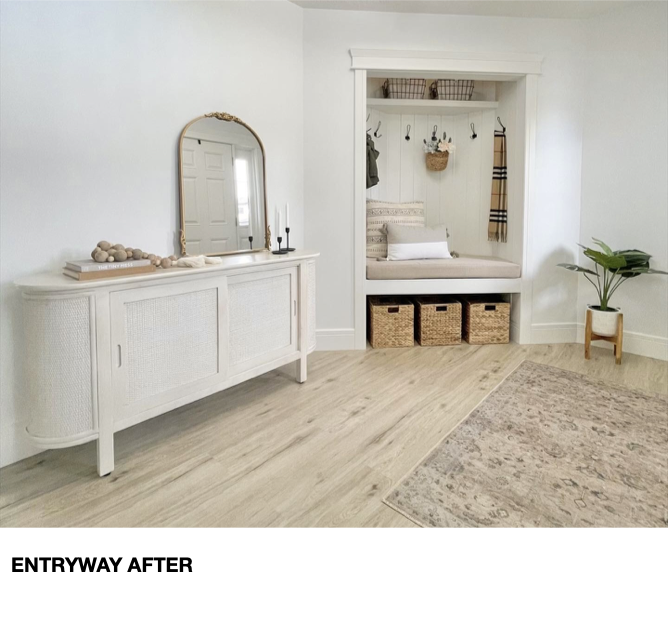
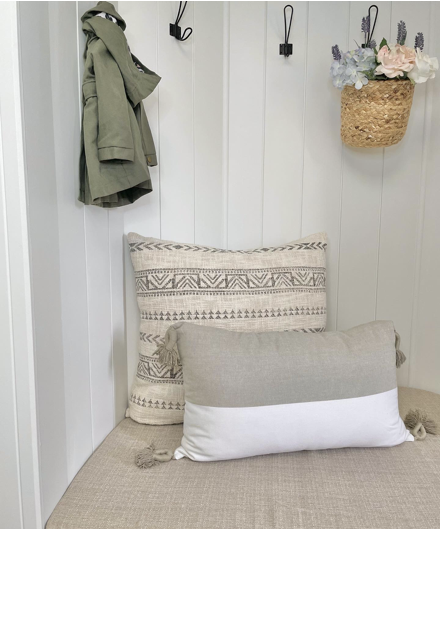
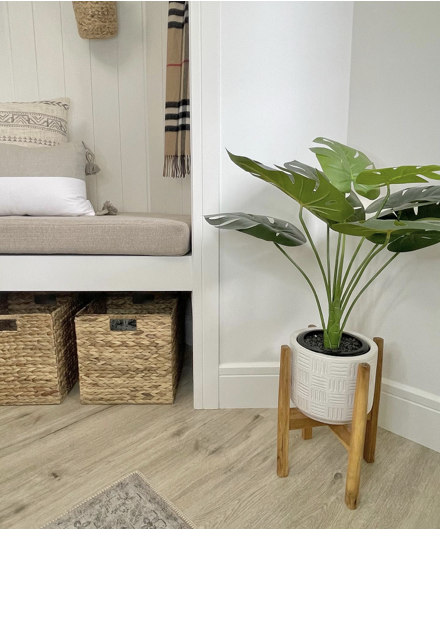
Step 8: Decorating
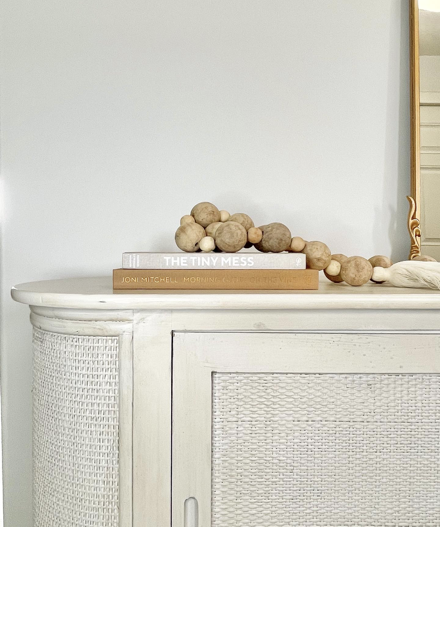
Now for the fun part! Decorating! Before shopping for new items, try to repurpose any storage baskets or accent pillows from another part of your home. Put it all together and ta-da! I also replaced my console table with a credenza to complete my entryway! Click here for a video of the before and after! Below are more photos of this transformation! I hope you enjoyed this tutorial! For more DIY projects, hacks, and intentional design ideas follow me on my social platforms!
Ghalia Eltassi

What you will need for this project
- 2x4 inch pieces of plywood for framing ( amount will depend on size and shape of your closet)
- 2x2 inch plywood to frame the top shelf (I used 2, the amount will depend on the size of your closet)
- One 5/8’ thick 4x8 ft sheet of MDF ( you can substitute for plywood etc. MDF is a more budget-friendly option)
- 1/4’ thick 2x4 ft sheet of MDF ( this material can be substituted based on preference)
- 1 1/2 inch or 1 3/4 inch pocket screws
- Shiplap boards ( this can be substituted for paint, wallpaper or hardboard based on your design preferences and budget)
- Pryer
- Brad nailer
- Drill
- Hammer
- Paint ( colour of your choice)
- Hooks
- Caulk + caulking gun & wood filler
- Storage baskets
- Xacto knife
- Stud finder
- Angle finder/protractor
- Miter saw/hand saw/miter box
- Level
CREATOR: Ghalia

Instagram: @urban.homeoloy
Tiktok: @urban.homeology
Website: www.urbanhomeology.com