Our downstairs toilet was, without a doubt, the worst room in the house. The wallpaper was awful, the skirting boards were riddled with woodworm, and both the sink and toilet were cracked, dated, and past their best. But the thing that bothered me most wasn’t even the condition — it was the layout. The sink was awkwardly shoved into the corner, making it impossible to place a mirror properly or create a space that felt intentional.
We knew something had to change.
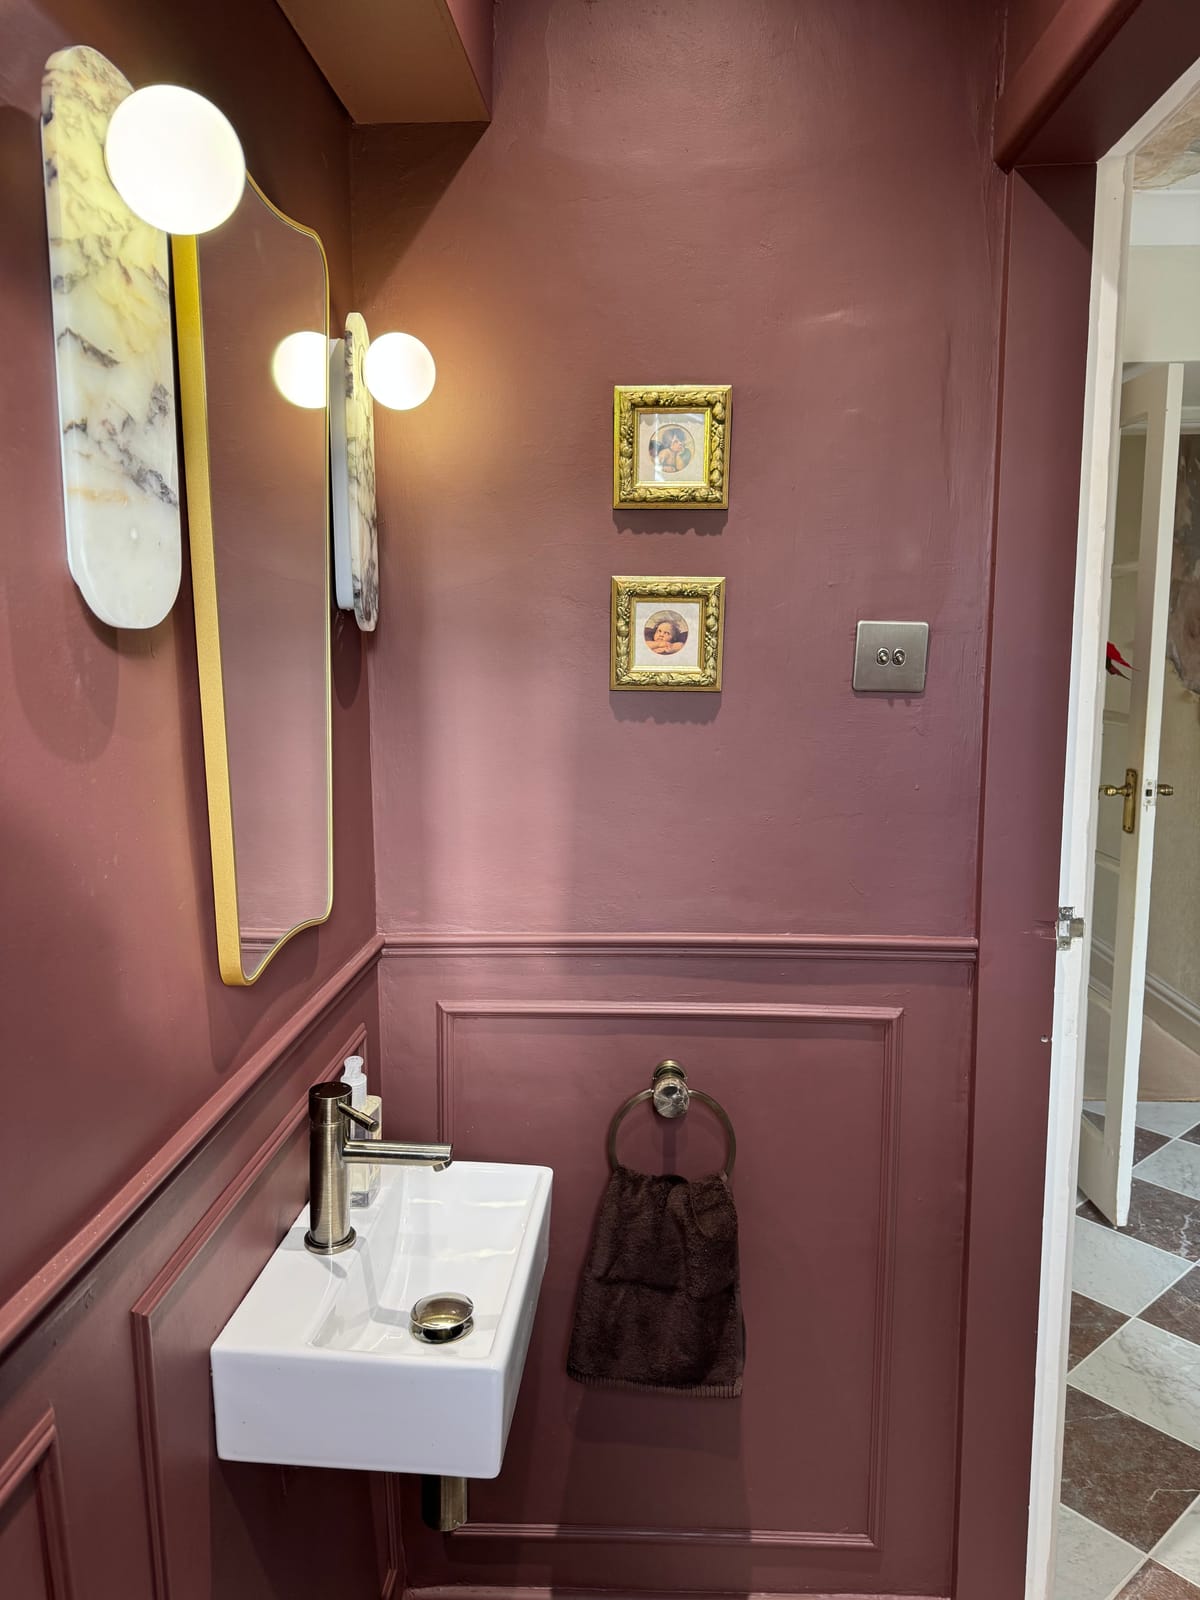
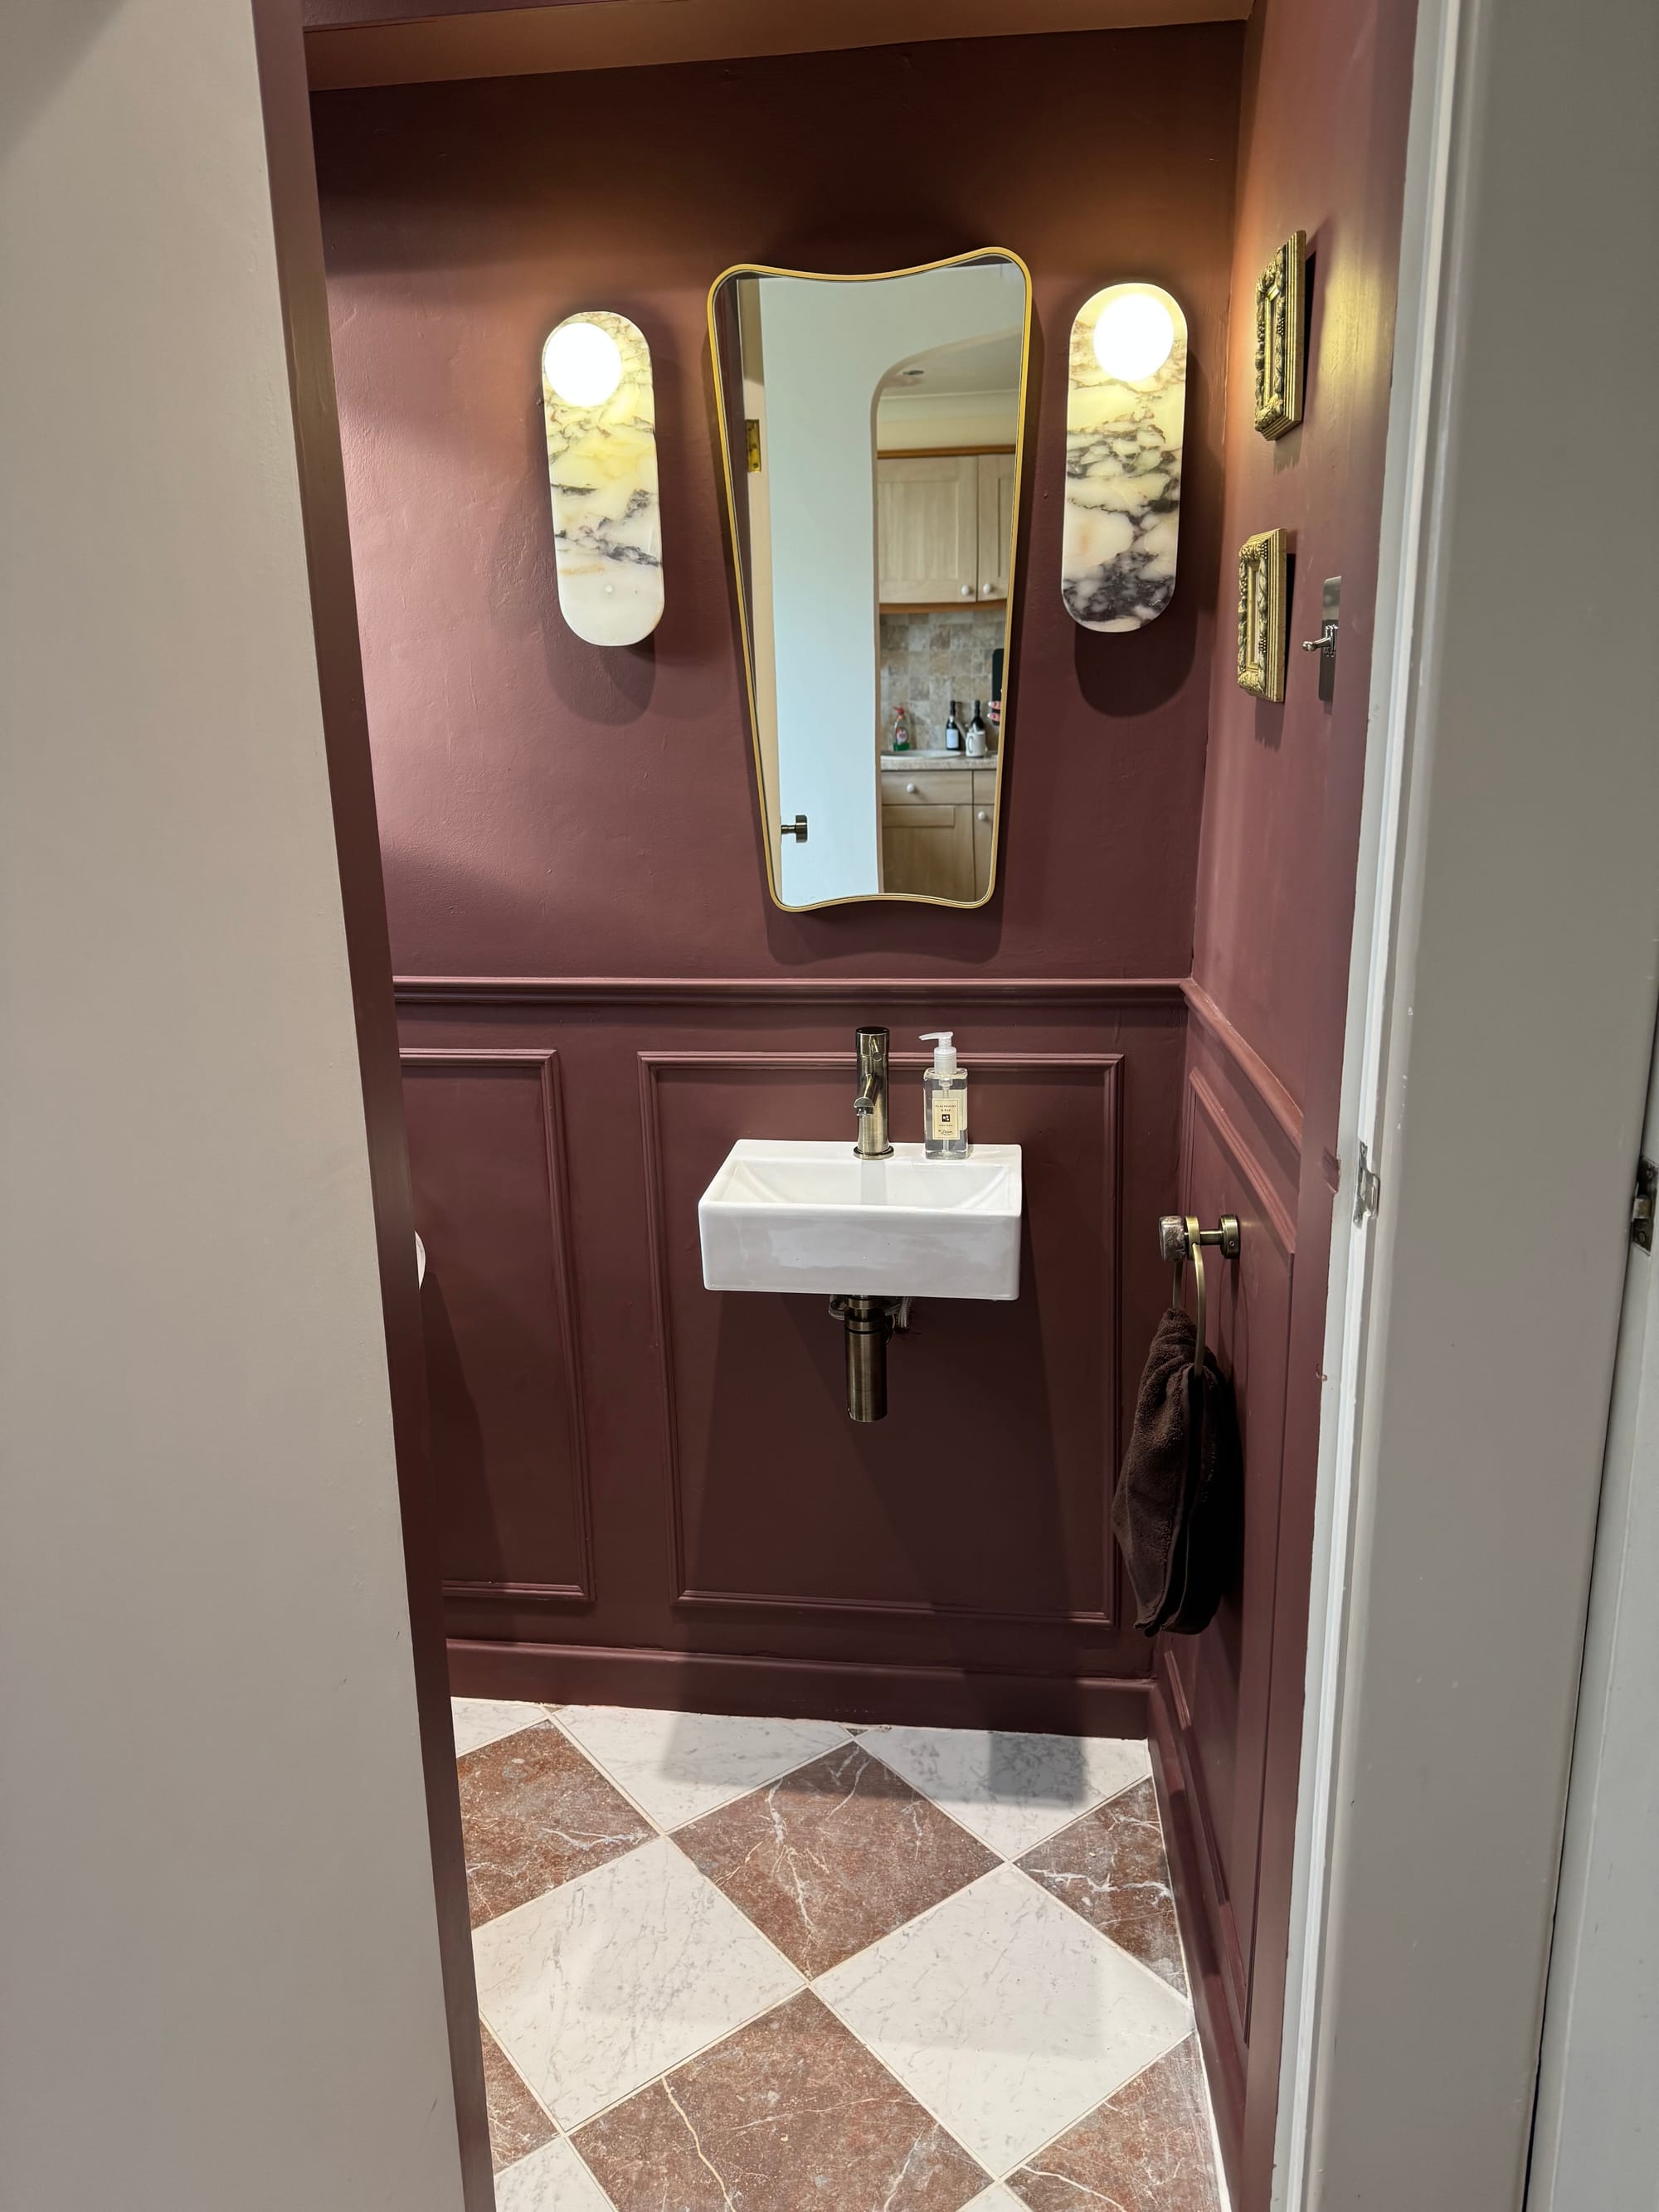
There were plenty of raised eyebrows when we mentioned moving the sink to the front-facing wall. People worried the space would feel too tight or impractical, but they were wrong. Not only does it fit perfectly, it completely transformed how the room feels.
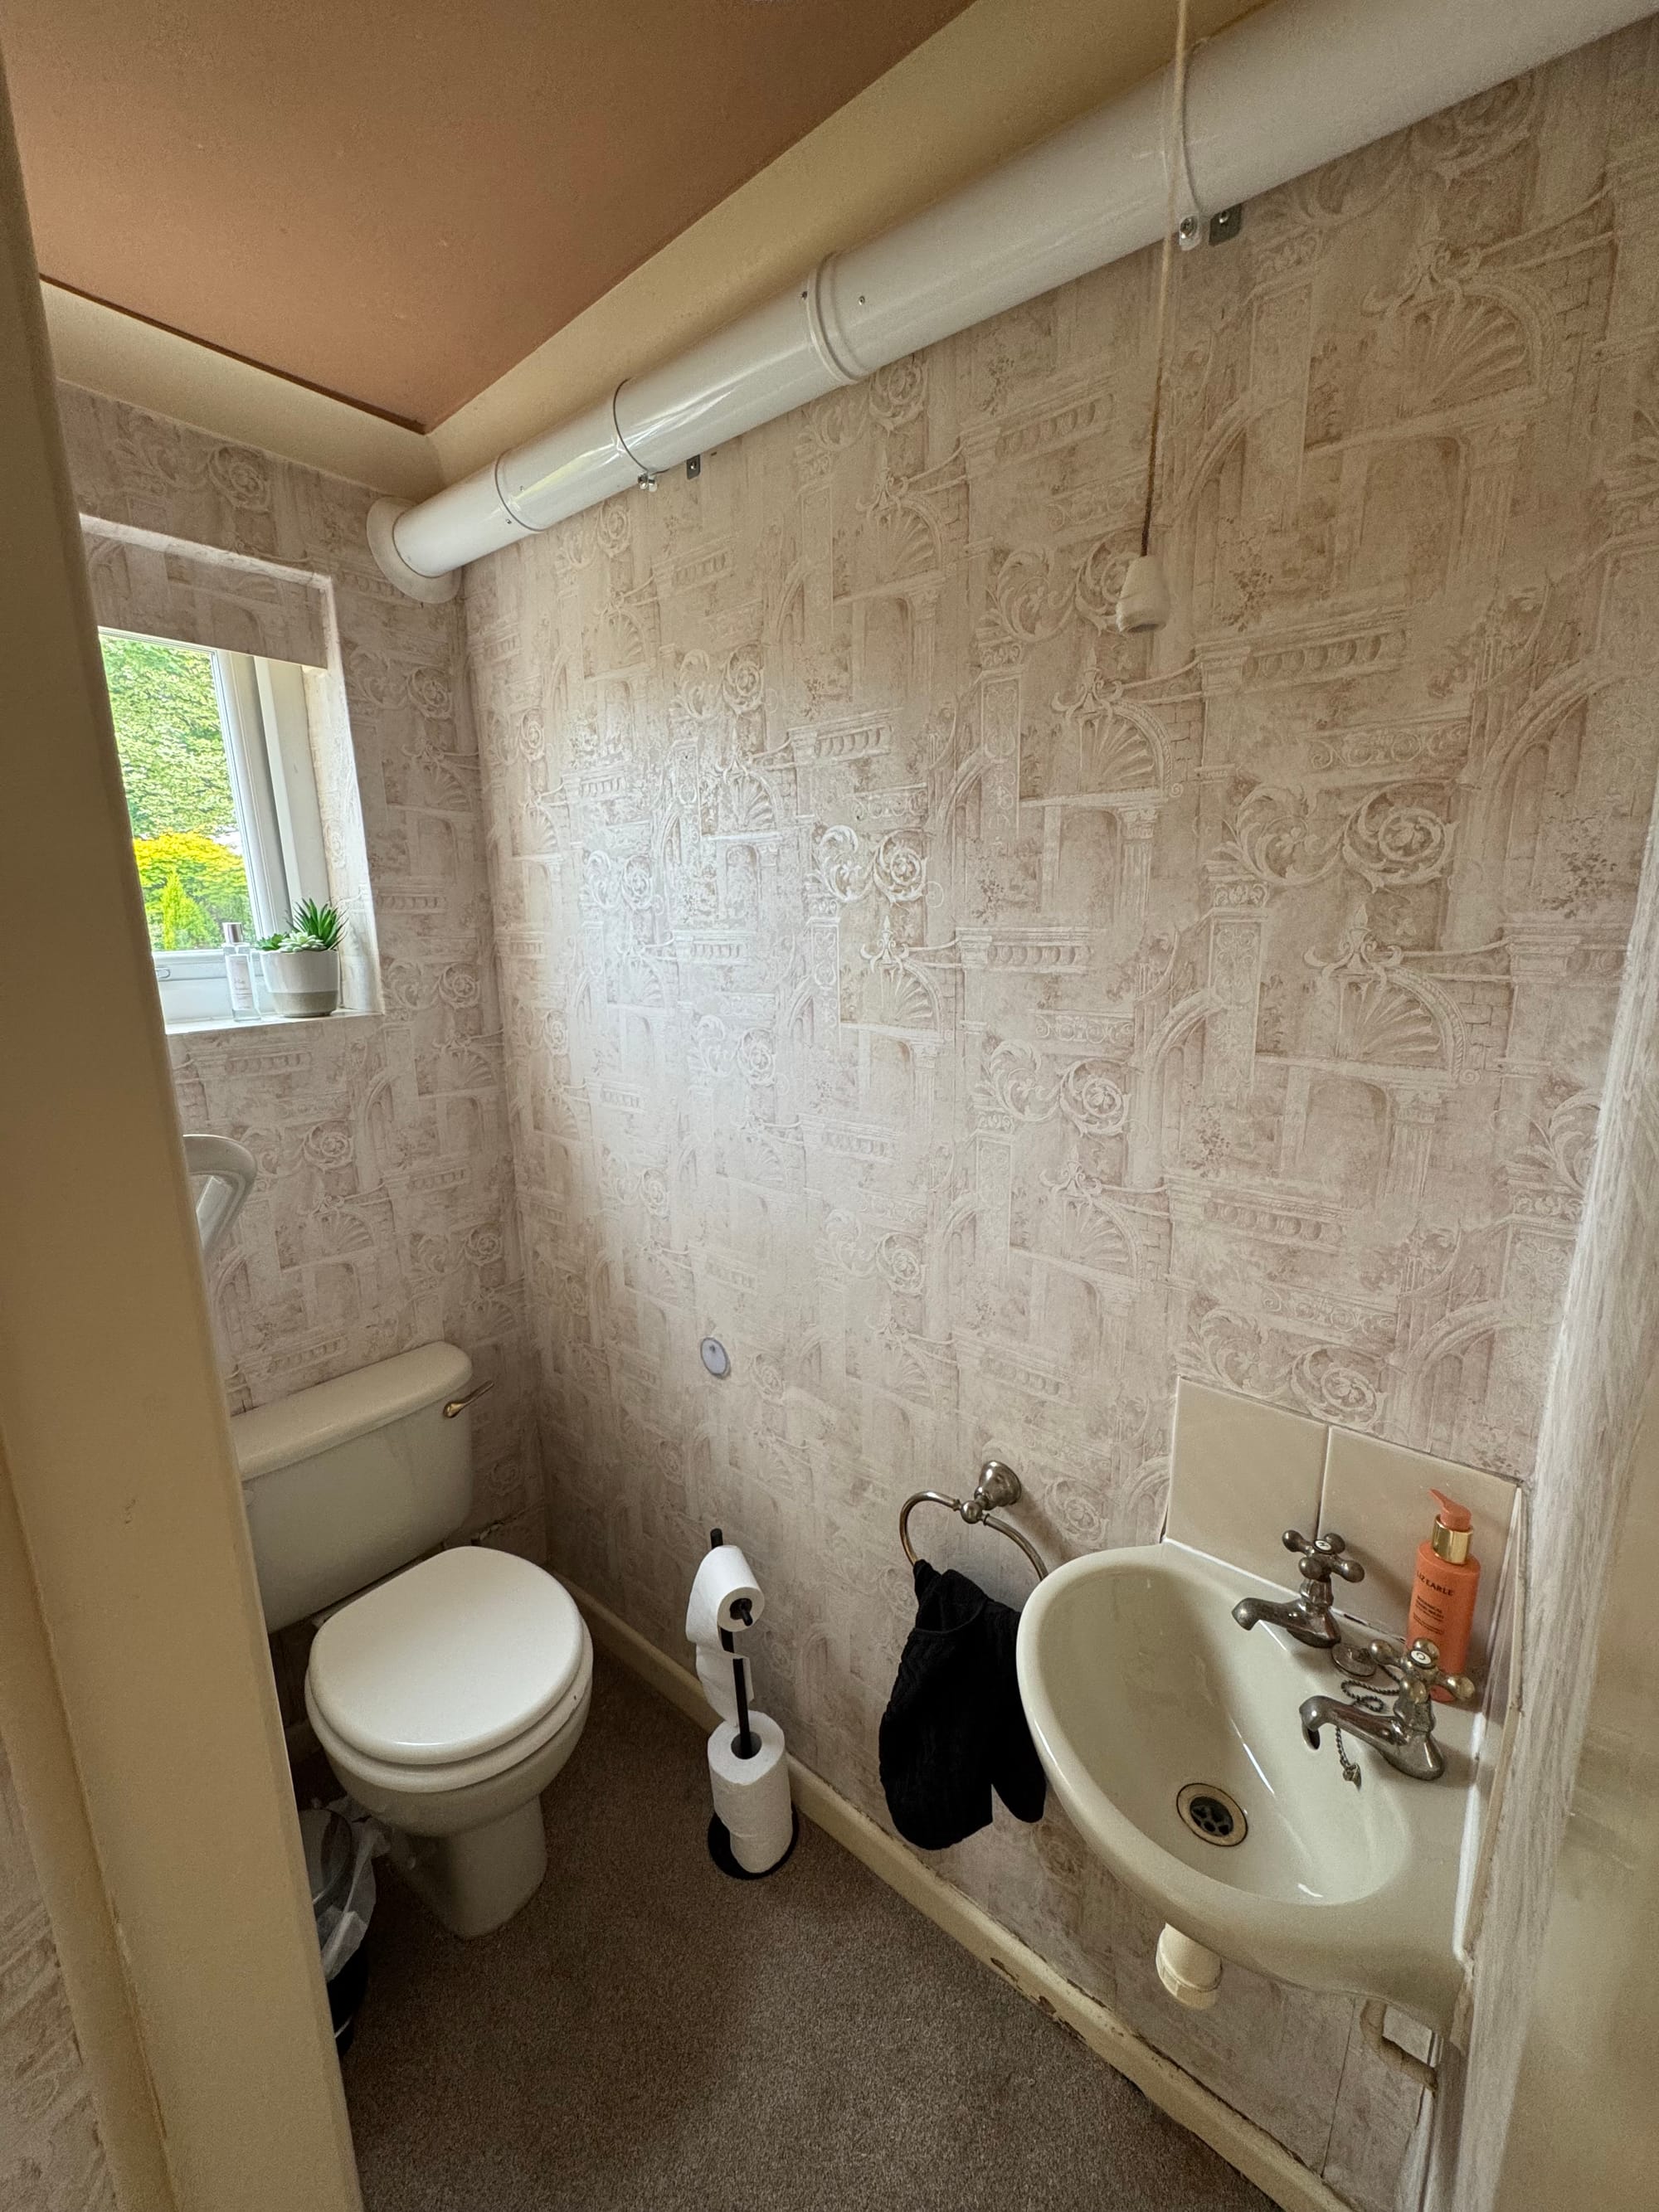
Before
This makeover wasn’t just about aesthetics. We also had exposed pipework everywhere, with the toilet and sink both showing messy plumbing that made the room feel unfinished. This project became about fixing practical issues while creating a space that finally felt considered, cohesive, and genuinely beautiful.
Materials Used
- Red and white marble-effect porcelain tiles (30 × 30 cm) from Royal Stones
- Antique white grout
- Tile spacers
- Guillotine tile cutter
- Electric tile cutter
- Replacement skirting boards
- Wall mouldings and slim dado rail from B&Q
- MDF for boxing in pipework
- Wood glue
- Small nails
- Decorator’s caulk
- Farrow & Ball Deep Reddish Brown (colour matched in Valspar at B&Q)
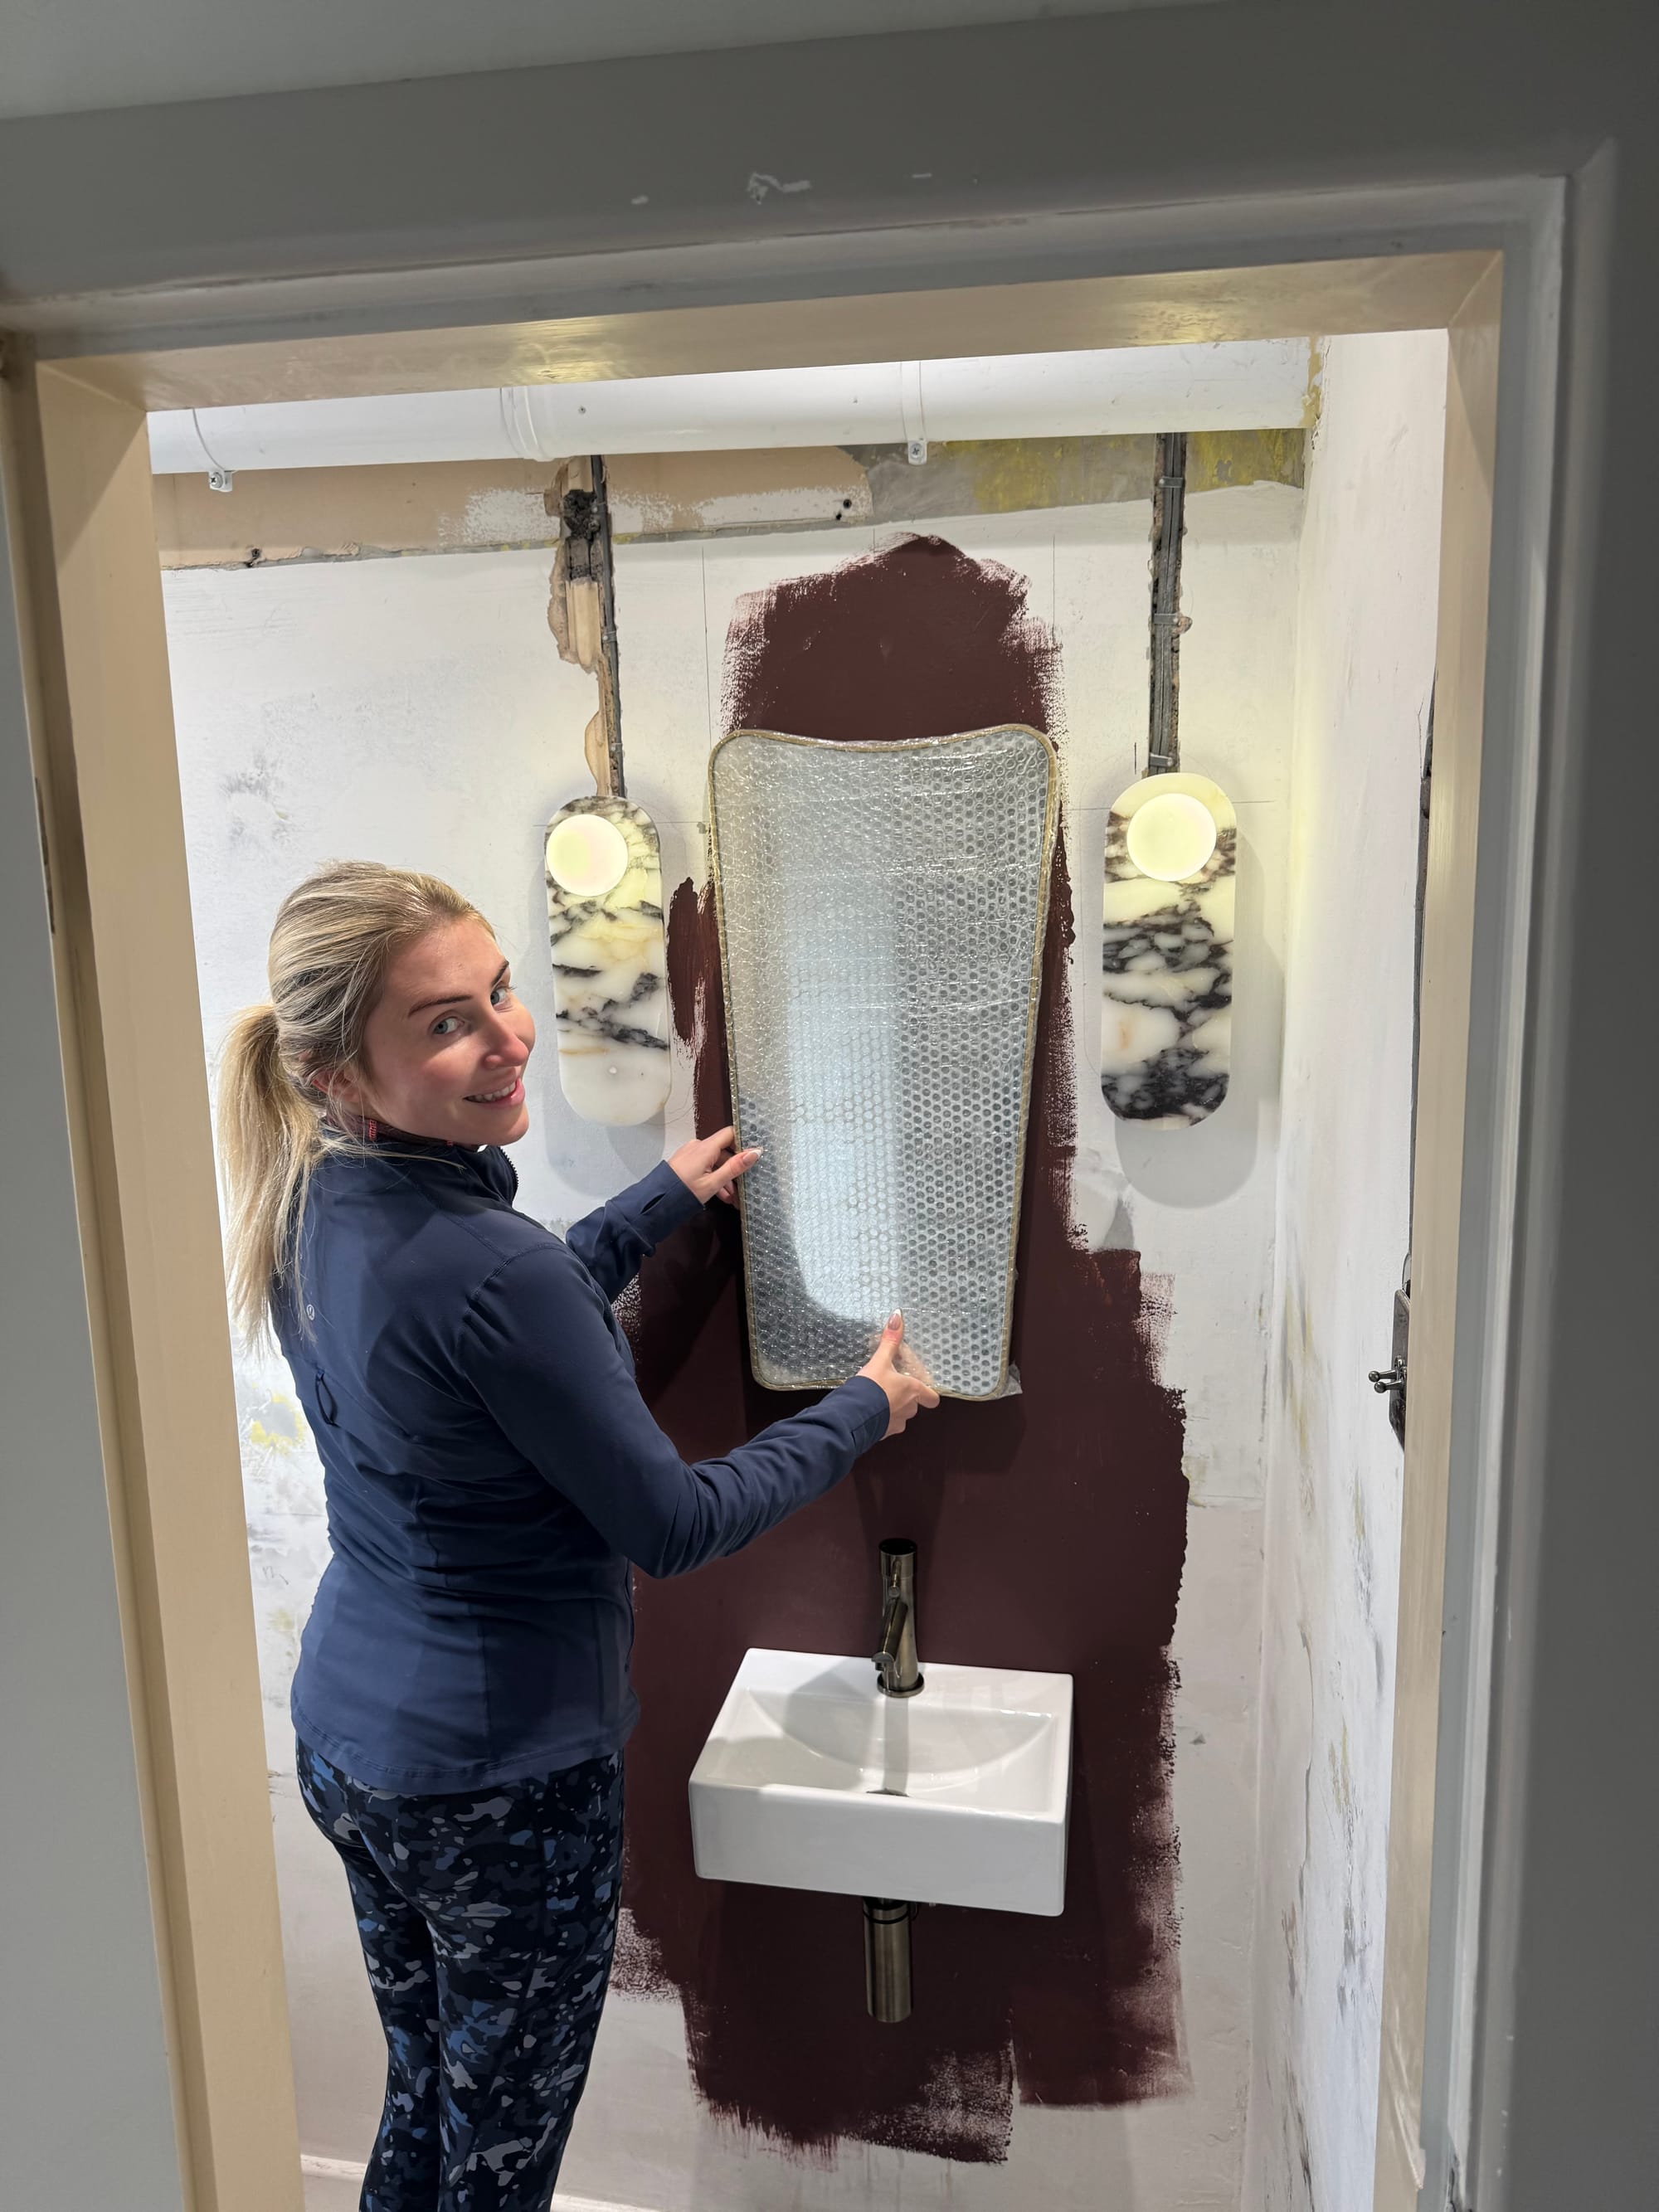
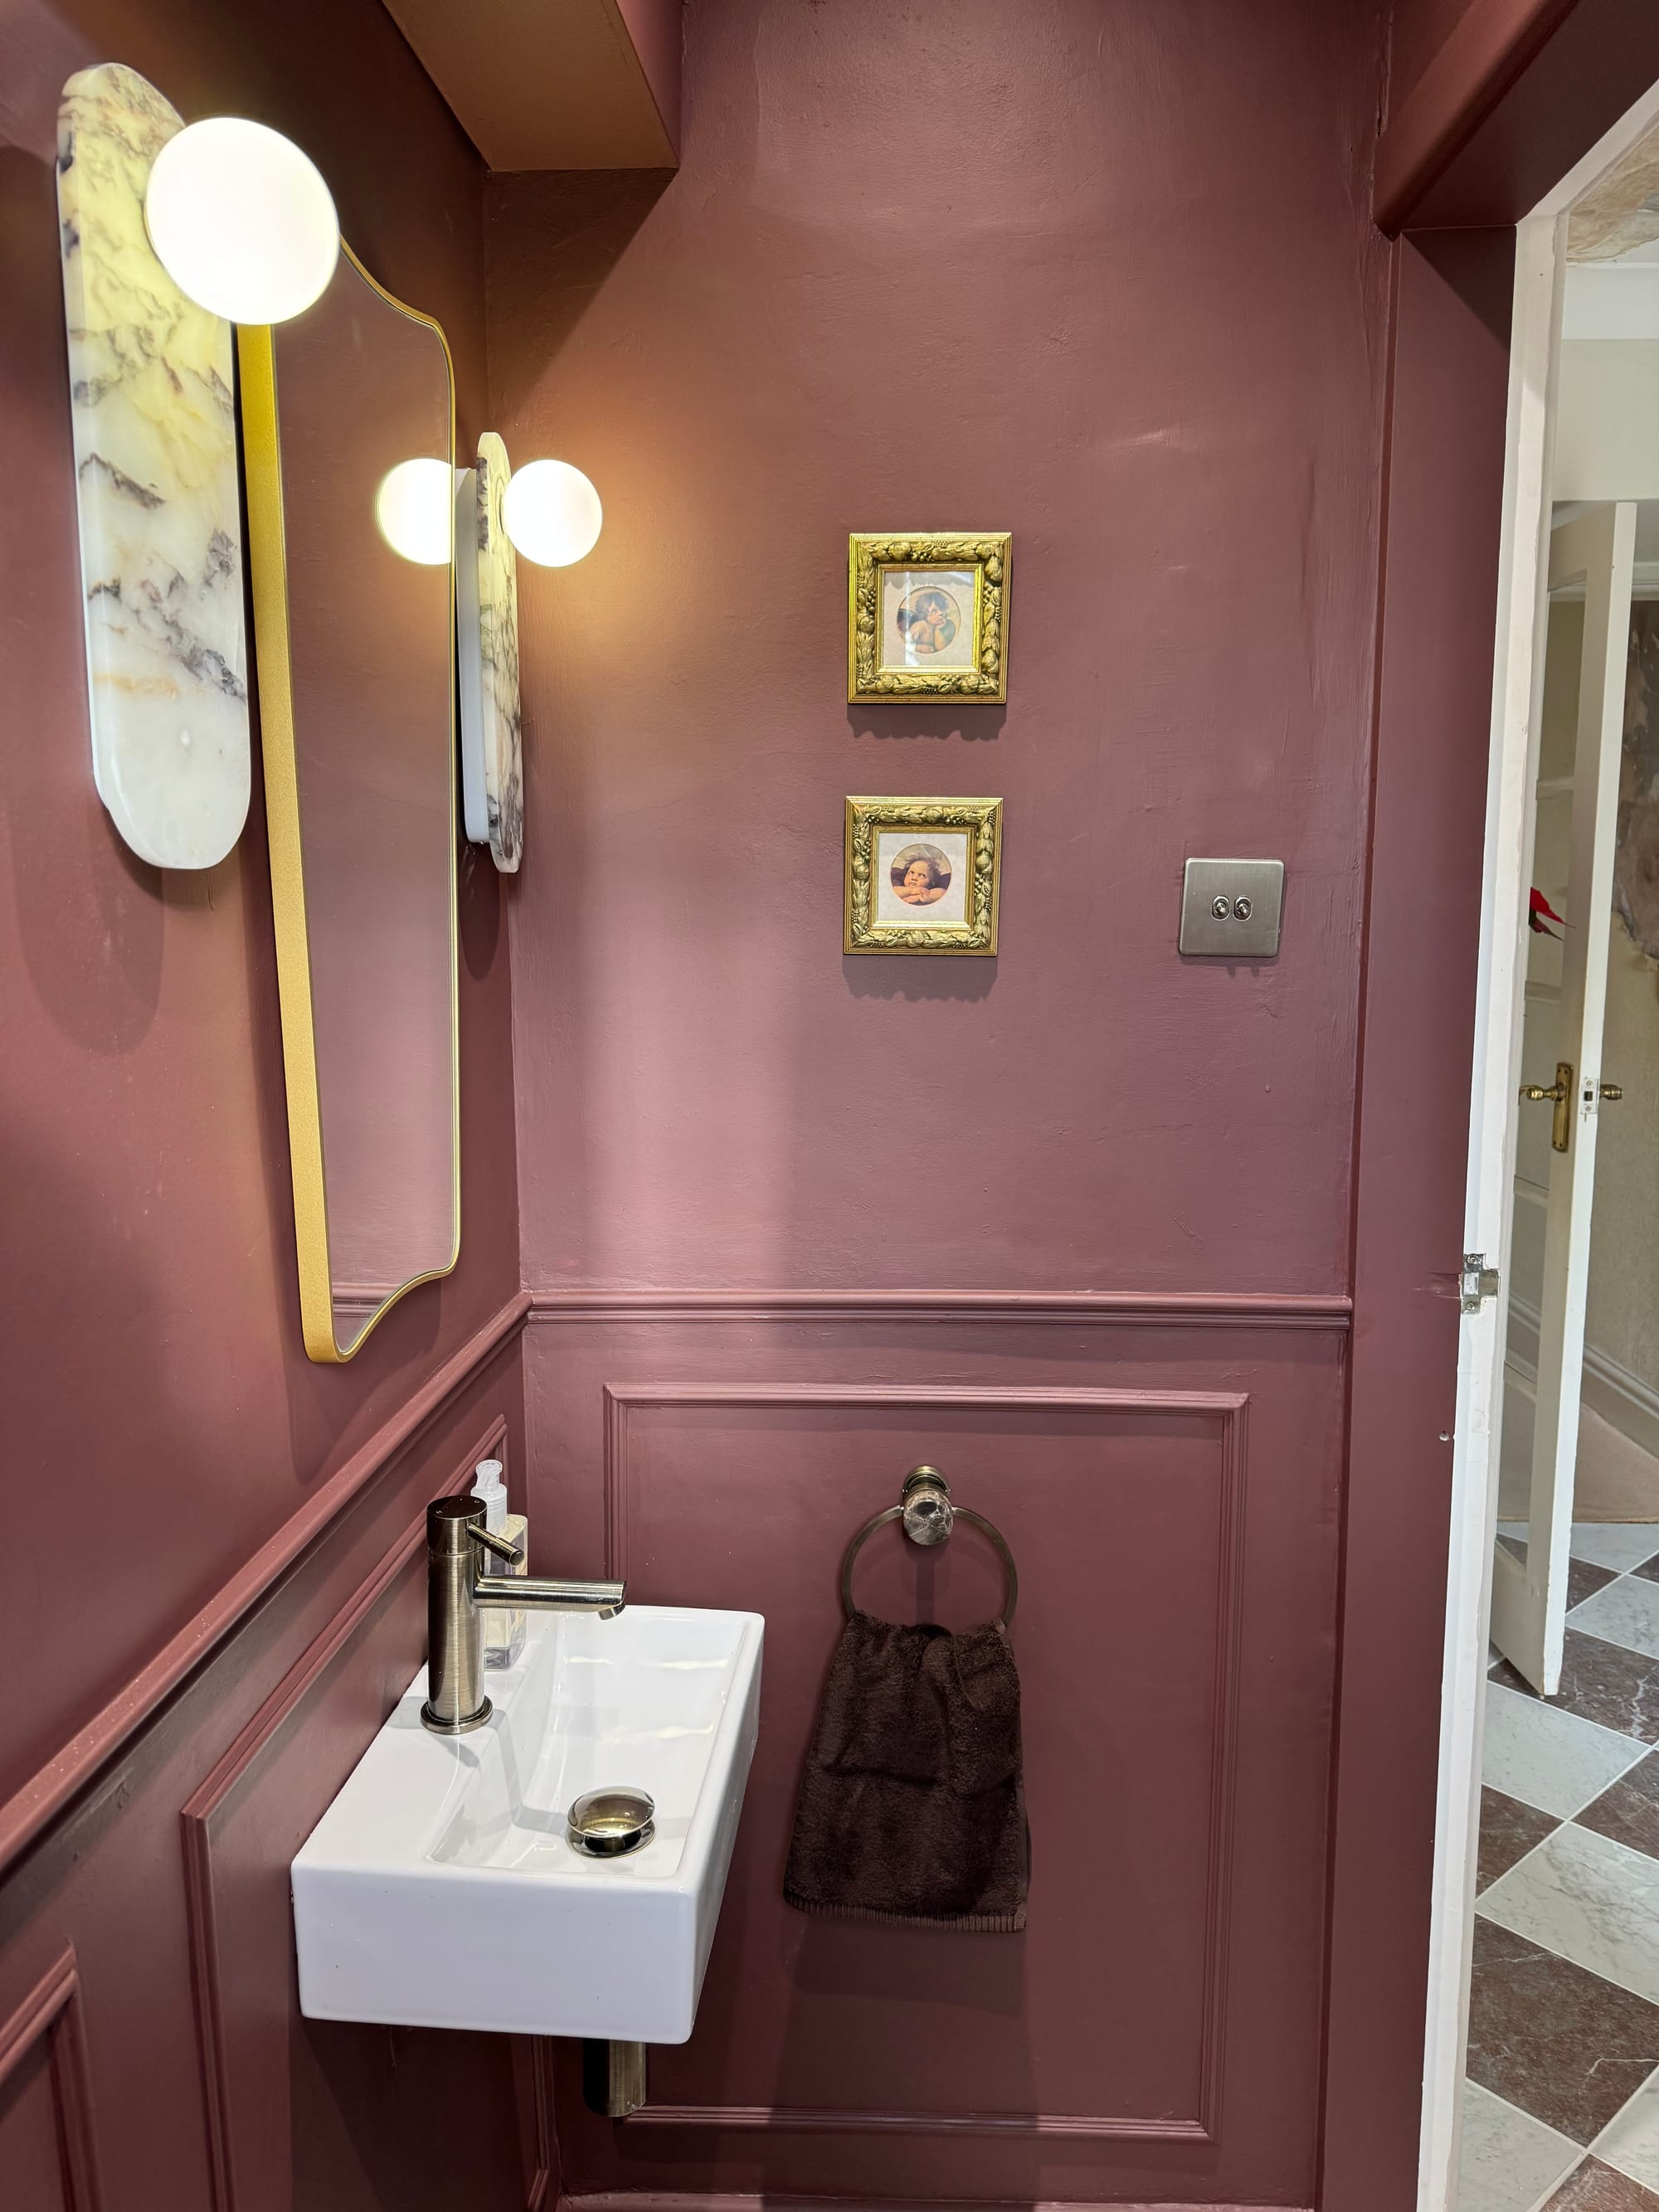
- Bespoke mirror from Etsy
- Calacatta Viola marble wall lights from AliExpress
- Sink, tap, waste and toilet from The Big Bathroom Shop
- Brown towel rail and toilet roll holder from Dunelm
- Thrifted frames
- Towel from Marks & Spencer
- Calacatta Viola marble samples for the windowsill
- Adhesive and grout for the marble sill
Approximate total cost: £1,000
Step-by-Step Cloakroom Makeover
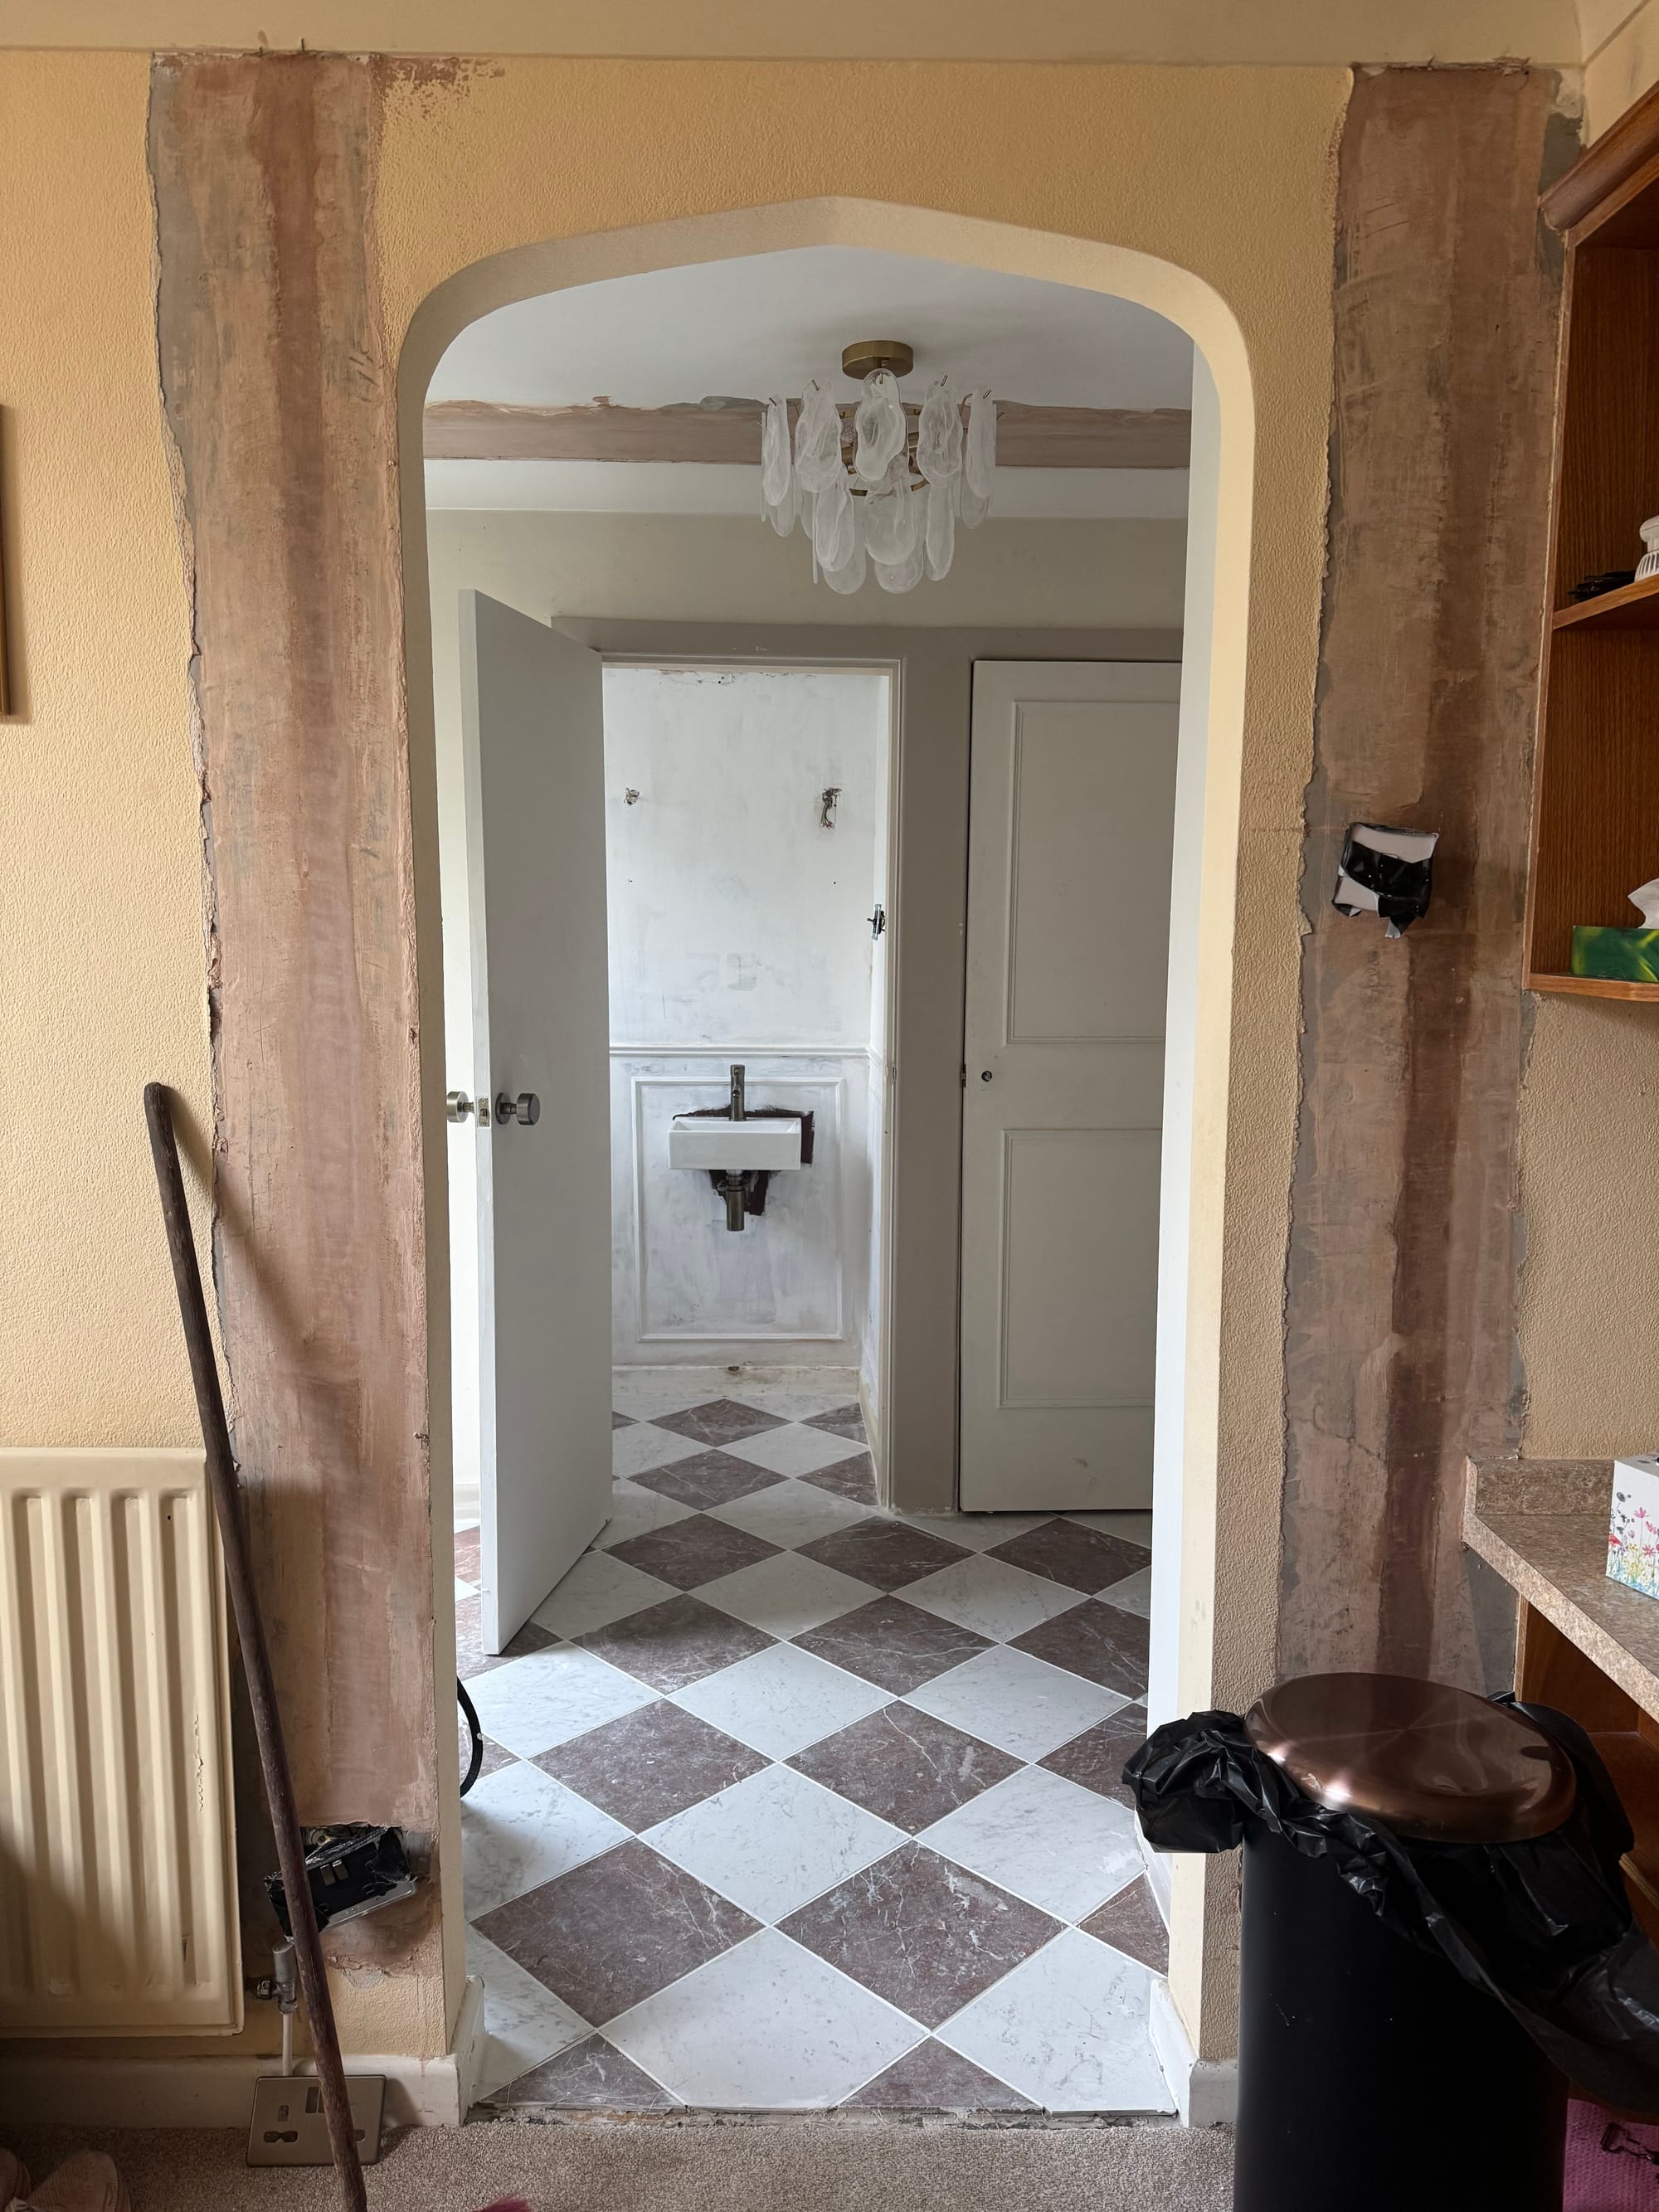
Step 1: New Skirtings and Checkerboard Tiles
The first job was replacing the skirting boards, which were badly damaged by woodworm. At the same time, Josh was laying checkerboard tiles in the back hallway using red and white marble-effect porcelain tiles. We loved the look so much that we decided to run the same flooring into the cloakroom, boiler room, and coat cupboard to create continuity.
Josh did the tiling completely from scratch, levelling and smoothing the floor, finding the centre of the space, and laying all the full tiles first before working outward. Tile spacers helped keep everything even, and while we used both a guillotine cutter and an electric tile cutter, the electric cutter was far better for tricky cuts around doorways. Once everything was laid, we grouted with antique white, cleaned it back, and the transformation was instant. The space felt brighter, bolder, and far more practical — especially for muddy paws on wet days.
Step 2: Strip Back and Reposition Plumbing
Next, we stripped off the wallpaper, filled all the holes, and sanded the walls smooth. There were more holes than we expected, but taking the time here made a huge difference later.
The plumber then moved the sink from the corner to the front-facing wall, carving channels into the wall so all pipework could be hidden behind plaster. The toilet pipes were treated the same way. Instantly, the room felt cleaner and more intentional. Once the plumbing was sorted, Josh replastered the walls and sanded them back, ready for paint.
Step 3: Prep and Undercoat
Before adding any colour, we undercoated the entire room and did another round of filling and sanding. This stage isn’t glamorous, but in an older house where nothing is straight, it’s absolutely essential. Every extra bit of prep here pays off later.
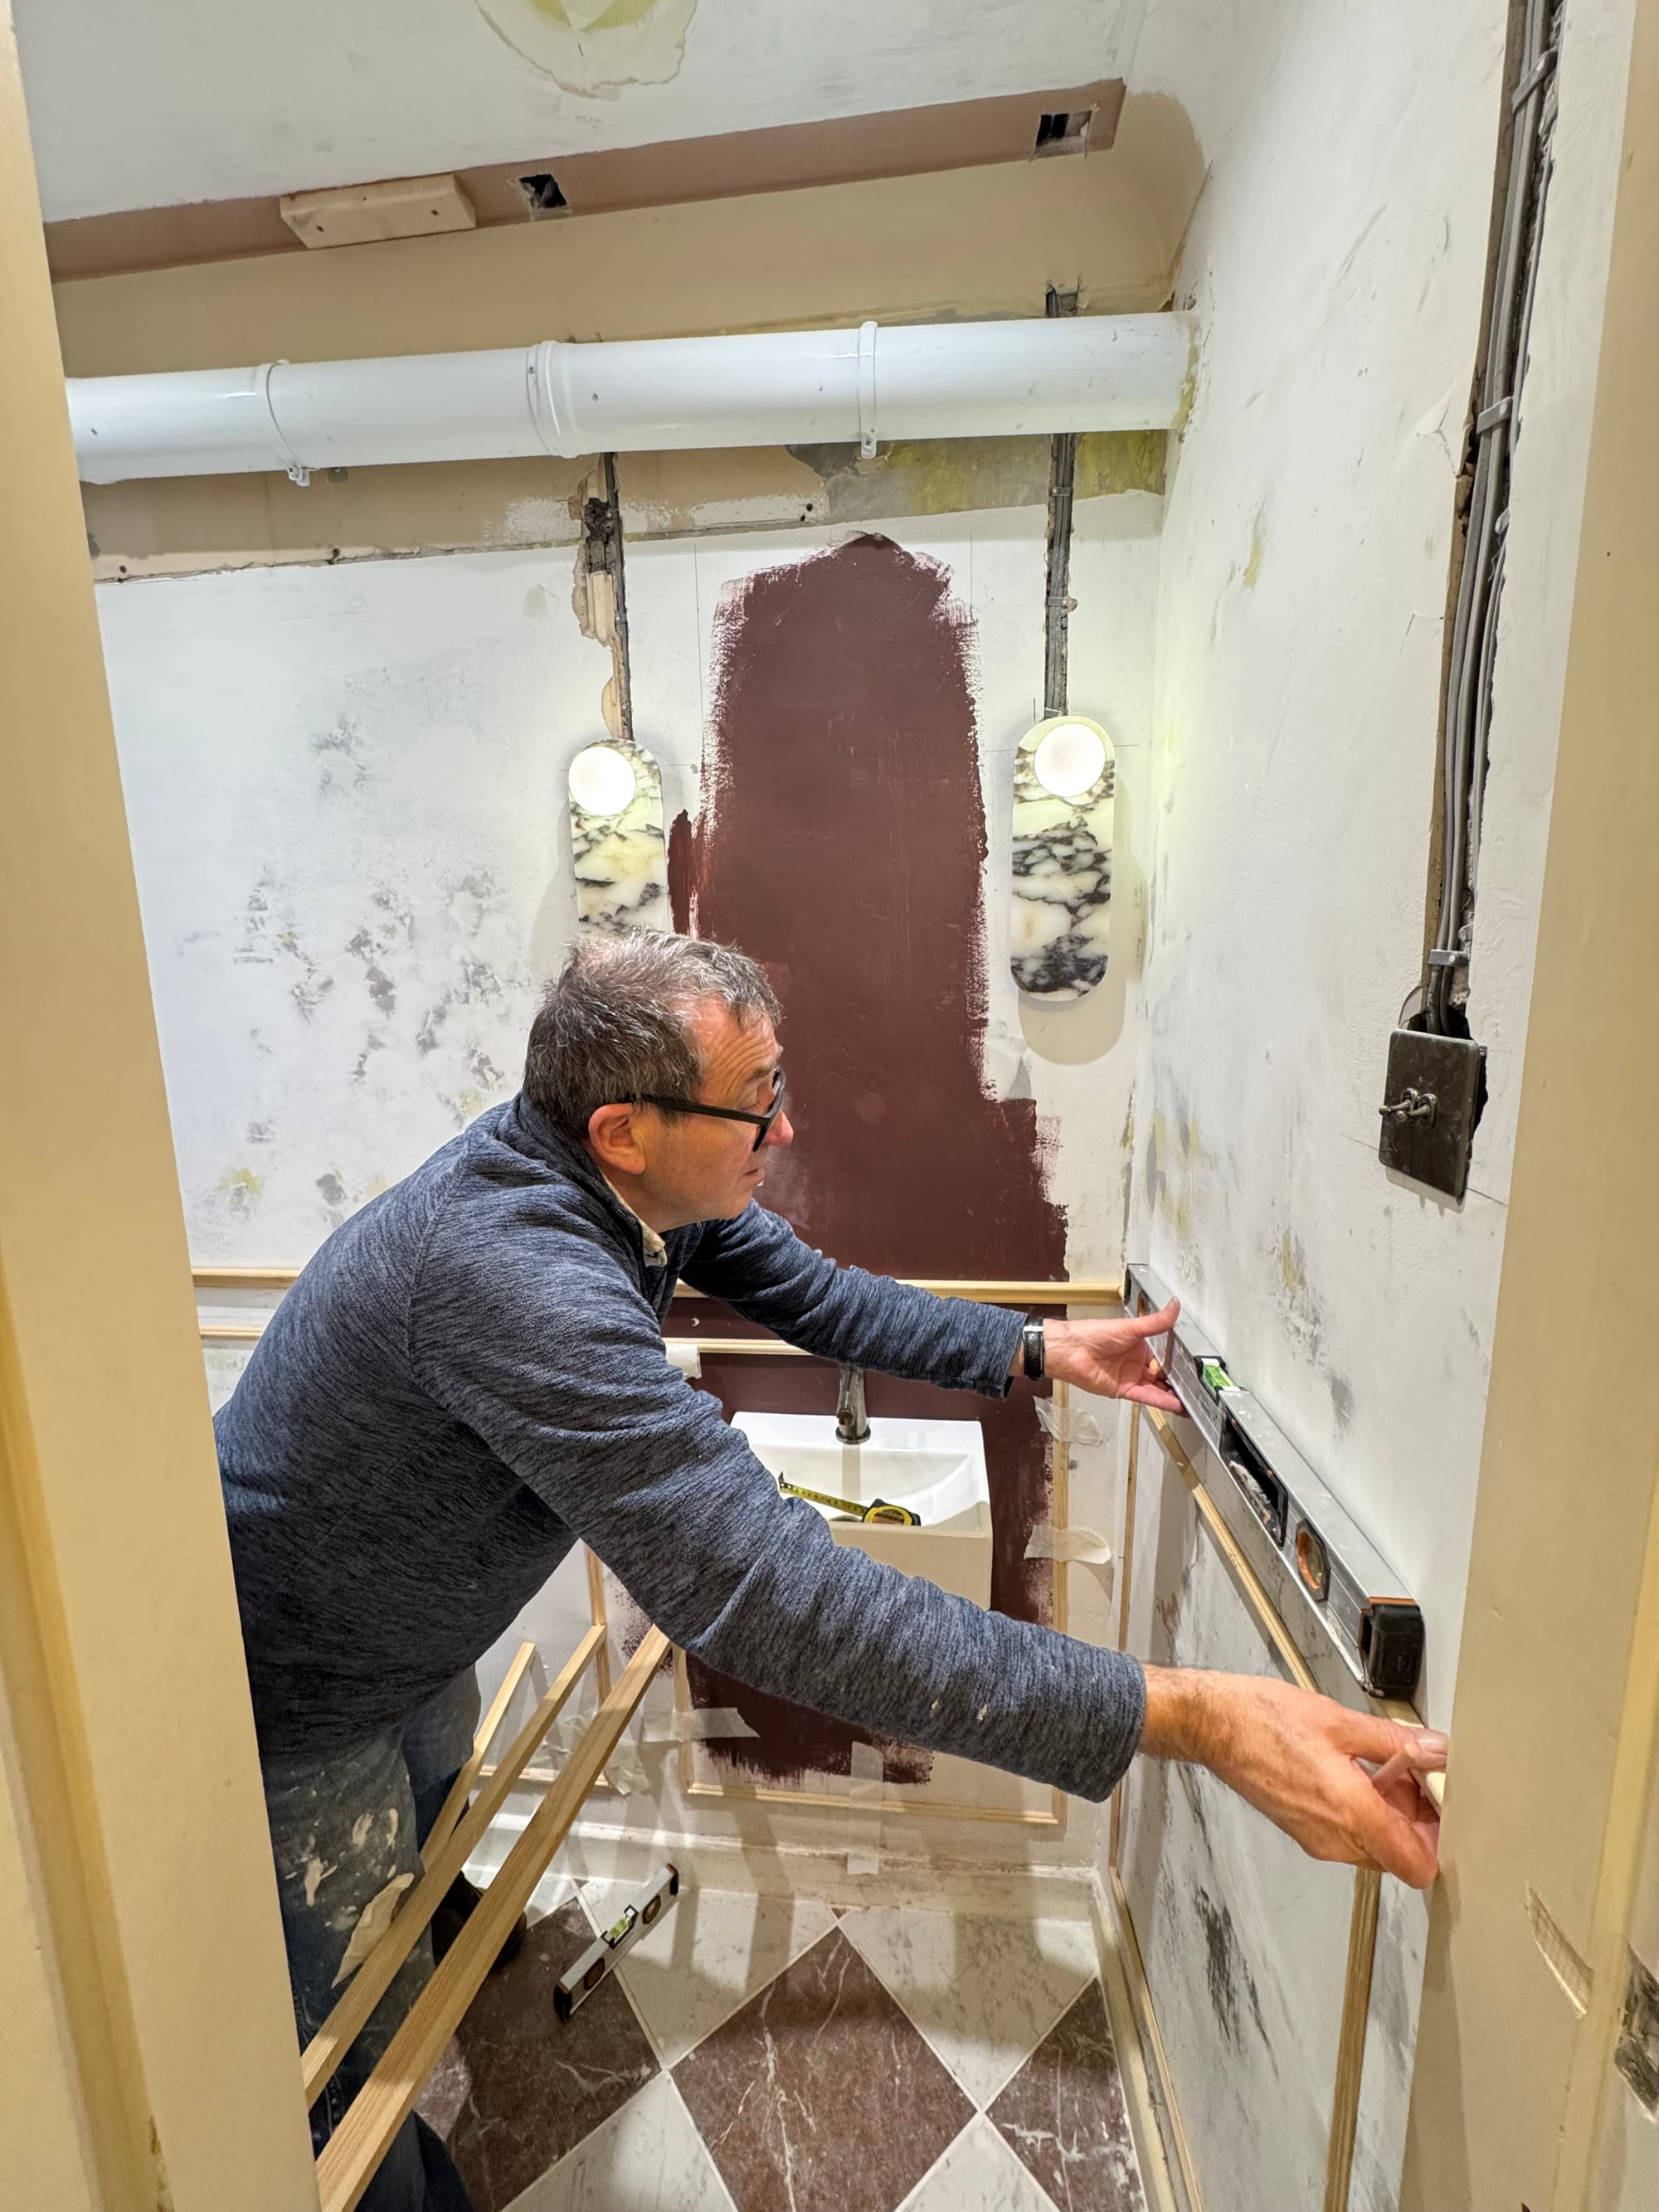
Step 4: Adding Wall Mouldings
This is where the character really started to shine. We bought mouldings from B&Q and drew the layout directly onto the walls, planning square panelling with a slim dado-style rail through the centre. Because the sink is the first thing you see when opening the door, we started measuring from there.
Nothing in the room was square or symmetrical, so some of the panels became subtle rectangles to keep everything visually balanced. Each panel was built first, then fixed to the wall using wood glue and small nails. The wonky walls definitely made themselves known, and in some spots the mouldings needed to be propped up for a few days while setting. Once secure, we caulked every edge, corner, and join to create that crisp, finished look.
Step 5: Boxing in the Boiler Pipe
A large pipe running from the boiler room into the cloakroom wasn’t doing the space any favours. We built a removable MDF box to hide it, making sure it could still be accessed in the future if needed. It instantly made the room feel more polished and intentional.
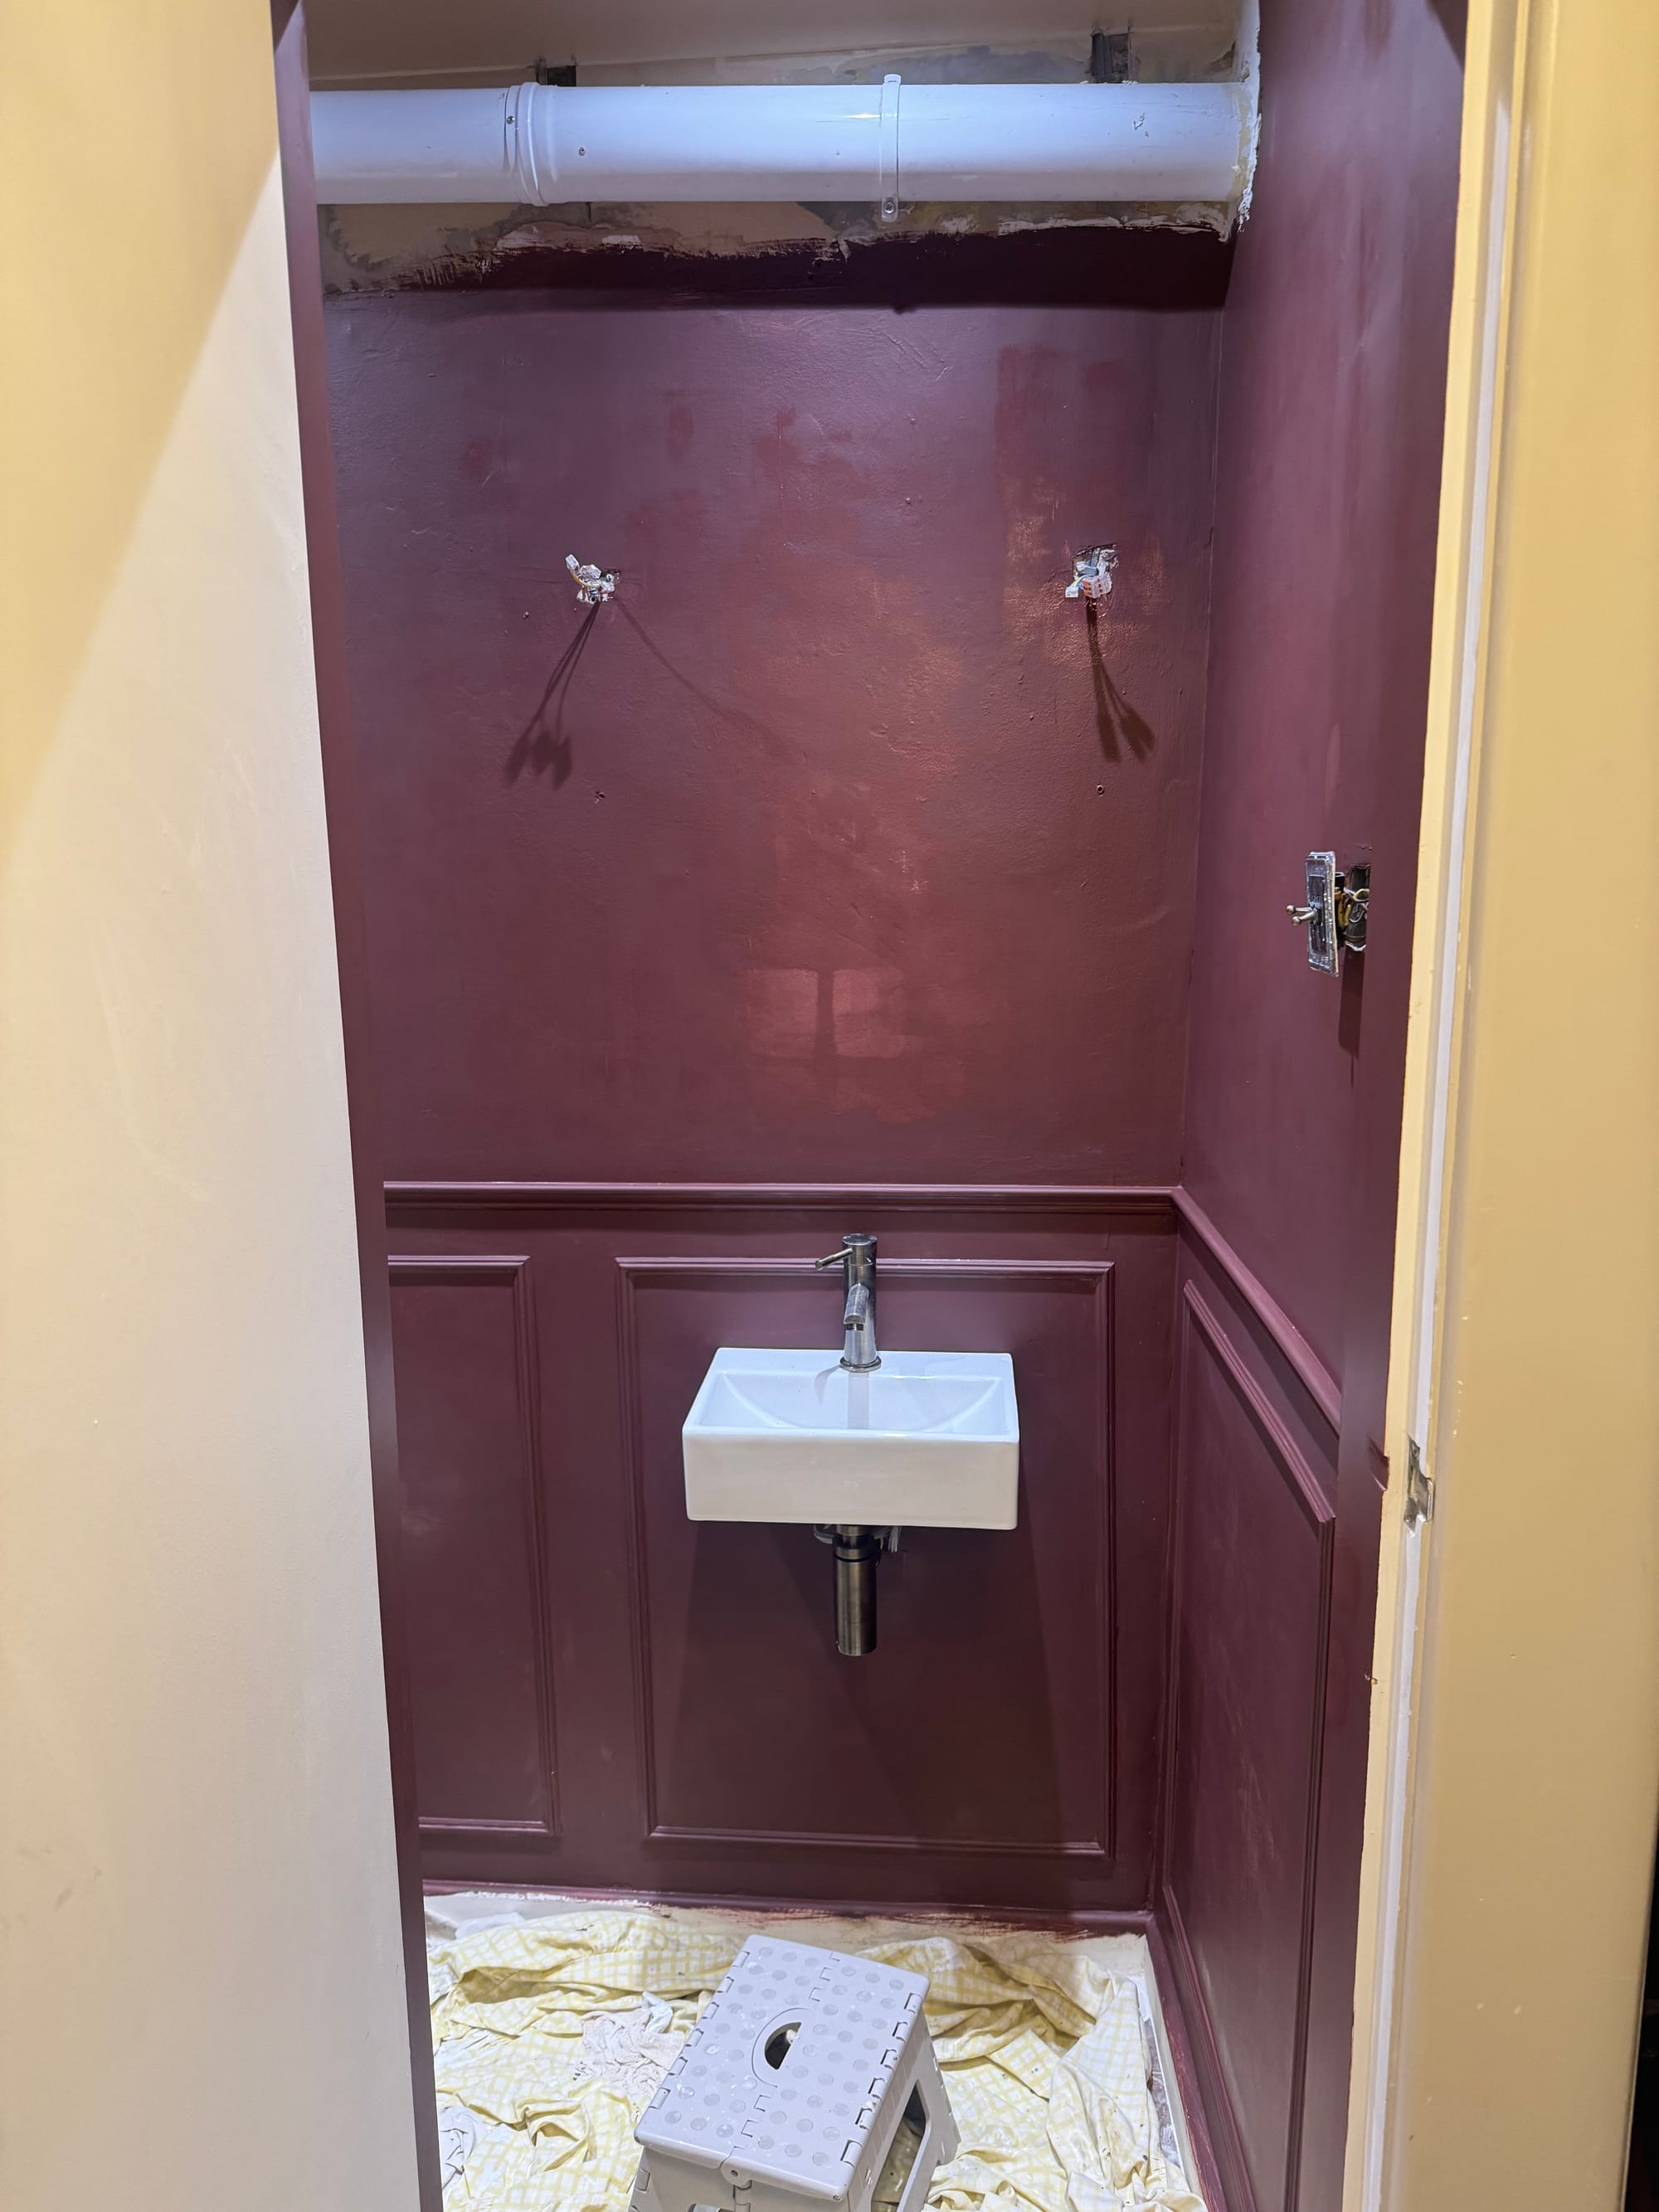
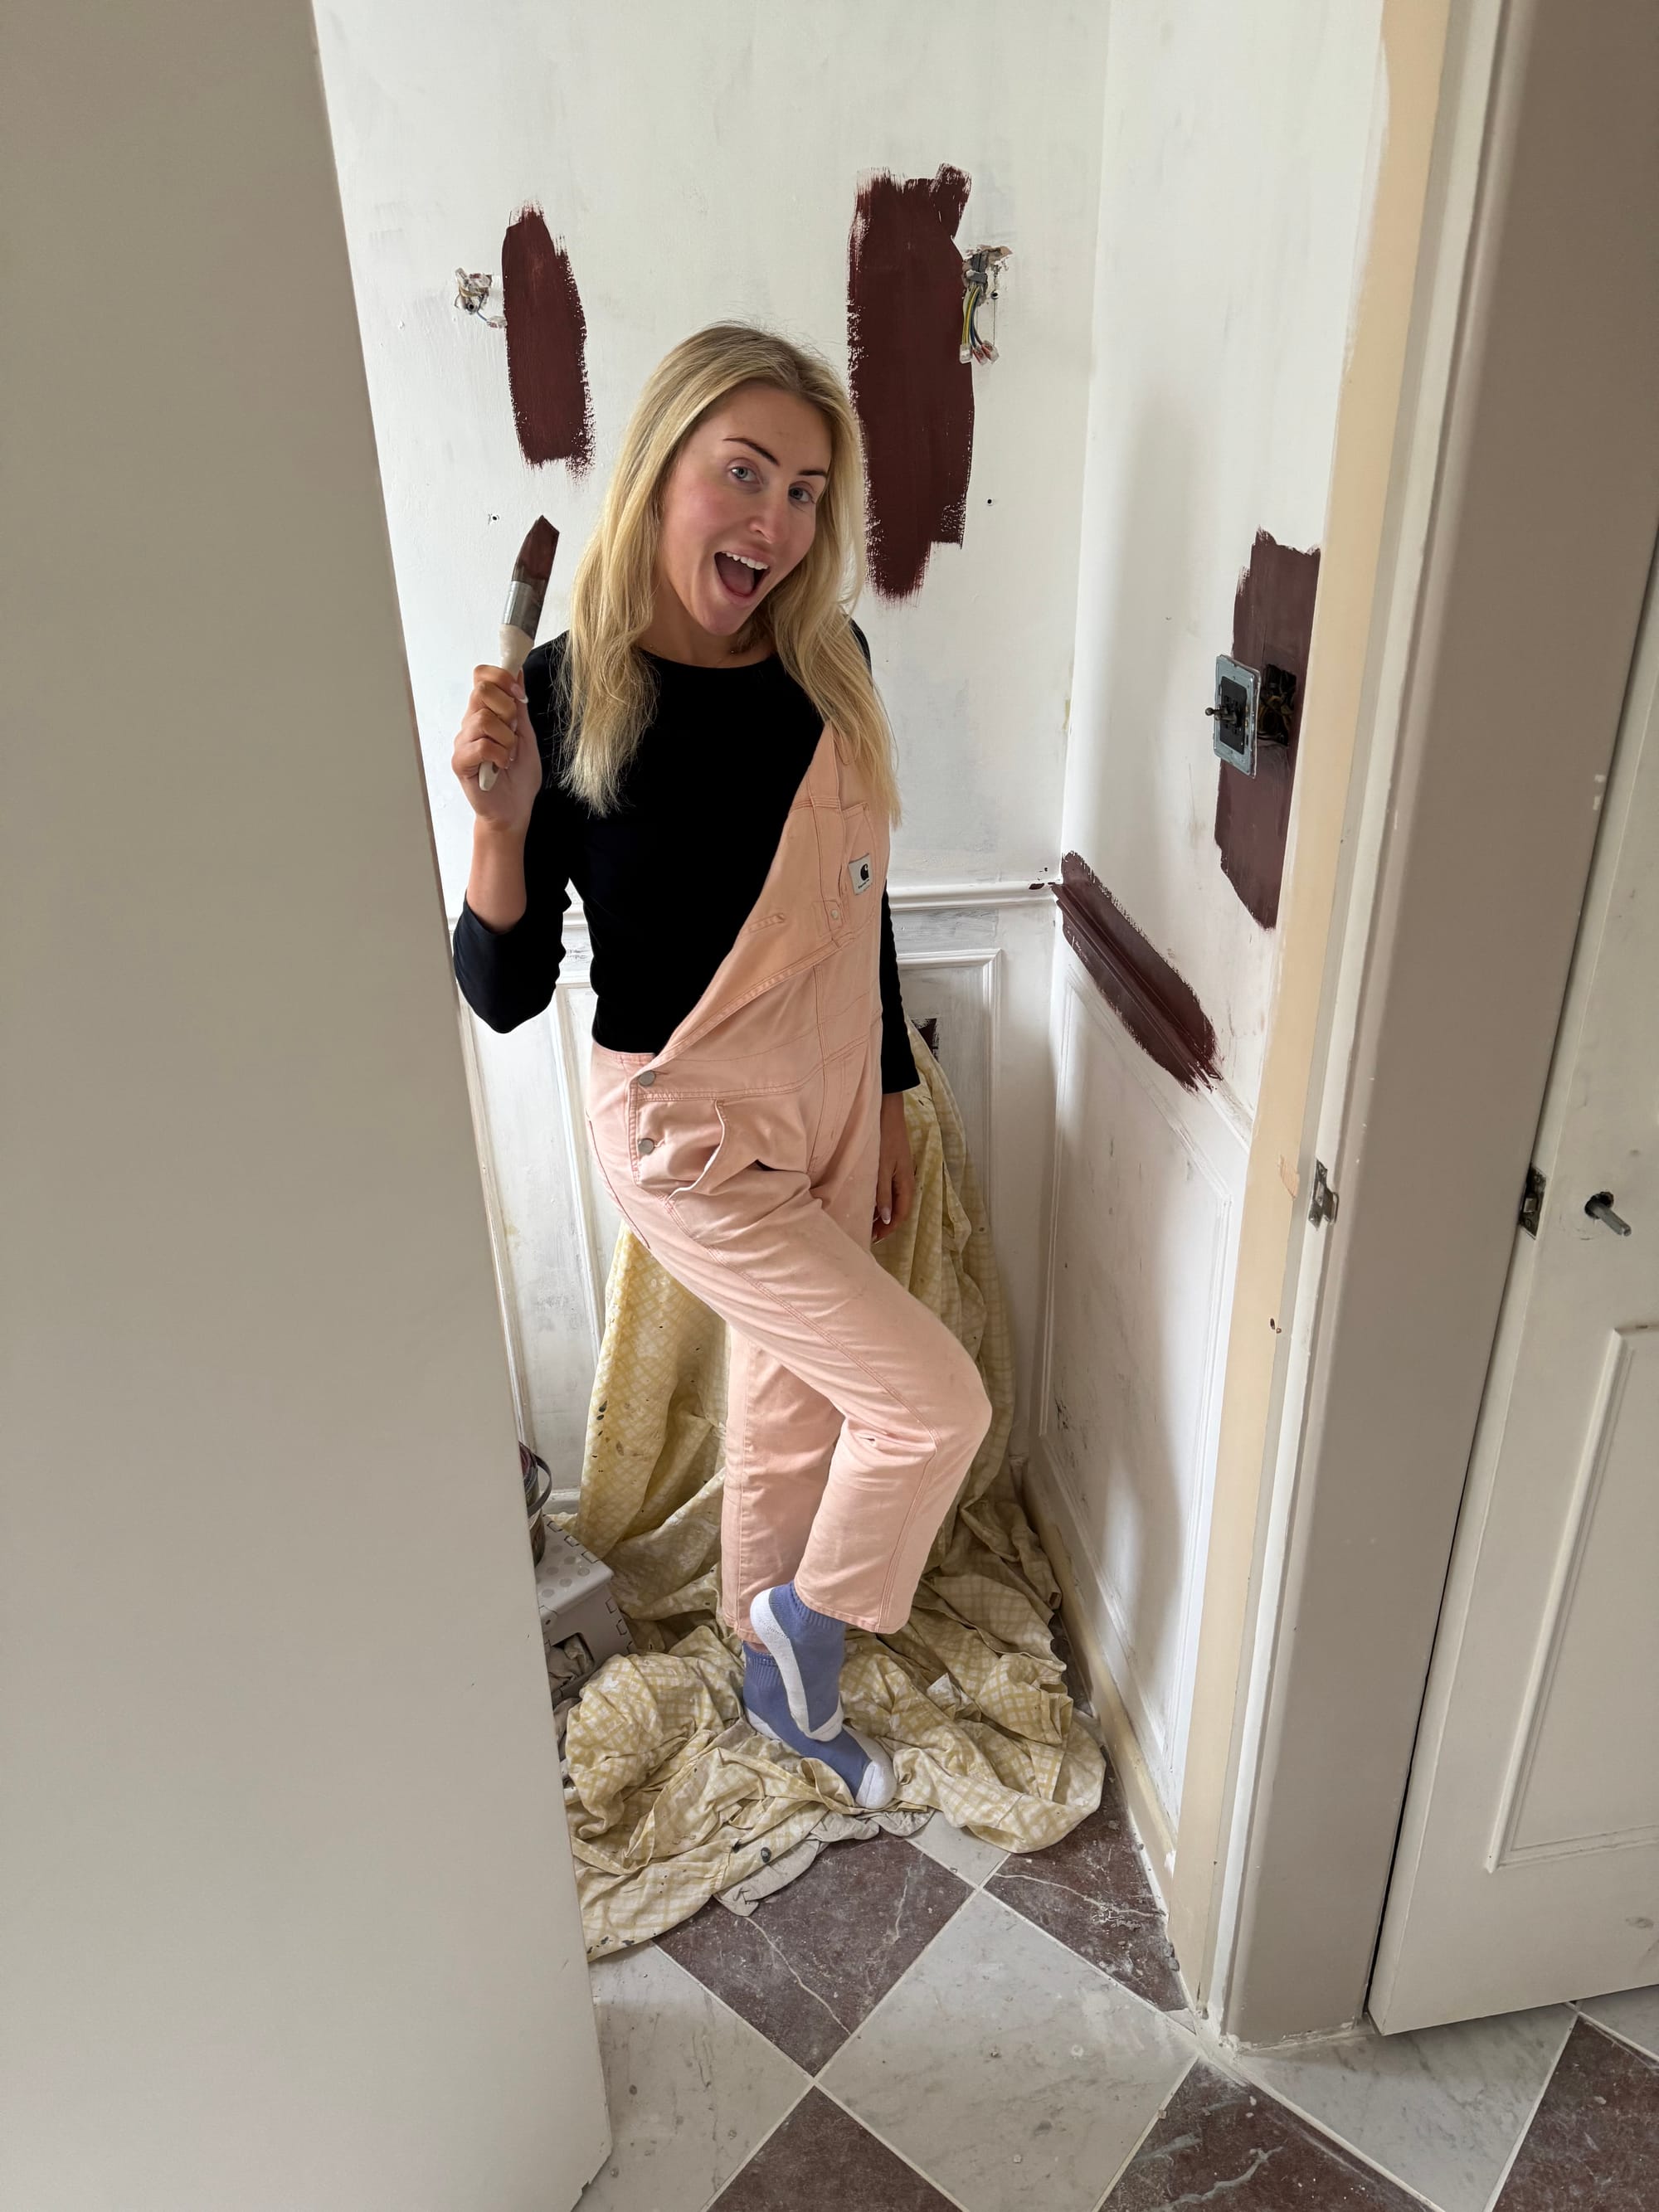
Step 6: Painting and Colour Drenching
Then came the fun part. We chose Farrow & Ball Deep Reddish Brown, colour matched at B&Q using Valspar paint. It’s a rich, dark red that pairs beautifully with the checkerboard tiles. We went for a matt finish to help disguise imperfections while still keeping it wipeable — ideal for a downstairs loo. We colour drenched the entire room, including walls, skirtings, ceiling, and the boxed-in pipework. Because we’d undercoated in white, it took four coats to achieve the depth we wanted, but the result was absolutely worth it.
Tips and Things to Consider
- Start tiling from the centre of the room for visual balance
- Electric tile cutters are invaluable for awkward cuts
- Expect wonky walls in older homes and adjust panelling as you go
- Caulk everything for a professional finish
- Hide pipework wherever possible
- Dark colours over white primer need extra coats
- Always make boxed pipework removable
What started as the worst room in the house has become one of my absolute favourites. It’s bold, practical, and full of character — and for the first time, it actually works both visually and functionally.

This makeover proves that even the smallest spaces deserve attention. With thoughtful planning, patience, and a willingness to adapt as you go, a forgotten cloakroom can become a space you’re genuinely proud of.
Goodbye, ugly downstairs loo — and hello to our favourite little room in the house.


Creator: The Old Barn
Instagram: @theoldbarn_rv