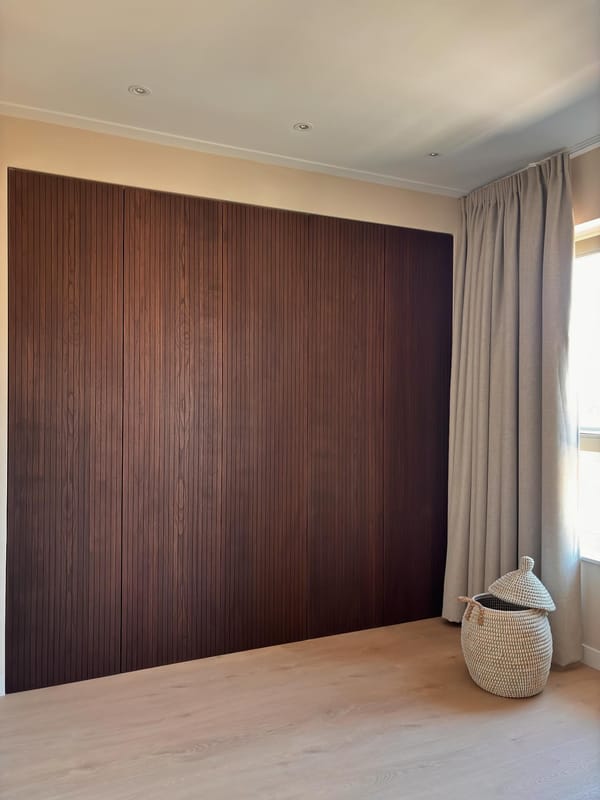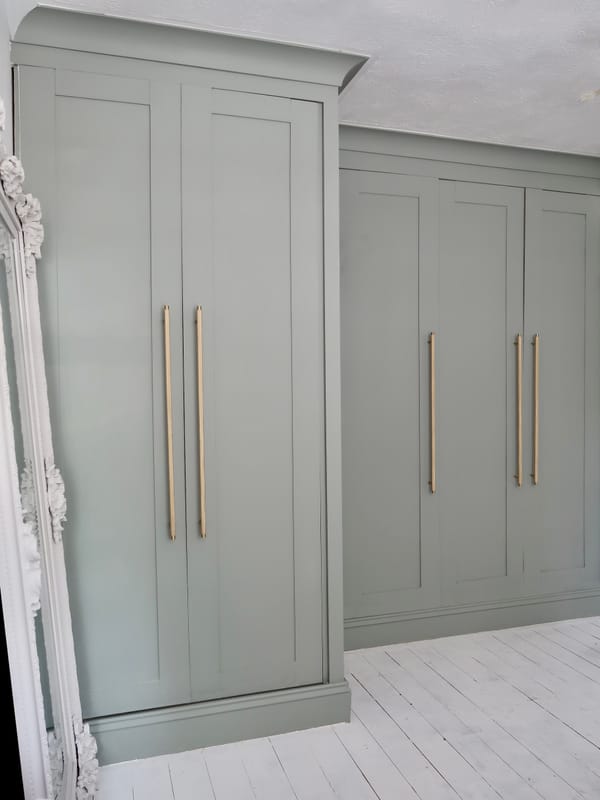
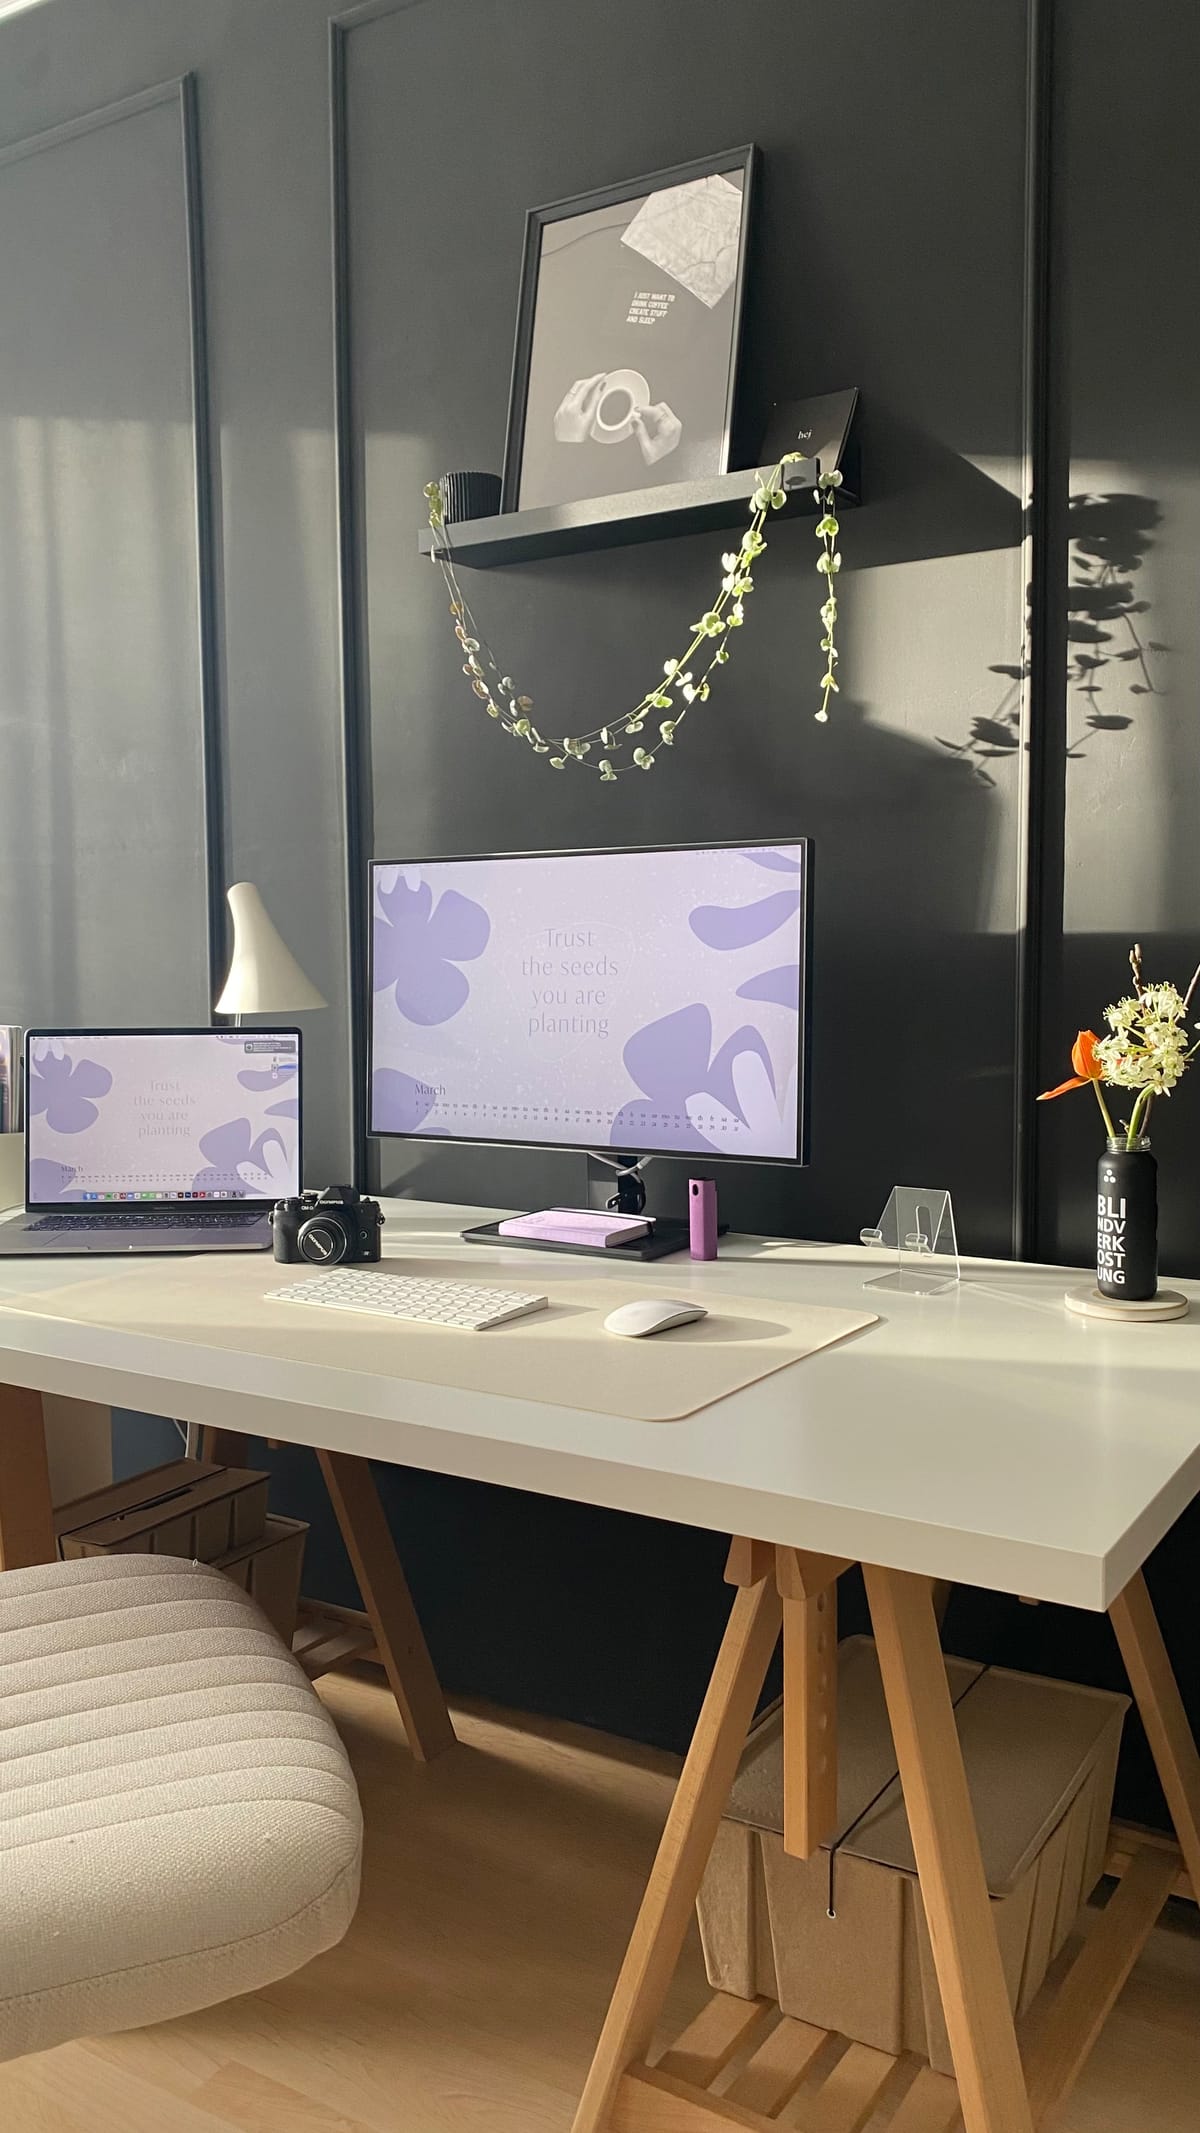
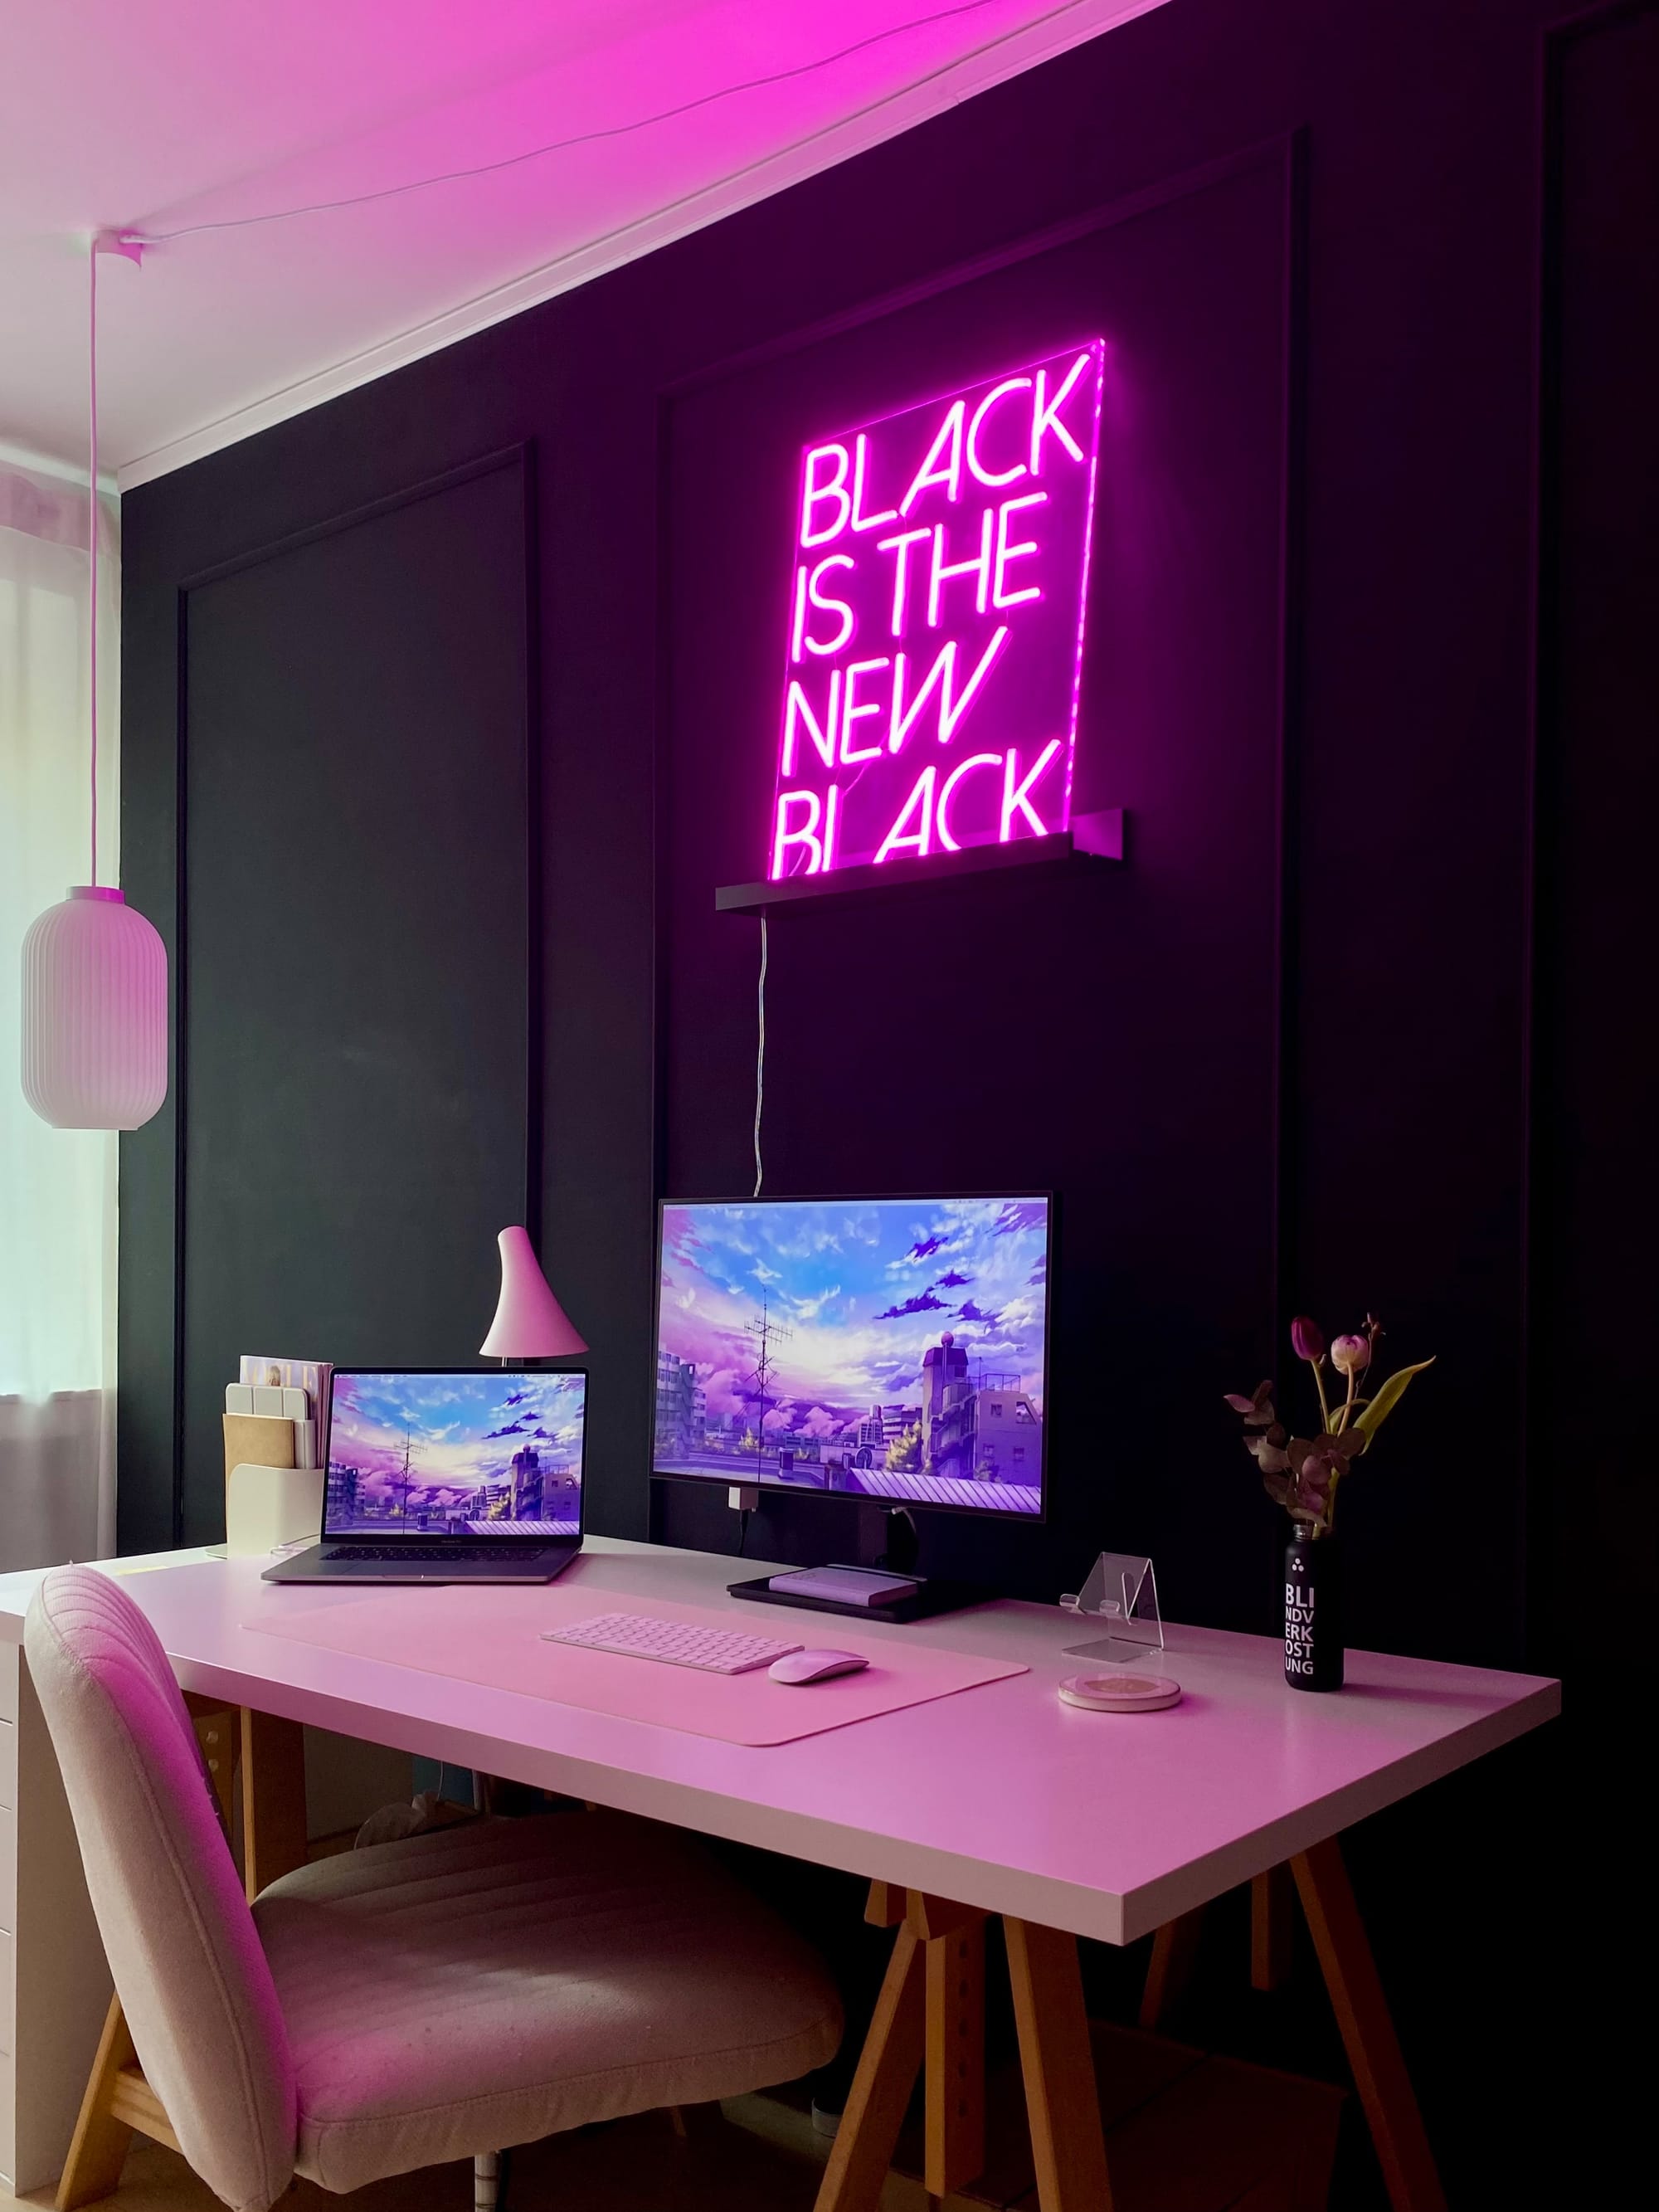
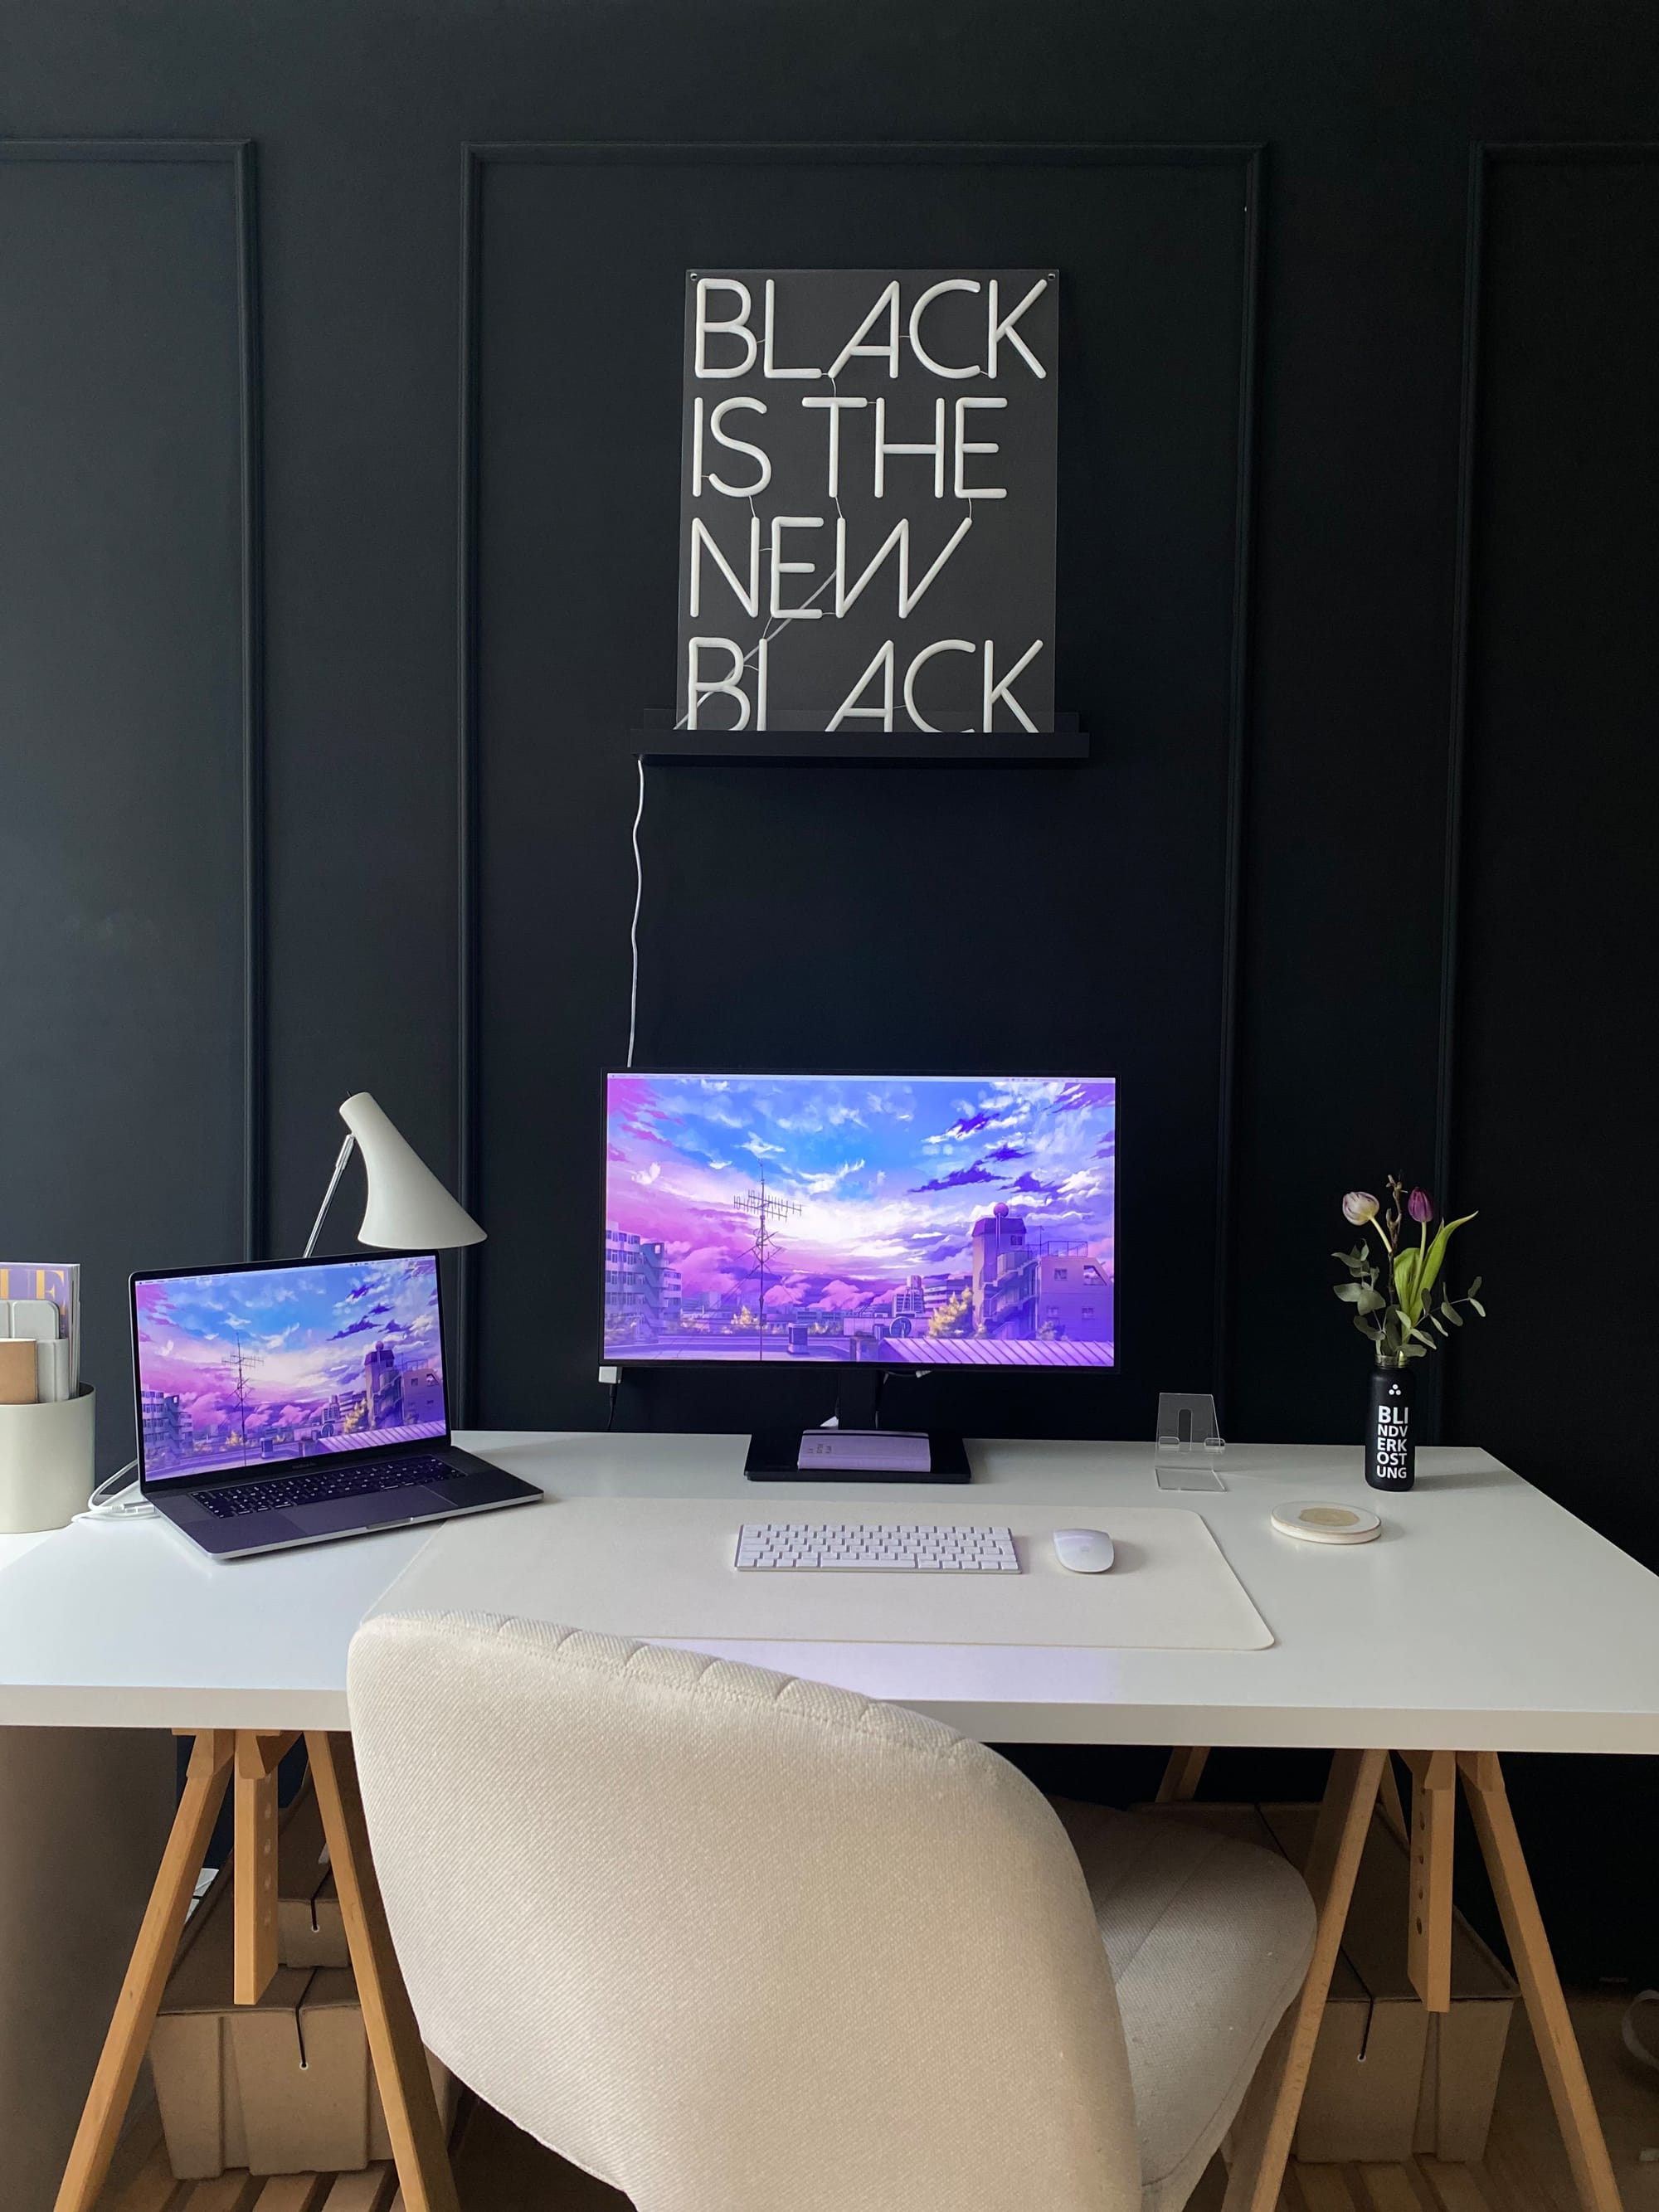
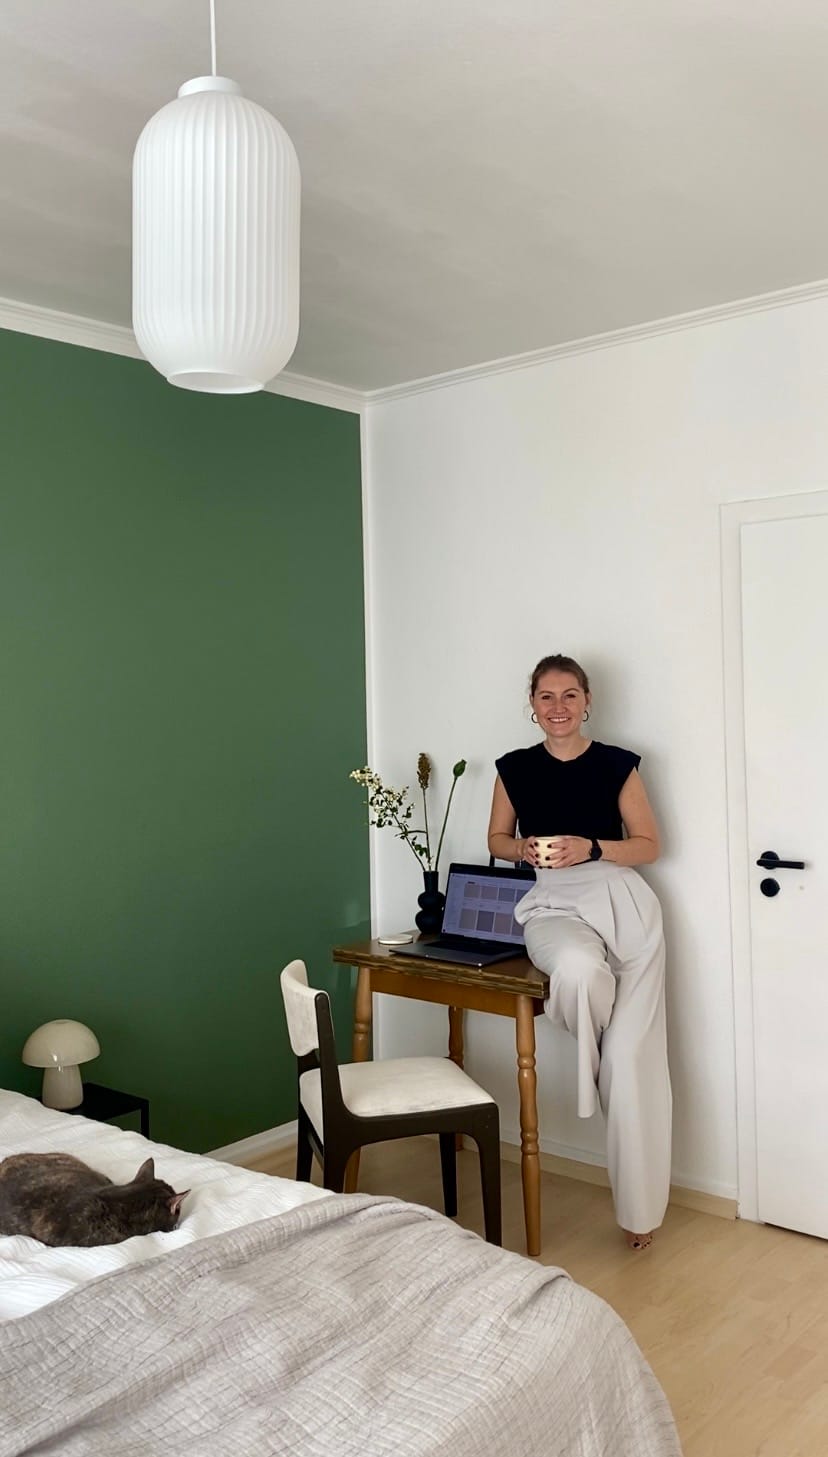
A custom-built-in wardrobe can instantly elevate a space, giving it a polished and seamless look. However, getting one professionally installed can be costly. That’s why we decided to take matters into our own hands and transform a standard IKEA Pax wardrobe into a stunning built-in closet and at the same time make it into a room divider so we can create a home office at the same time—all on a budget! With just a few simple materials and some patience, we achieved a sleek, high-end finish that blends perfectly with the rest of the room. If you’re looking to upgrade your storage without breaking the bank, this DIY is for you!
Materials You’ll Need:
- Squared timber
- Screws
- Plasterboard
- Scrim tape
- Filler
- Deep penetration primer
- Mouldings & adhesive
- Wall paint
Step-by-Step Instructions
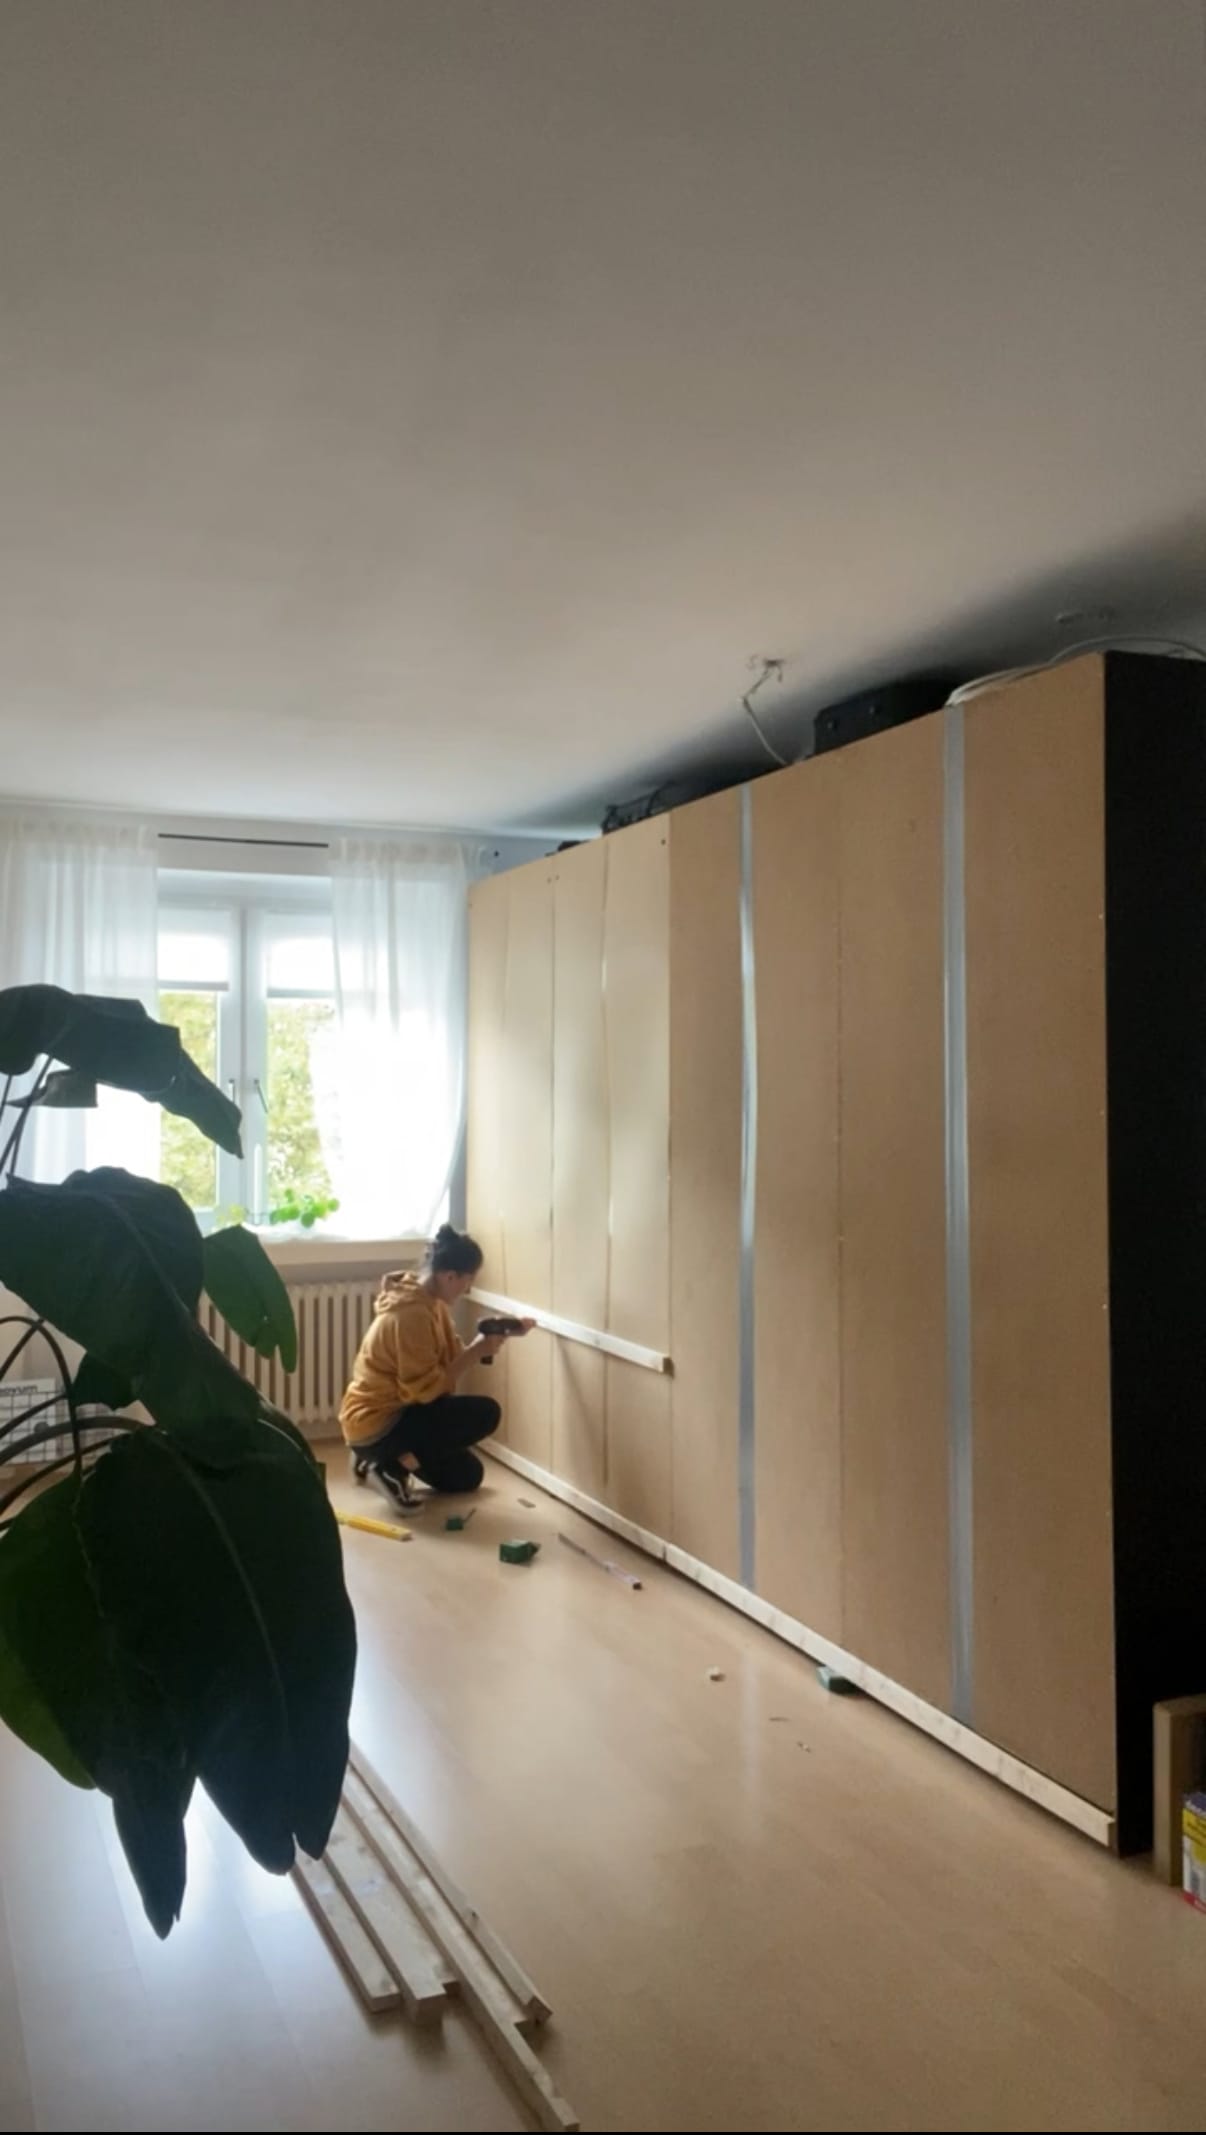
Step 1: Secure the Base
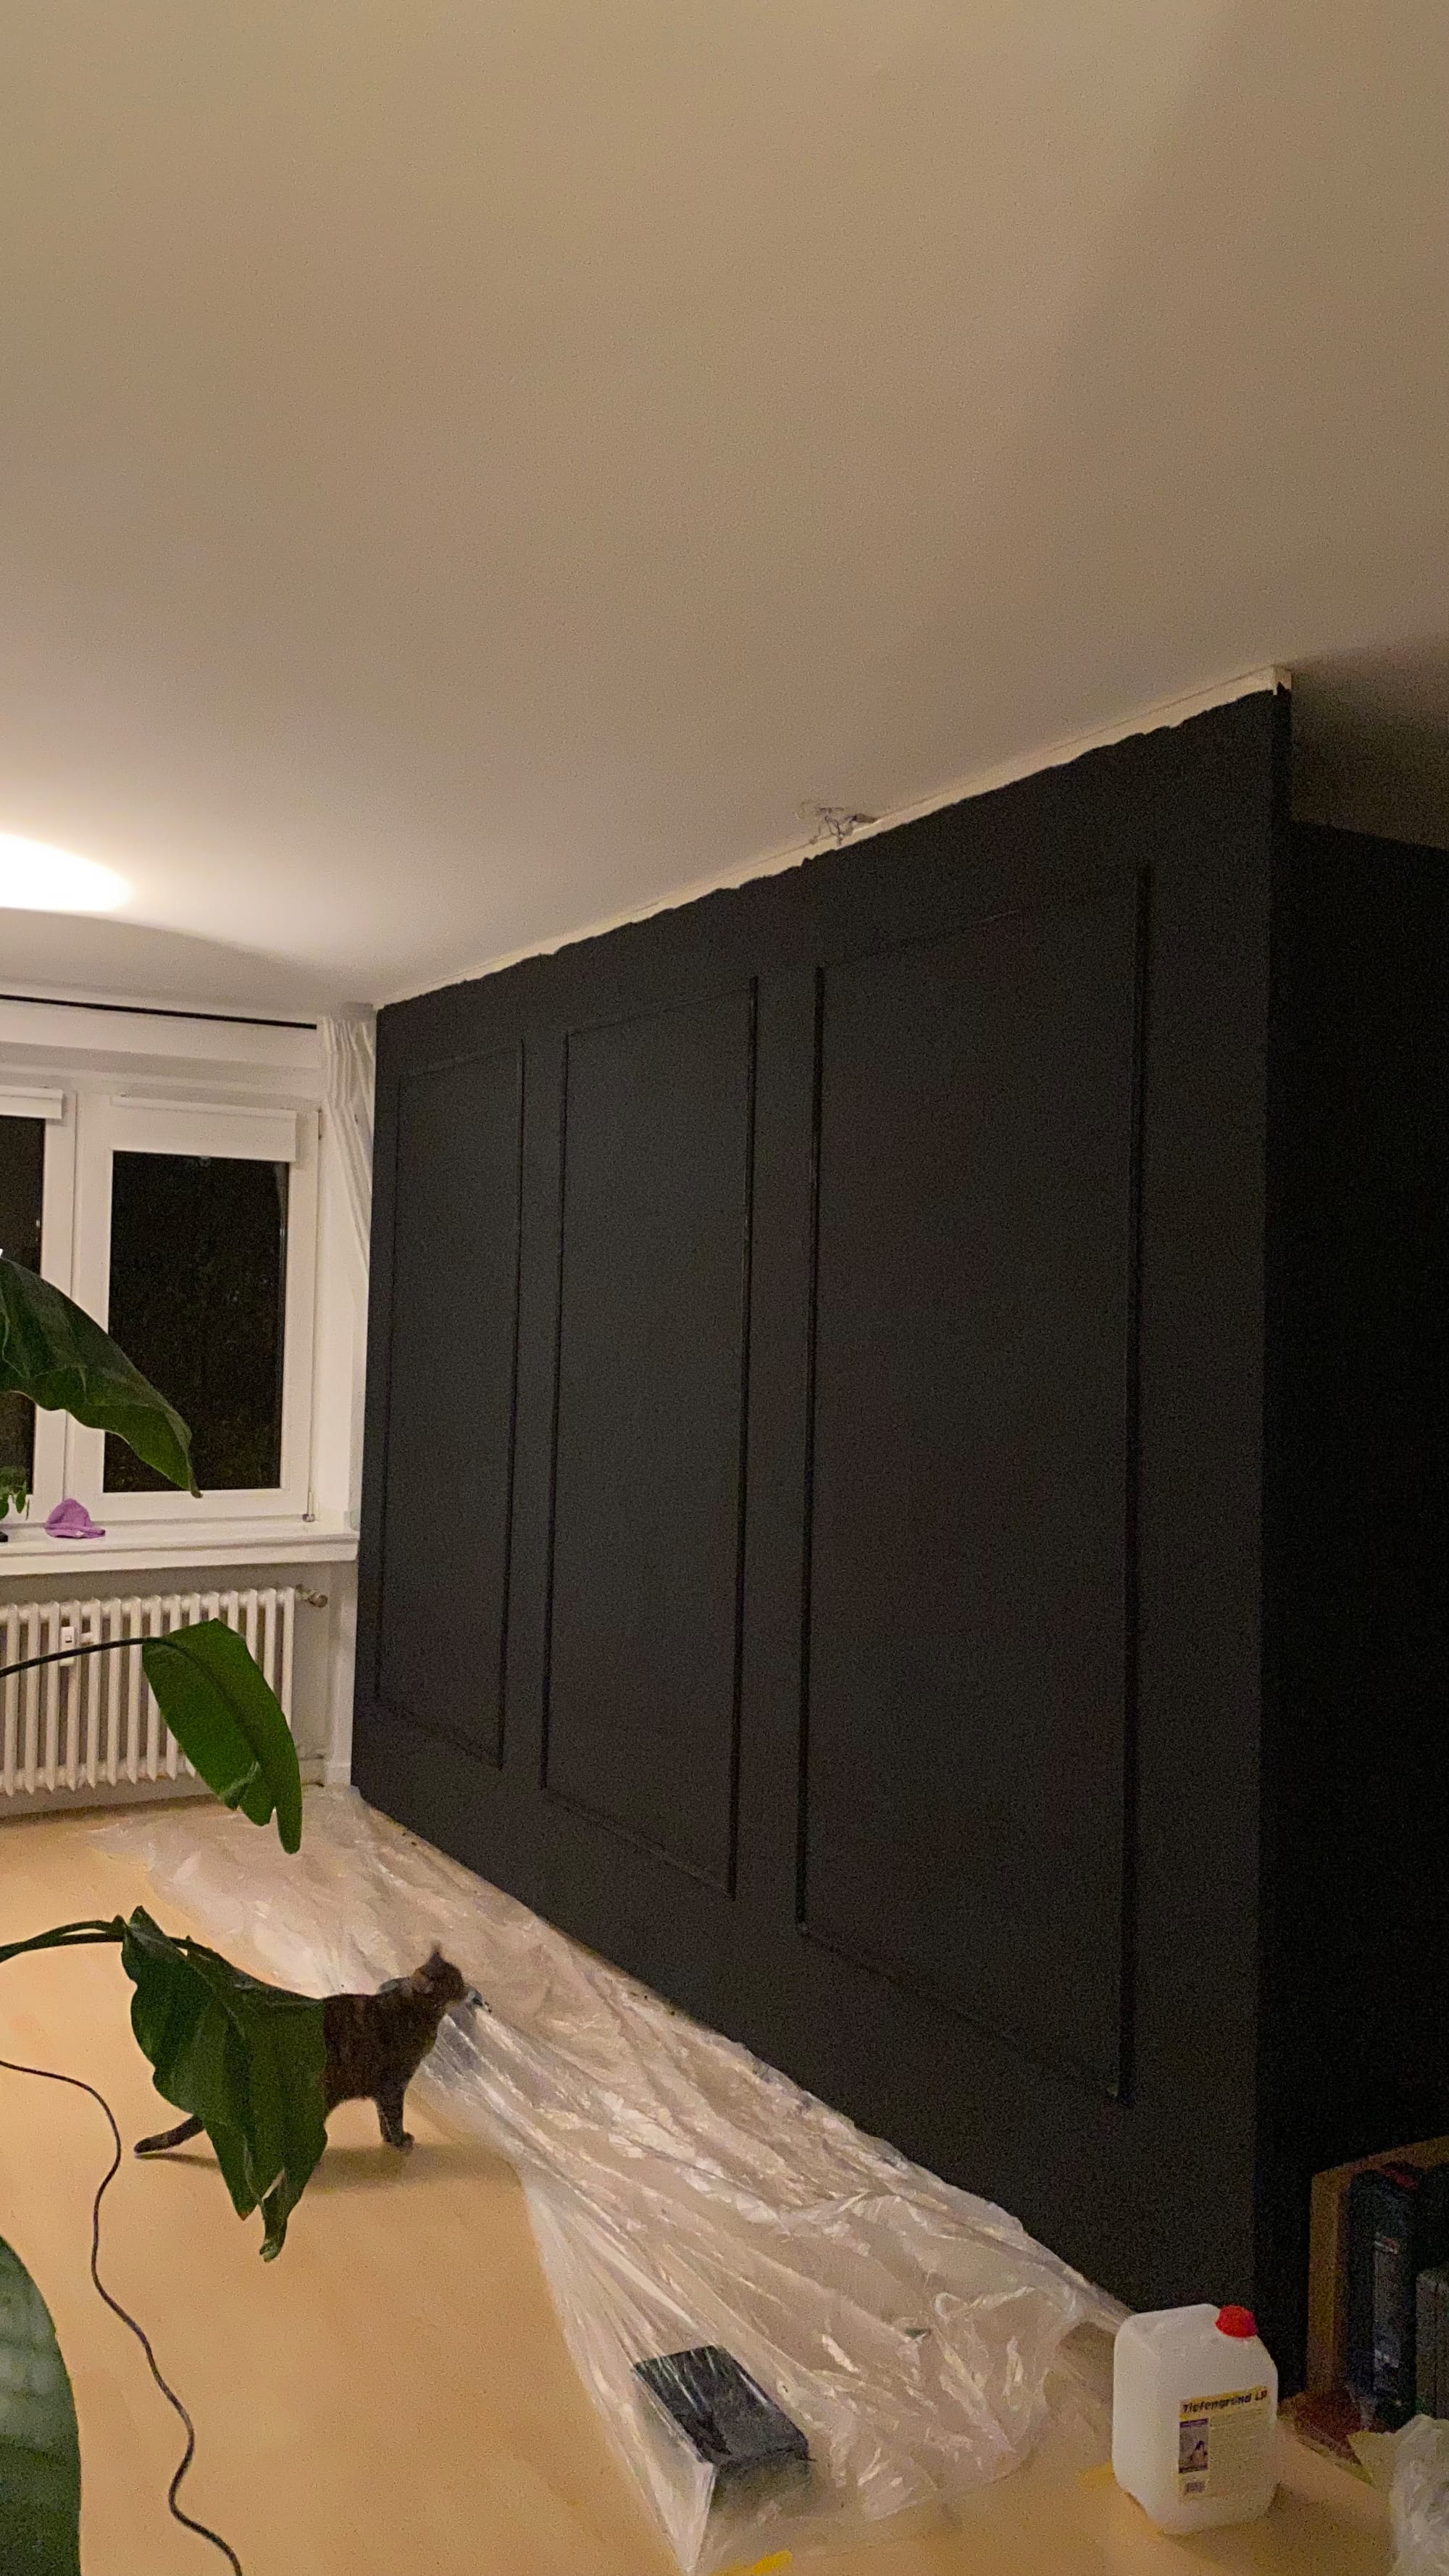
To ensure stability, start by screwing squared timber to the back of the wardrobe. This will provide a solid base to attach the plasterboard and create the built-in effect.
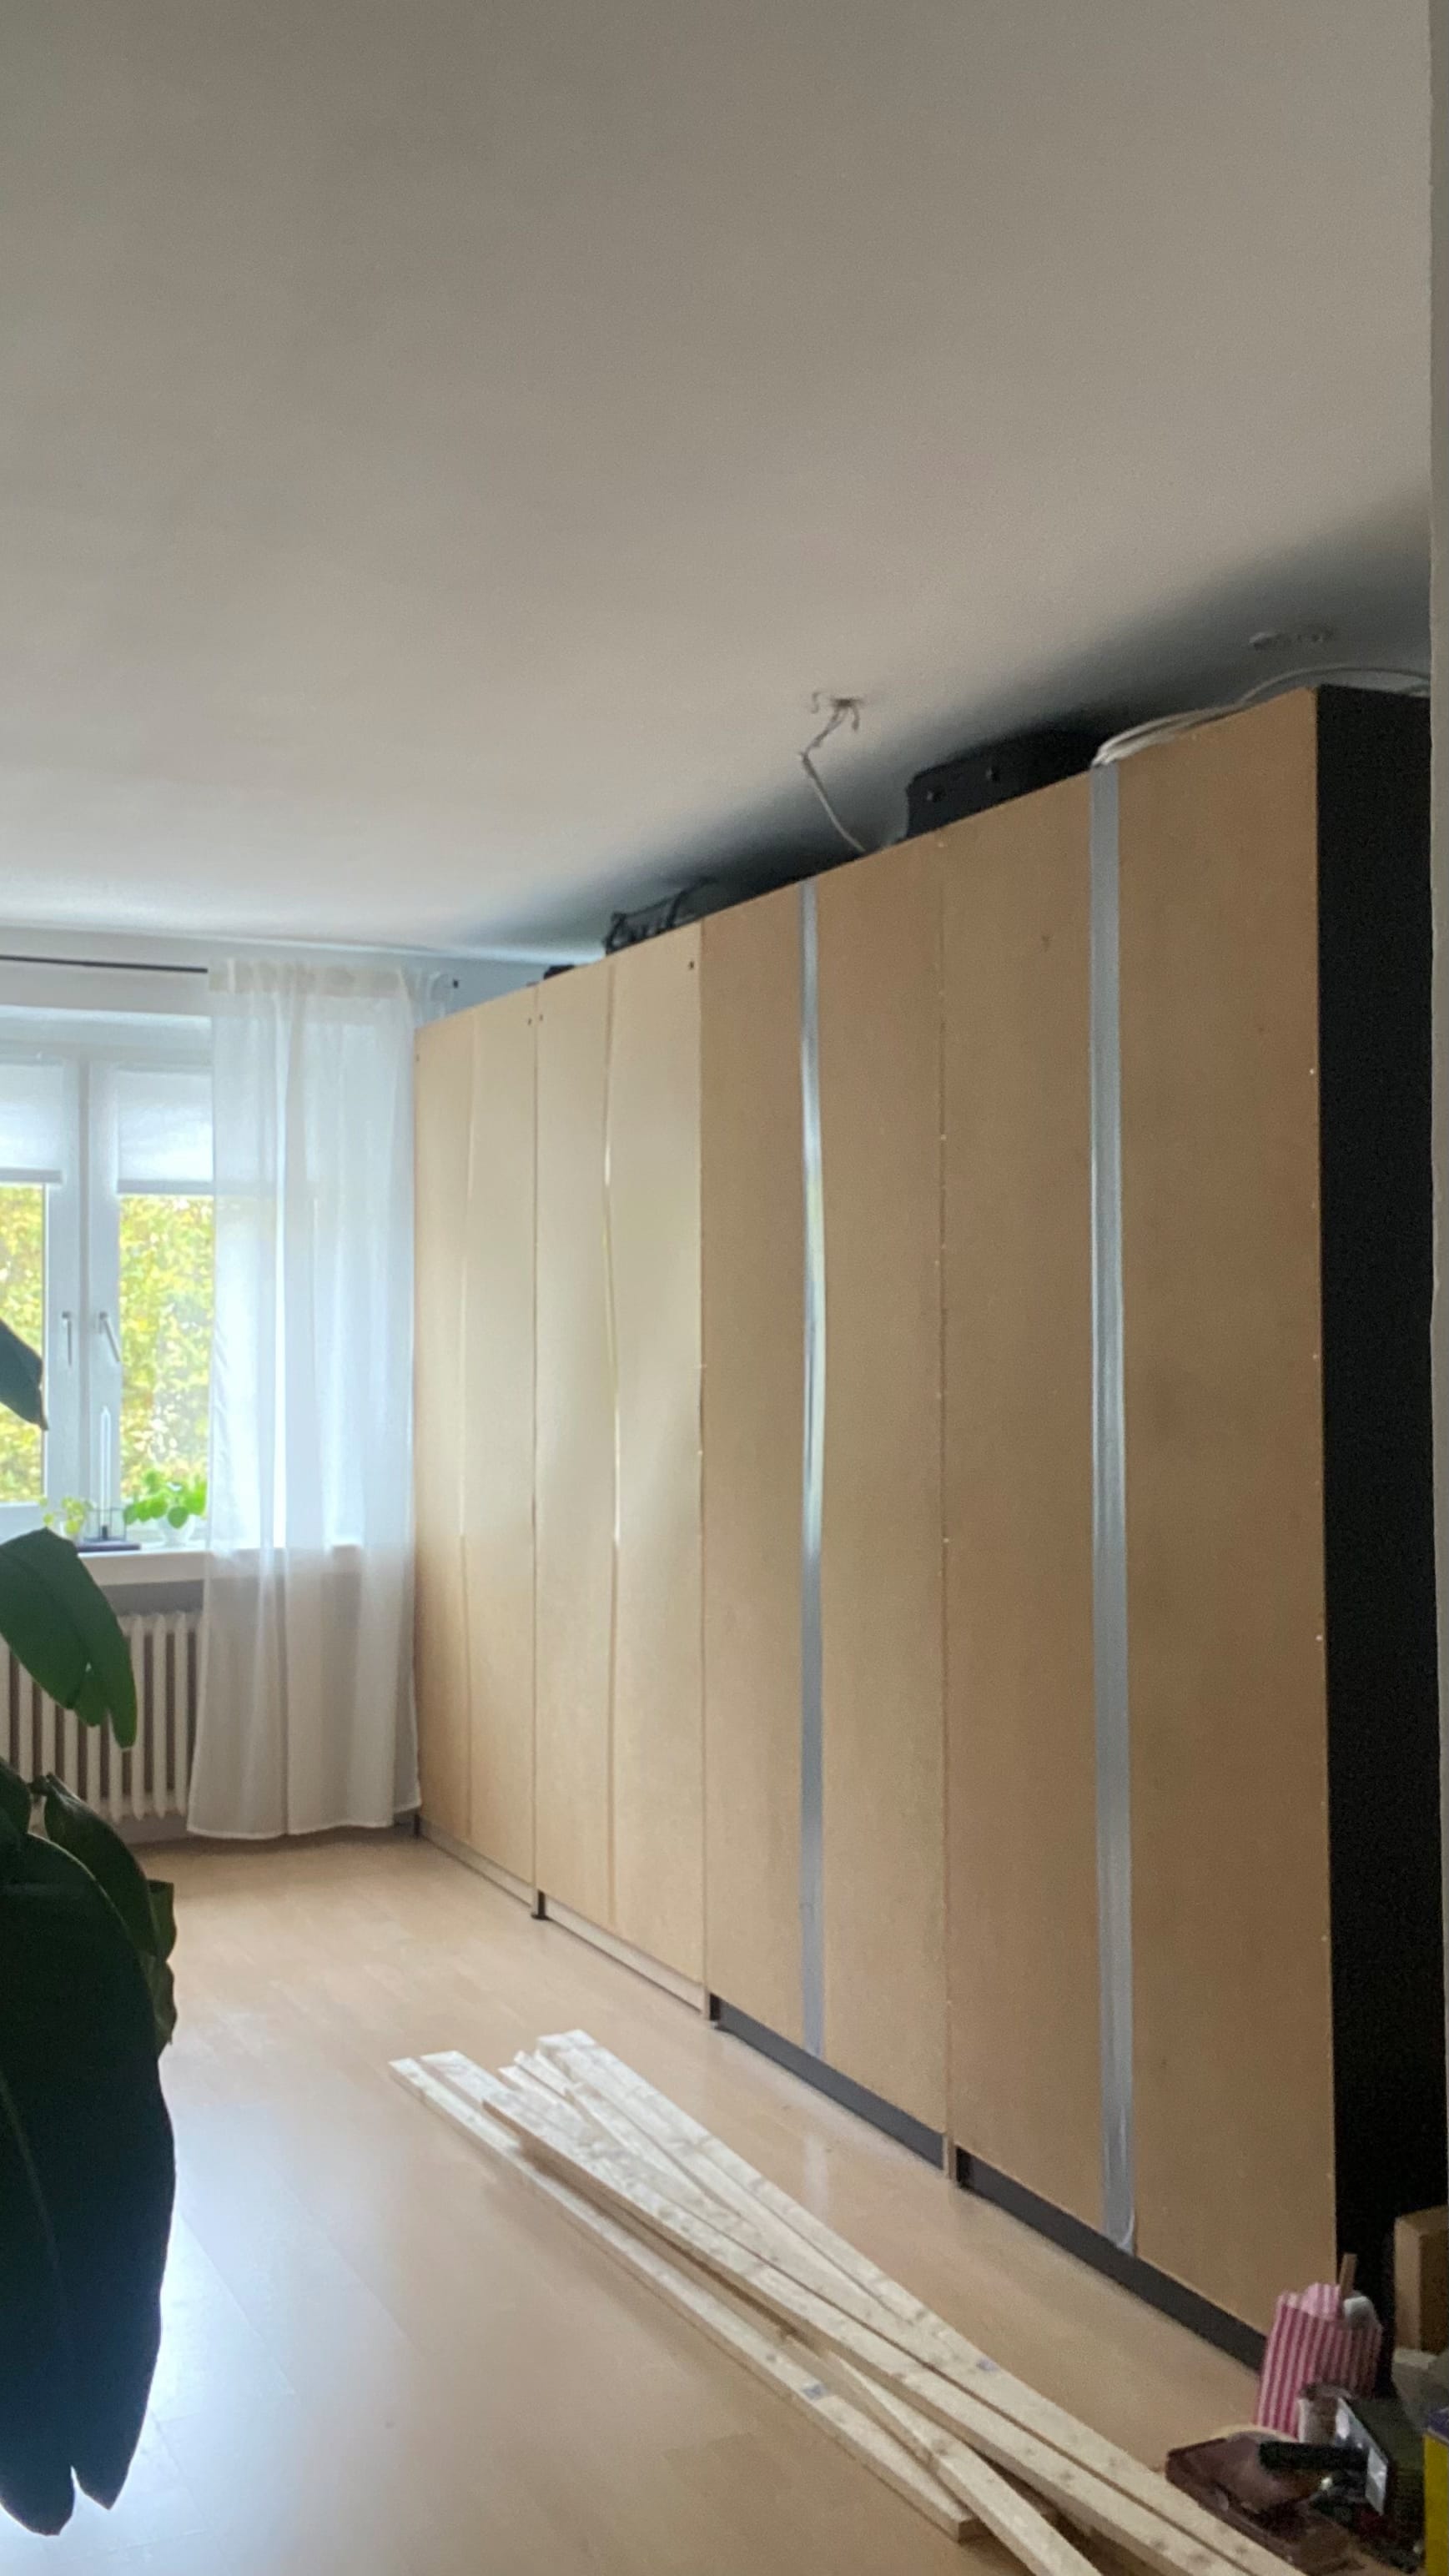
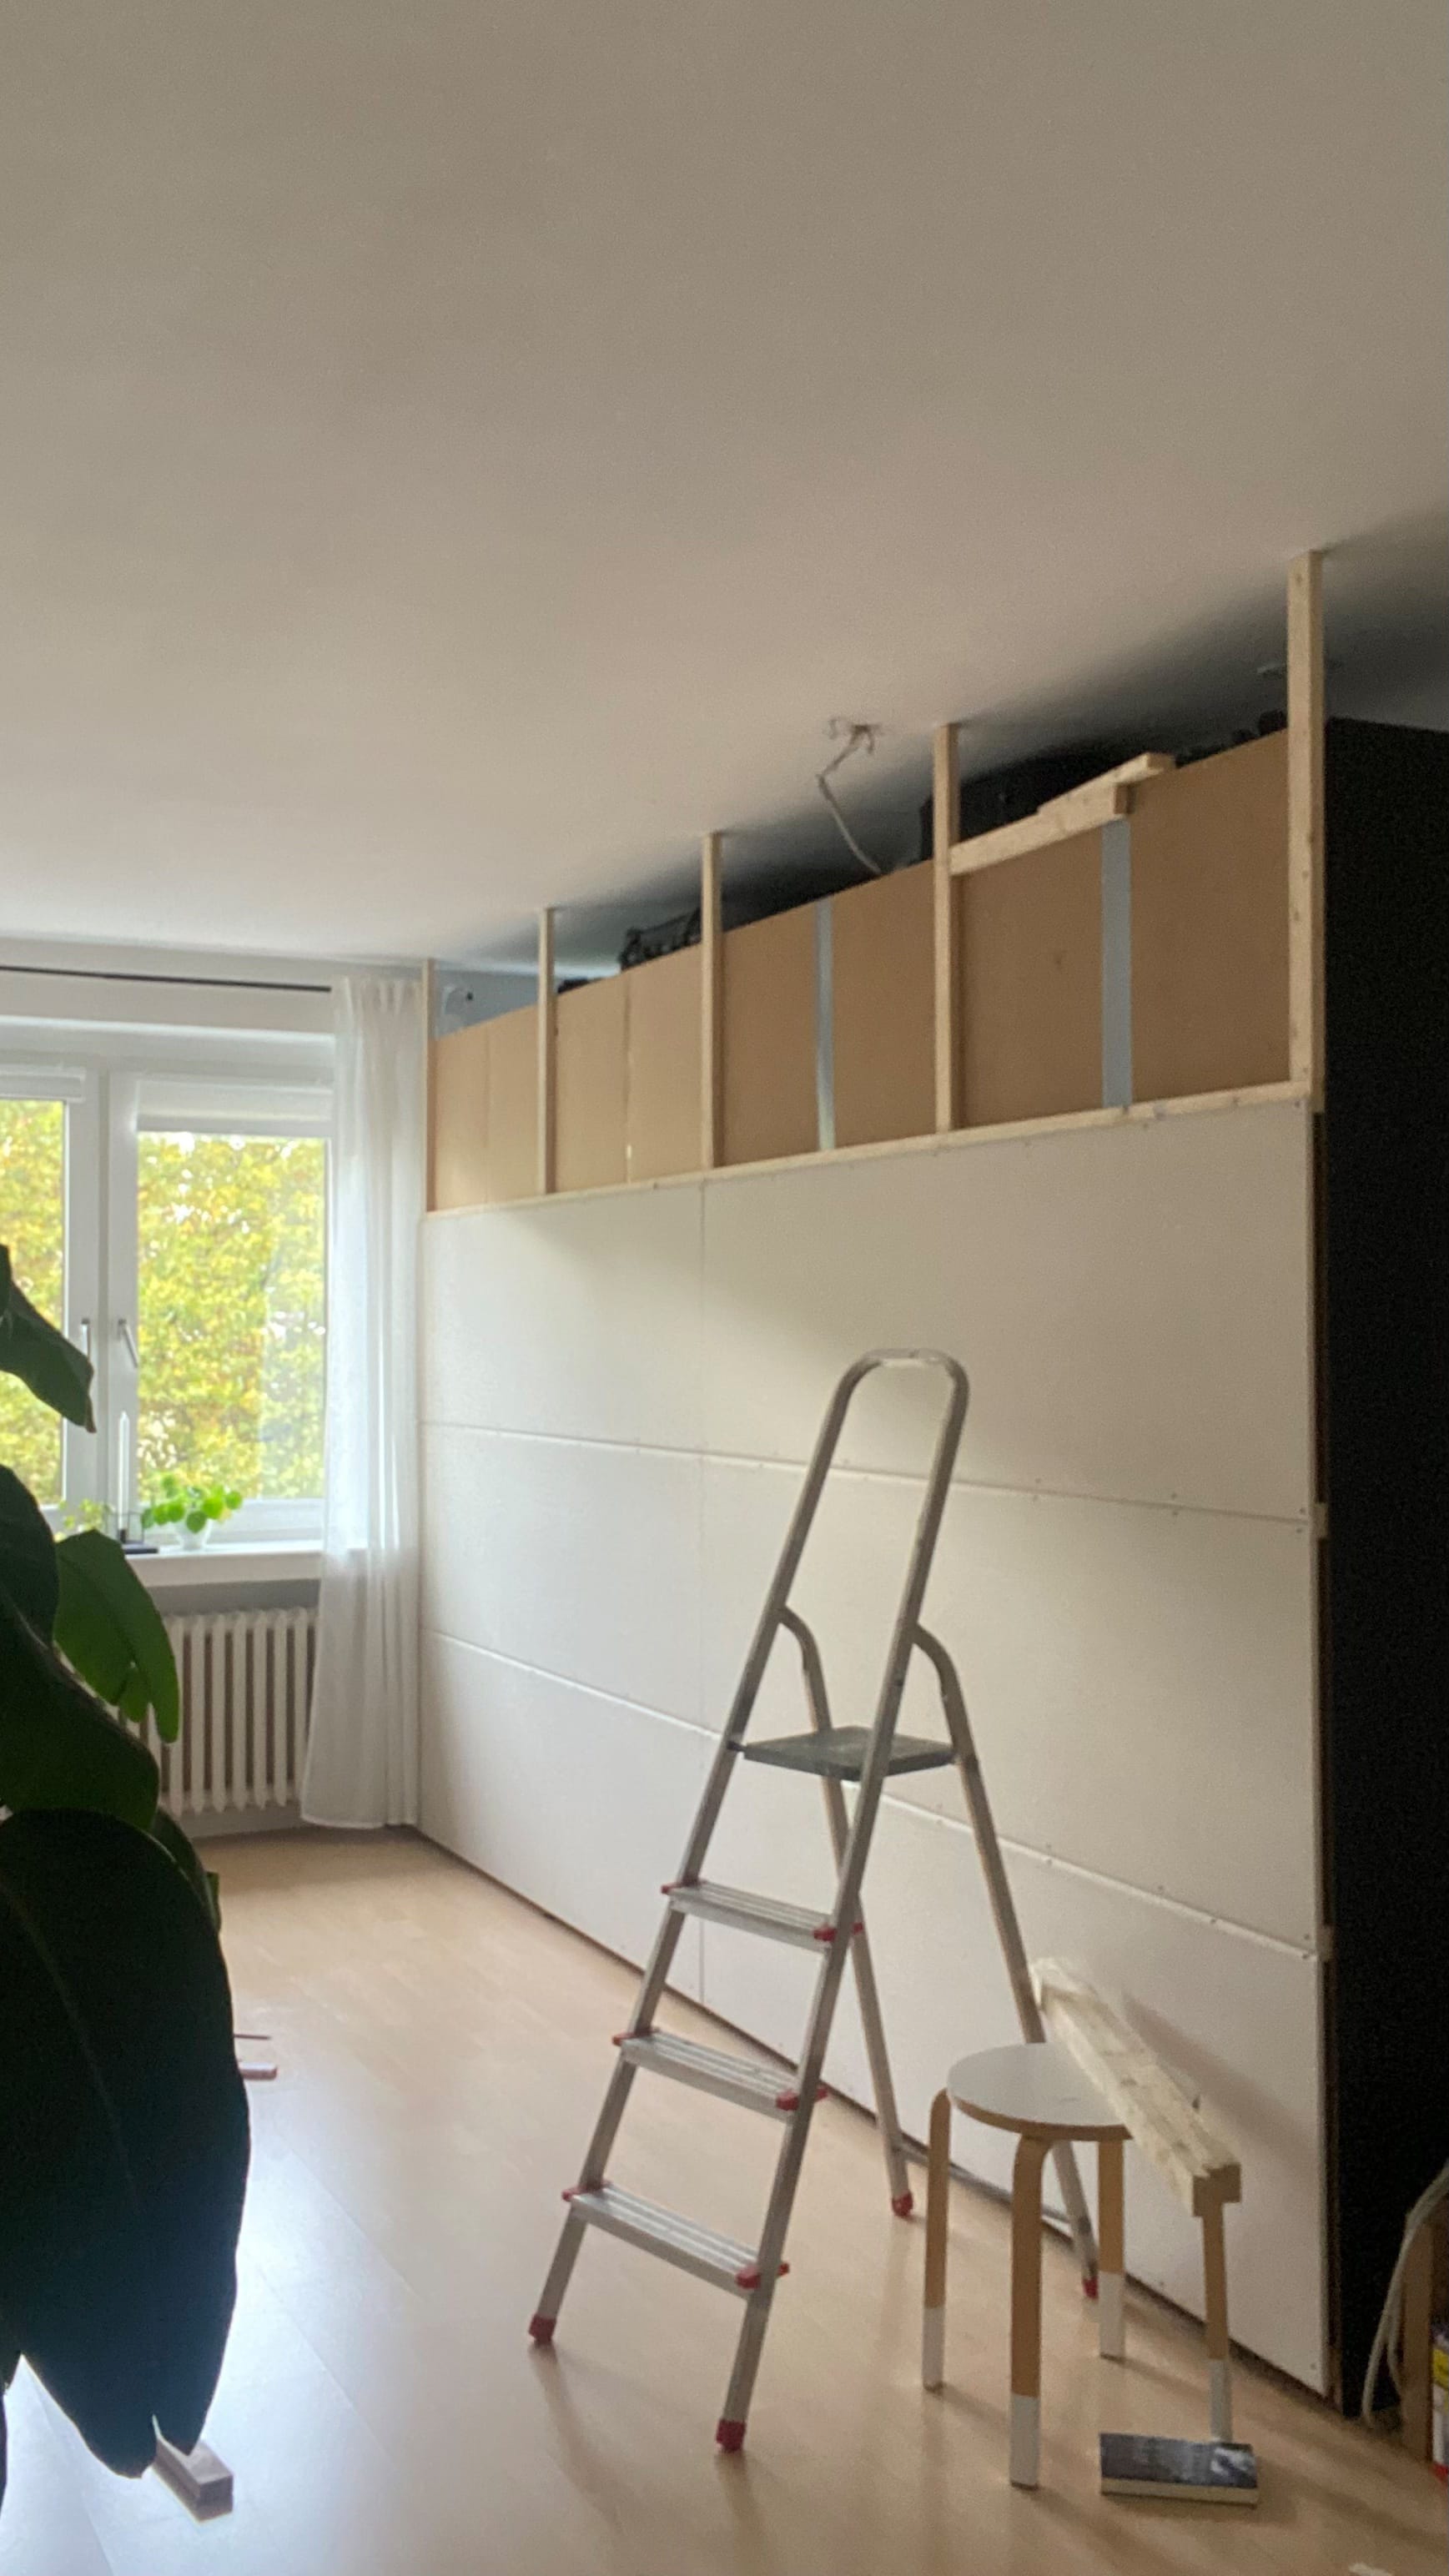
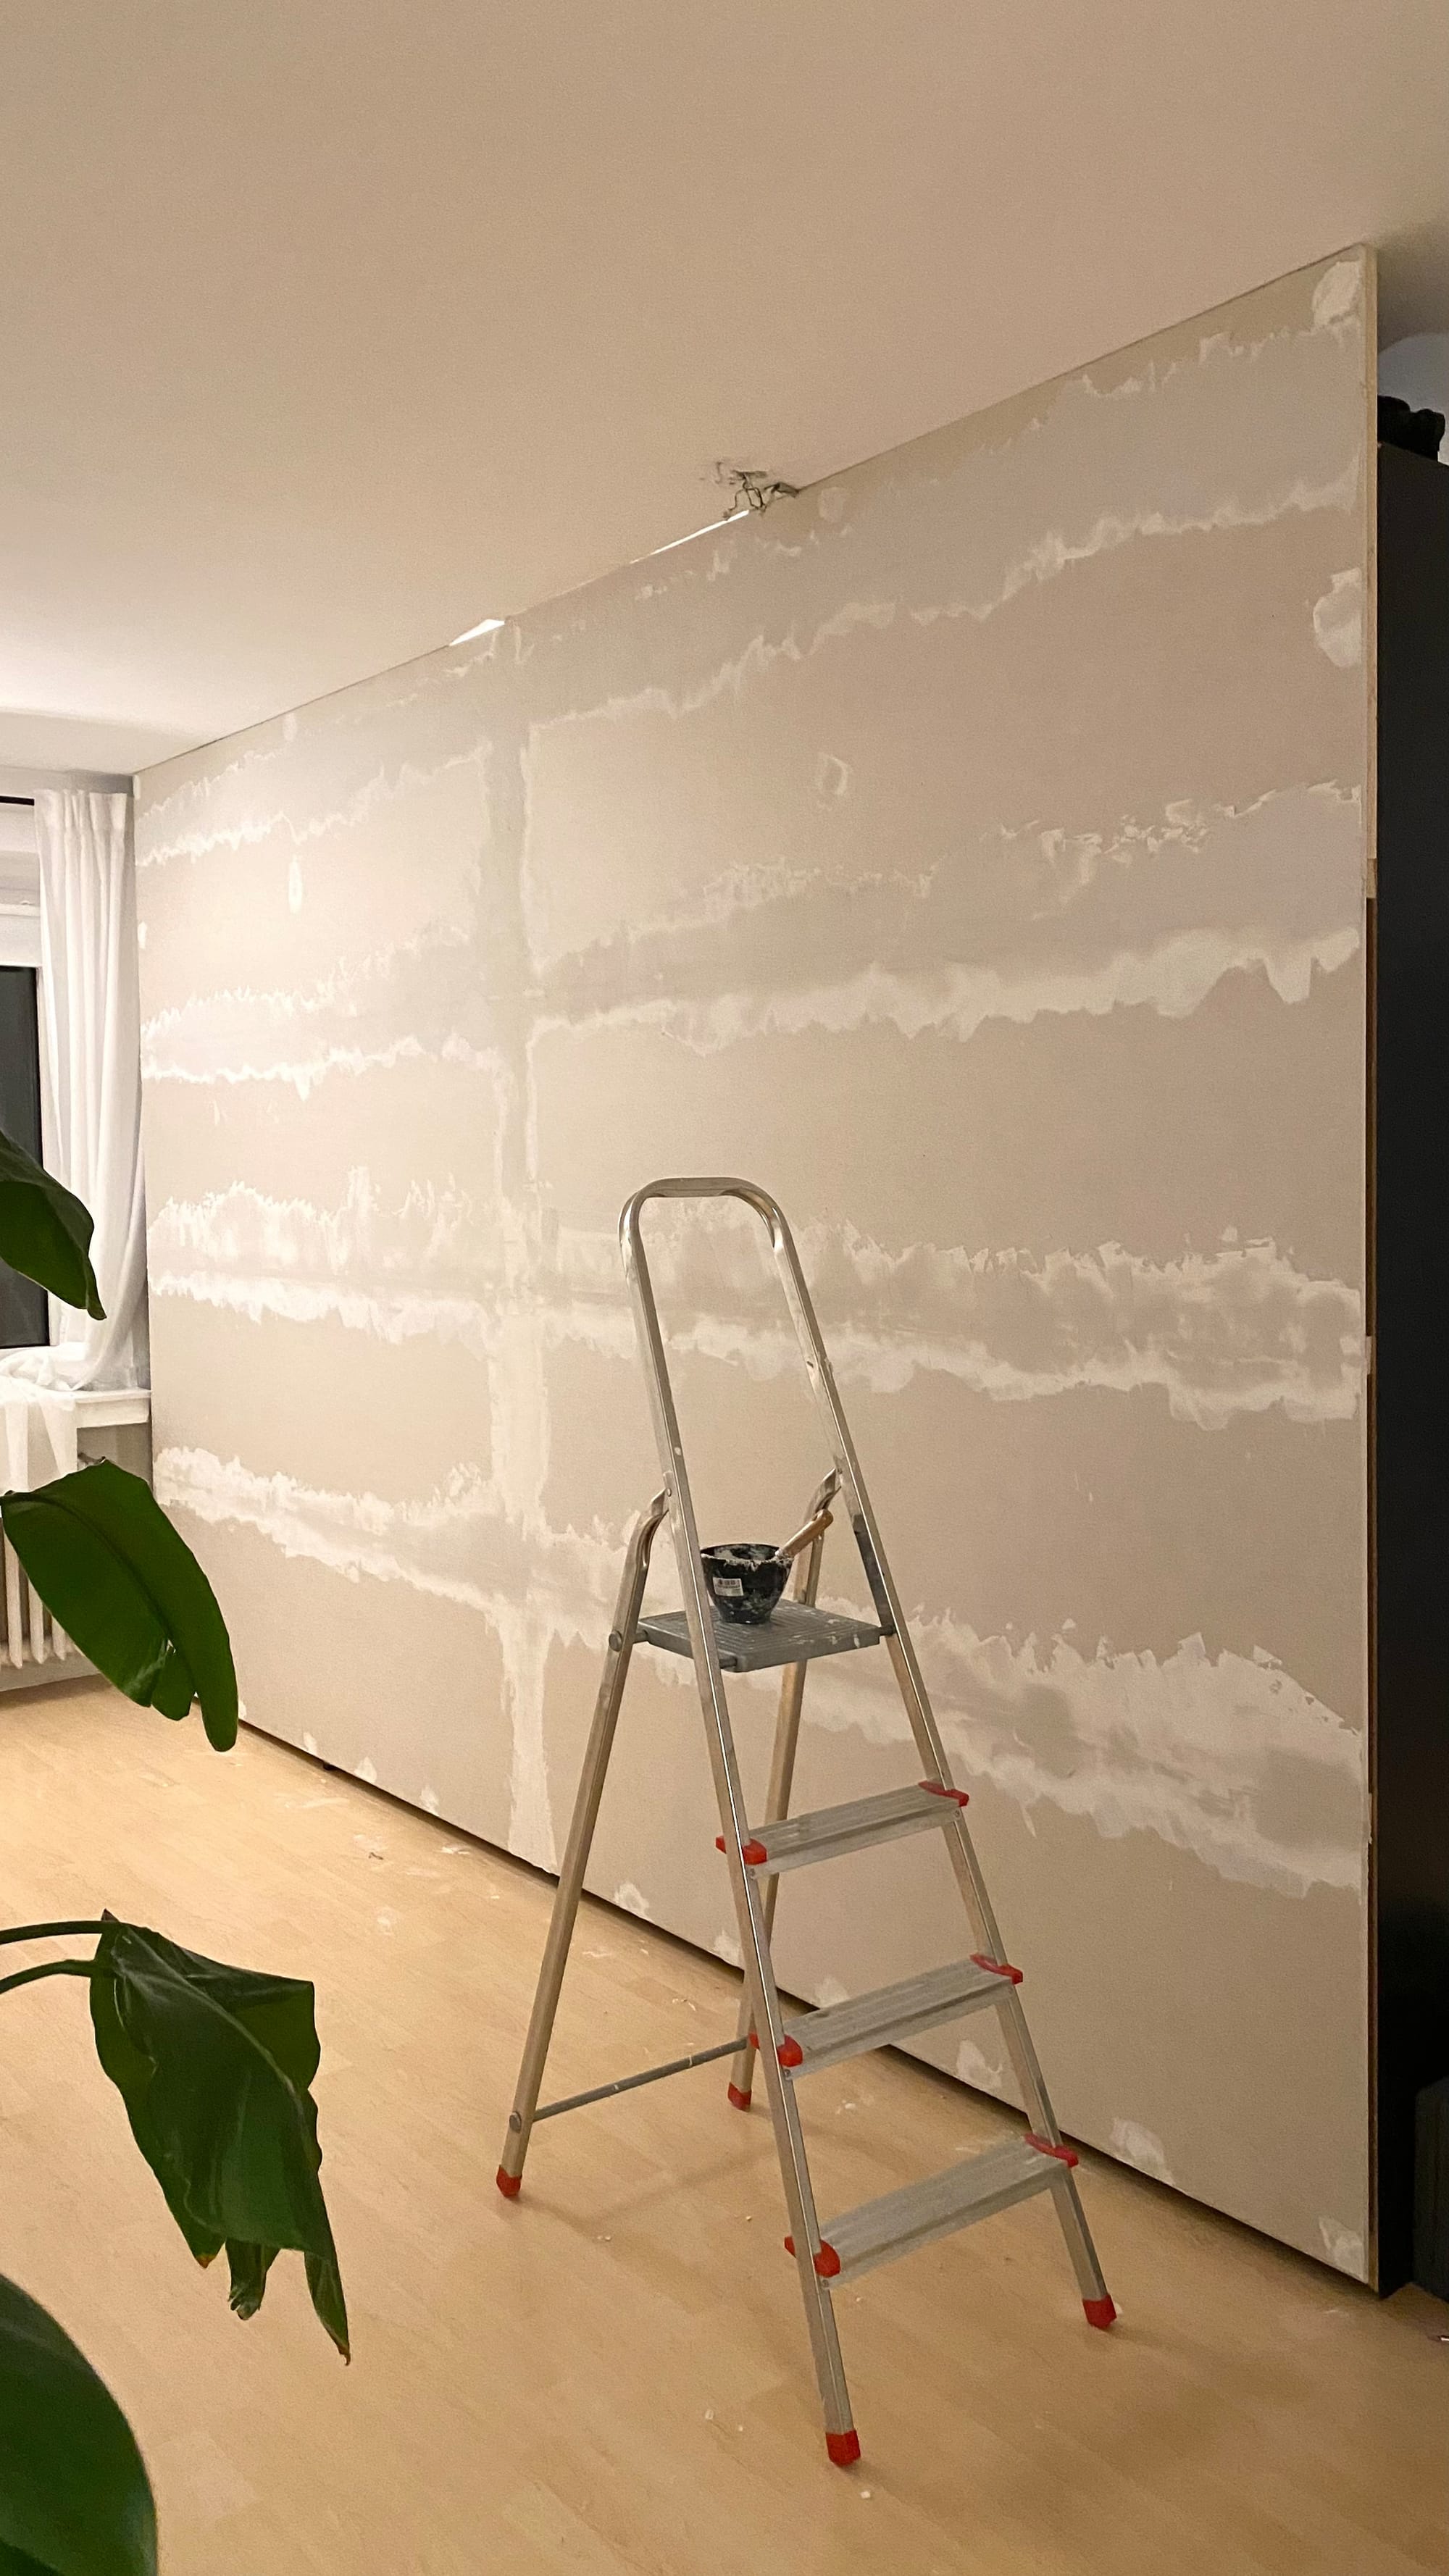
Step 2: Attach Plasterboard Panels
Measure and cut the plasterboard panels to fit around the wardrobe, then attach them securely. This step helps blend the Pax unit into the wall for that built-in look.
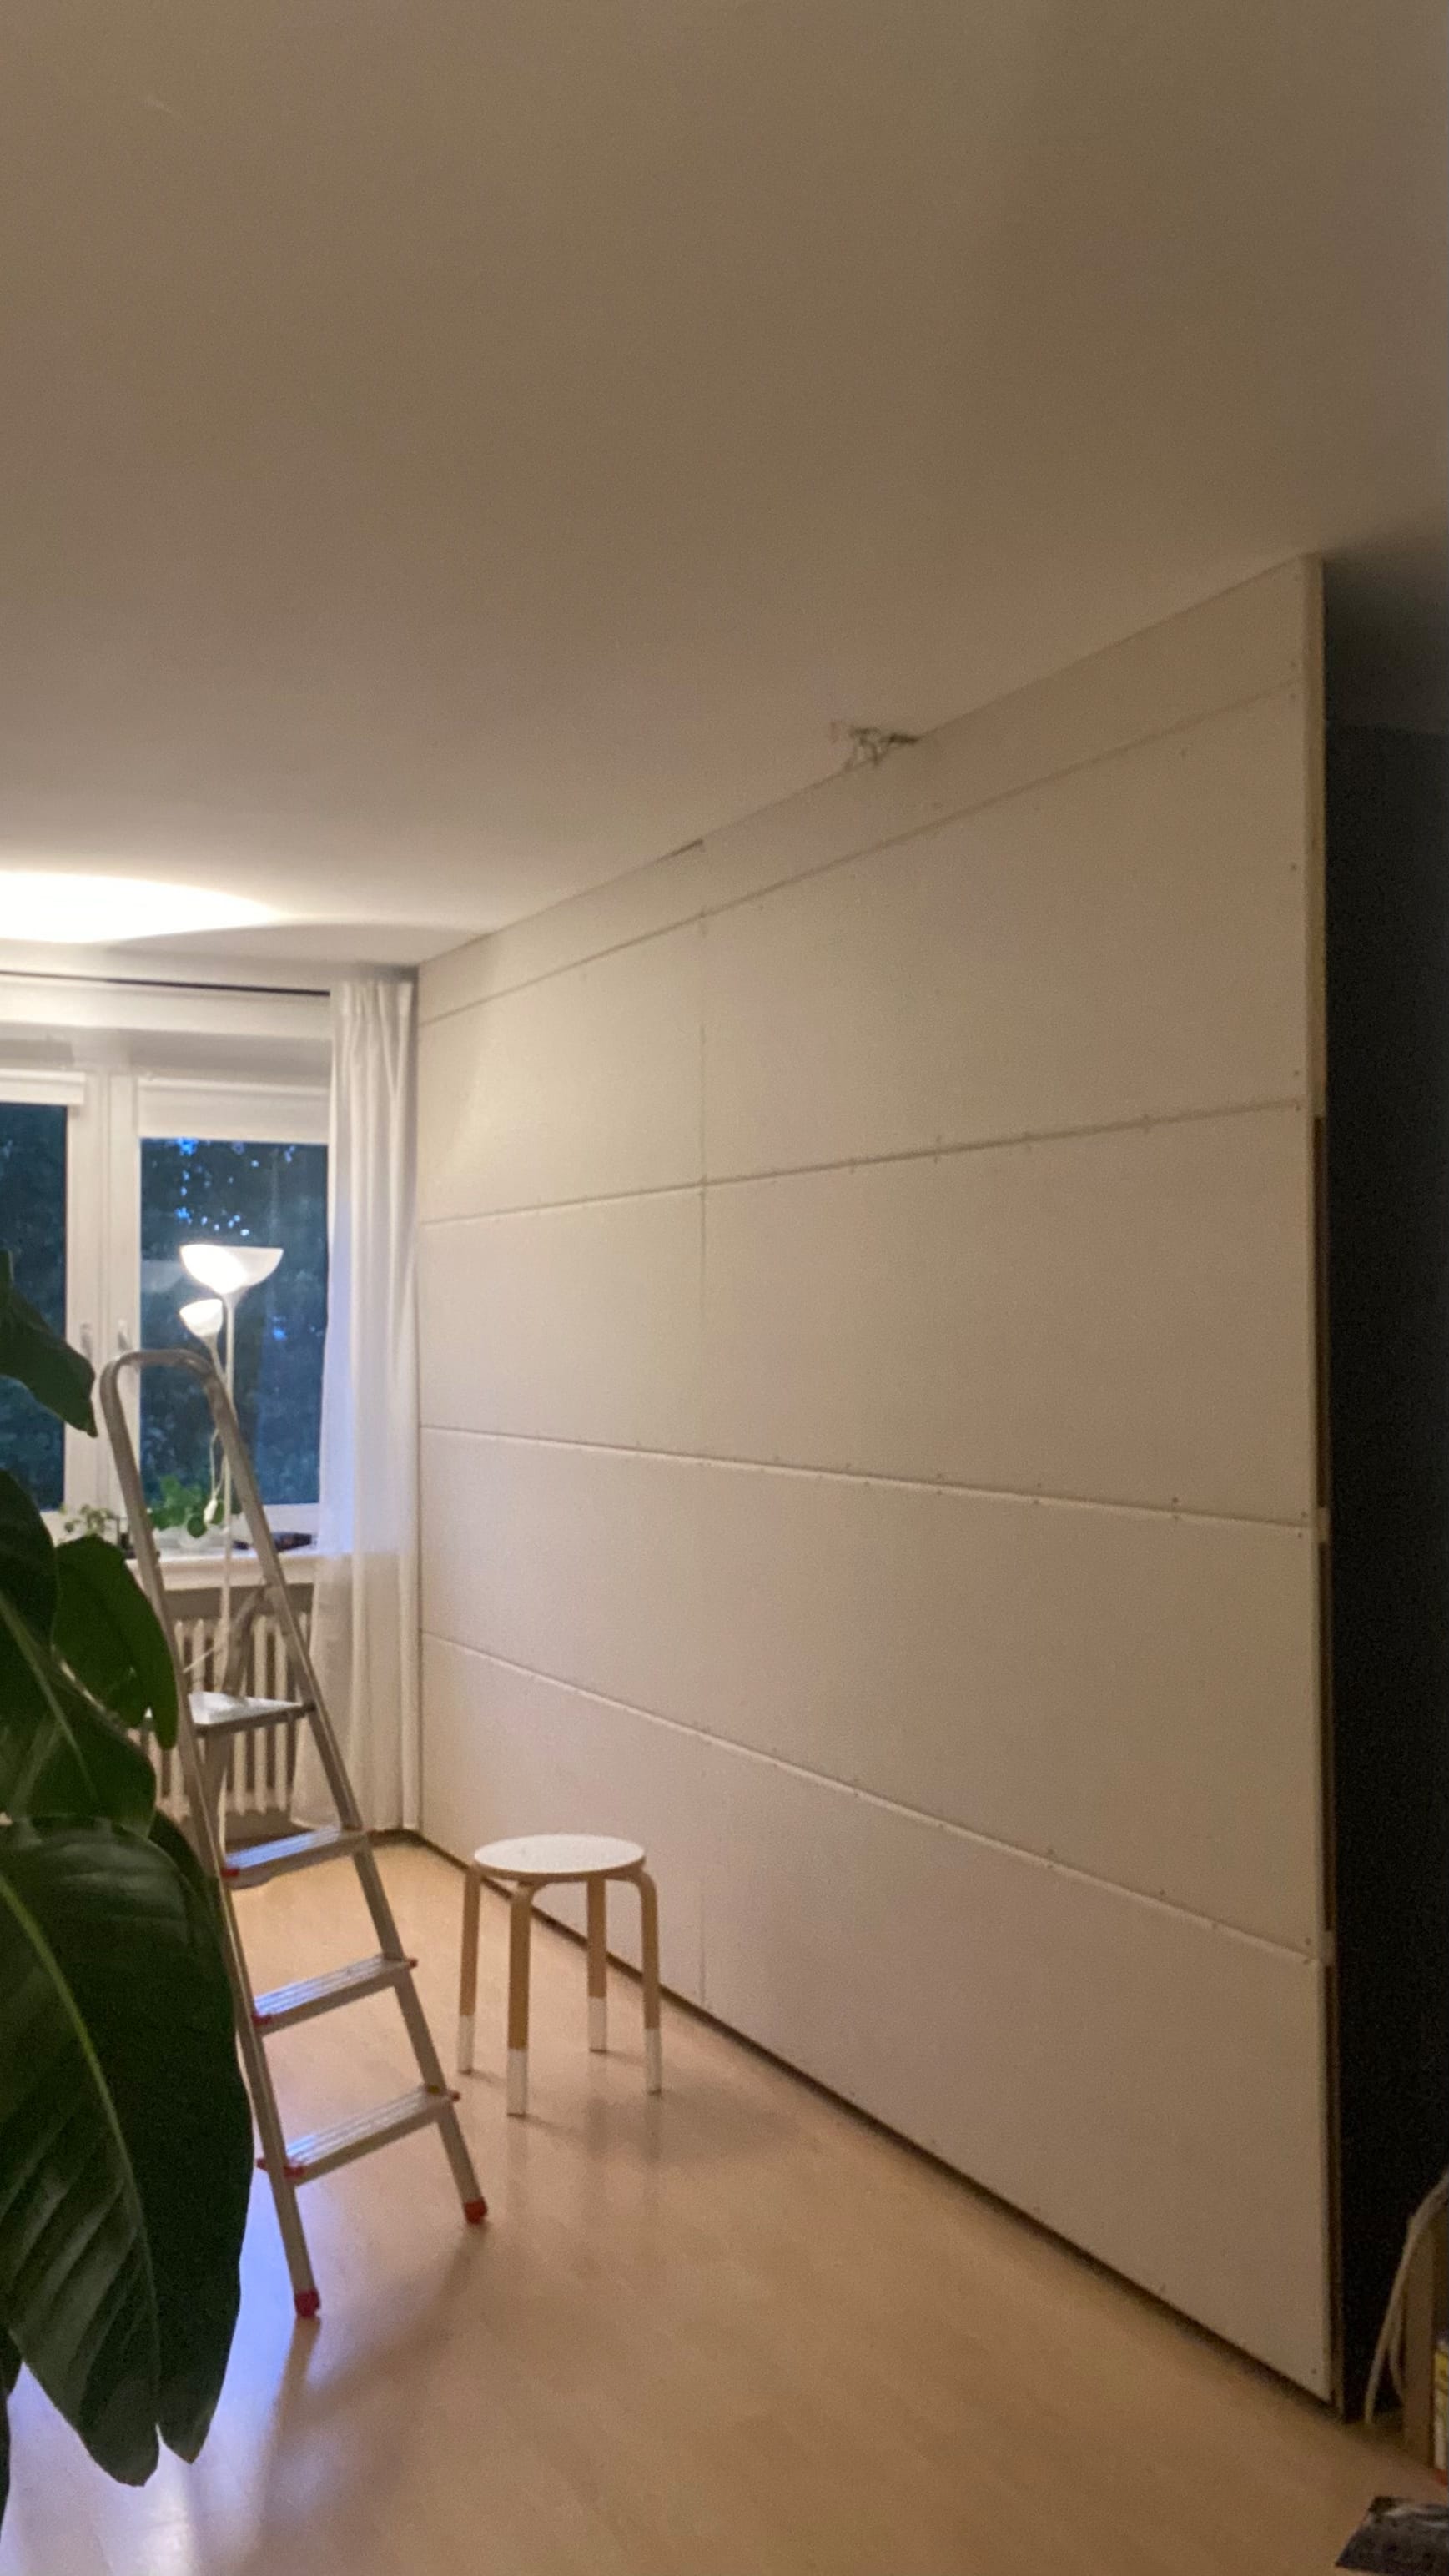
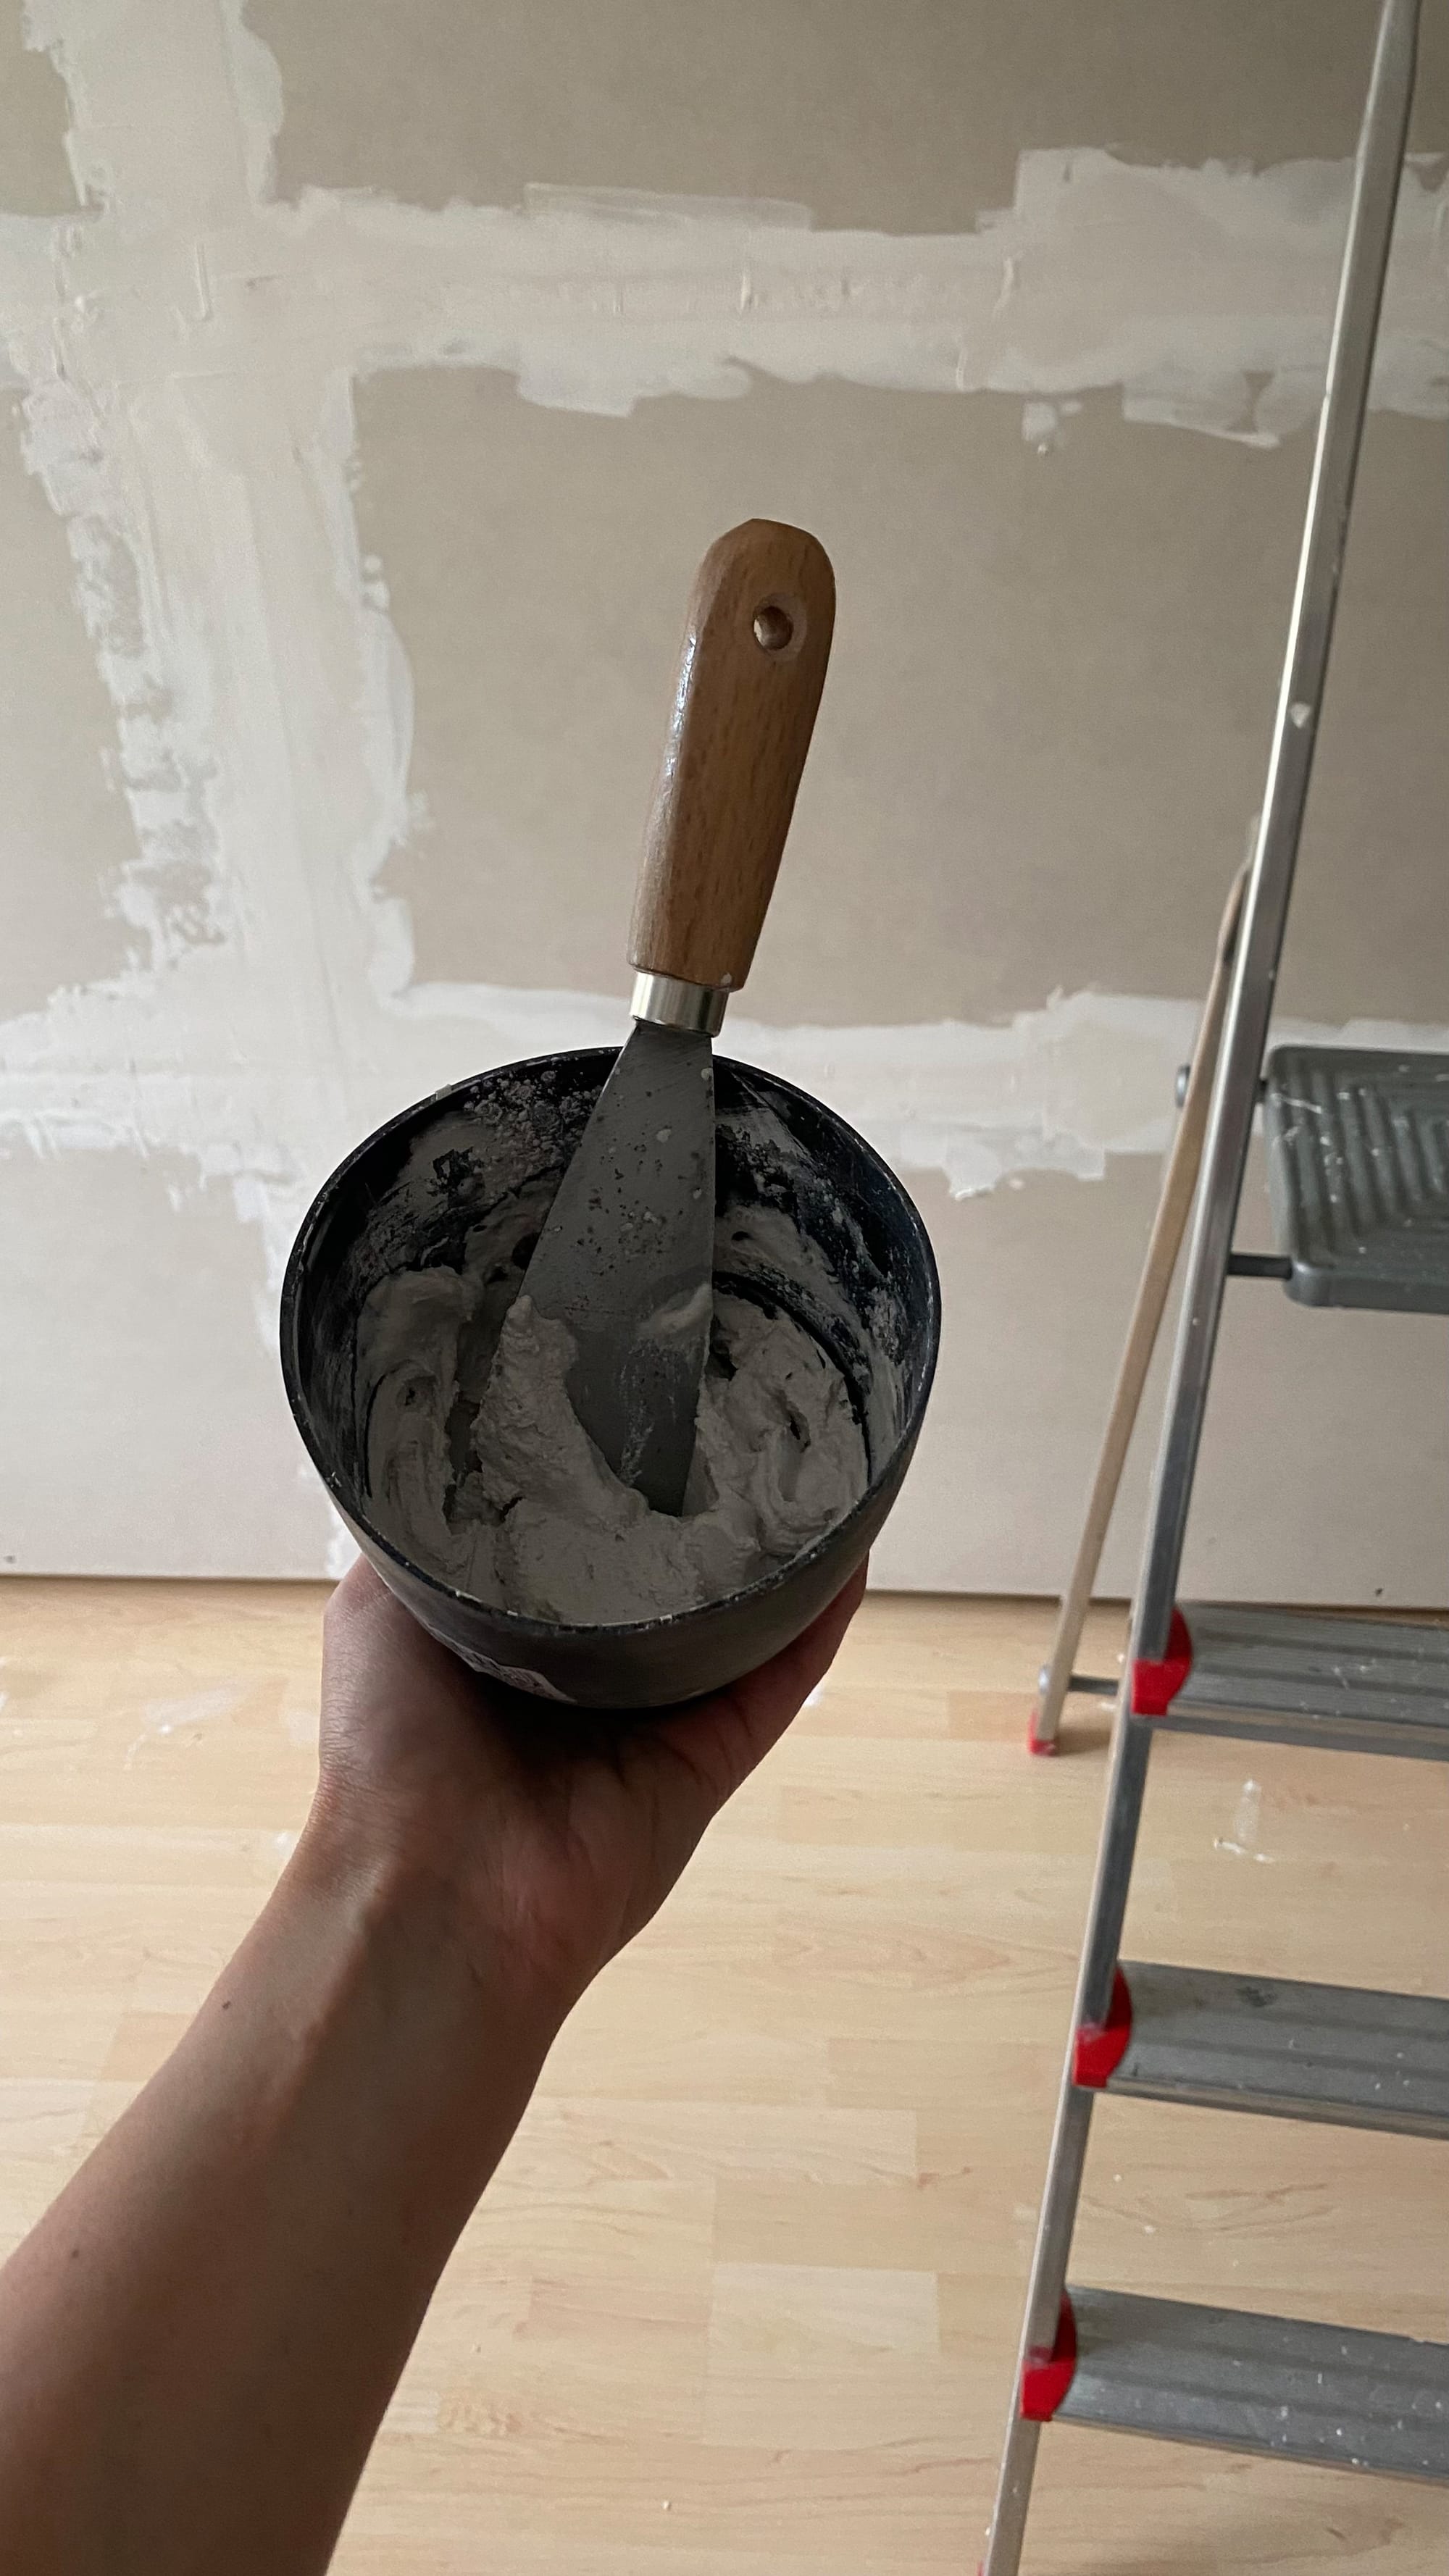
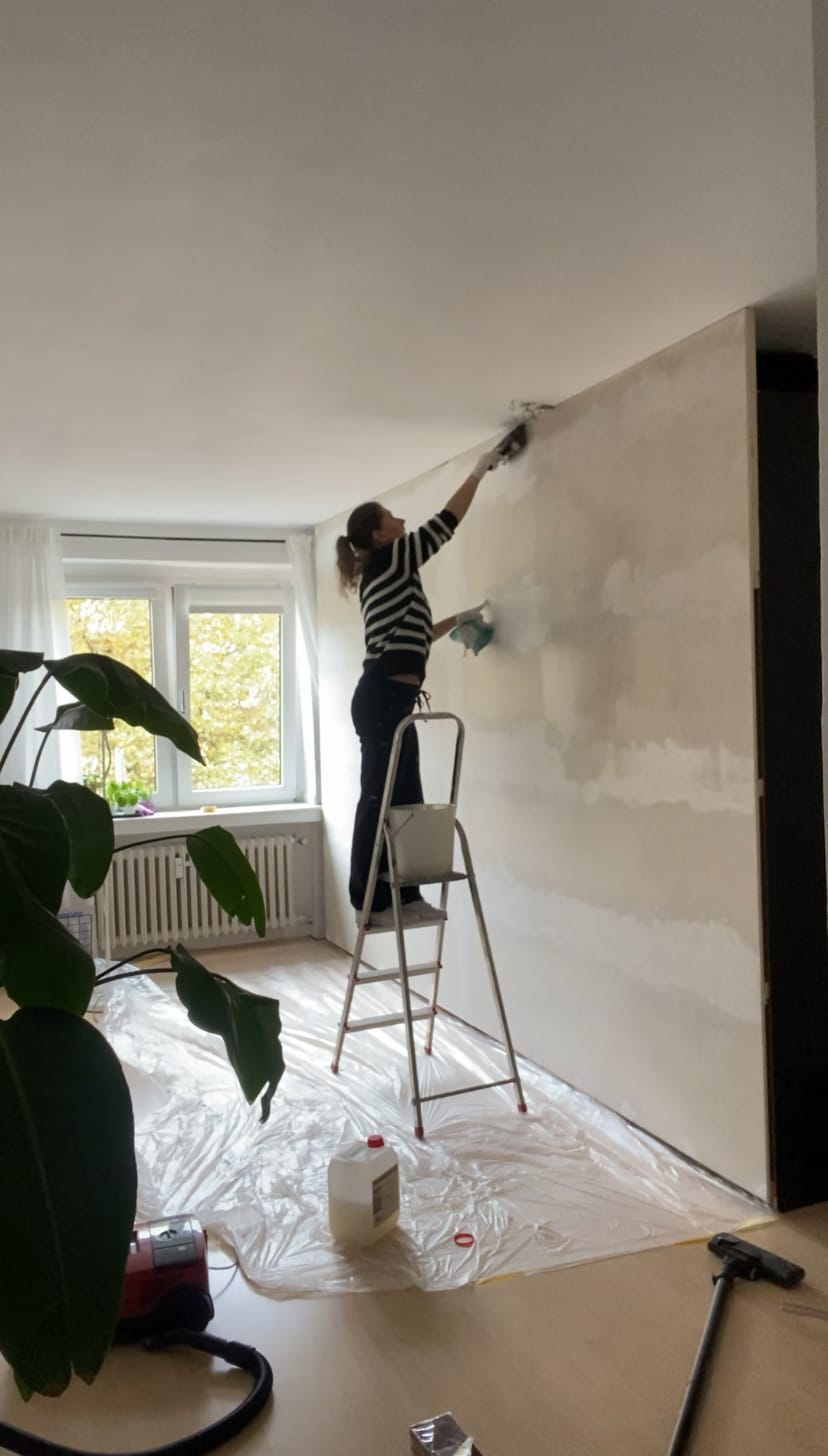
Step 3: Seal & Fill the Joints
Use scrim tape to cover the joints between the plasterboard panels. Apply a generous amount of filler over the tape to smooth out any gaps. Be thorough here—if too little filler is applied, you may sand too much, accidentally exposing the tape.
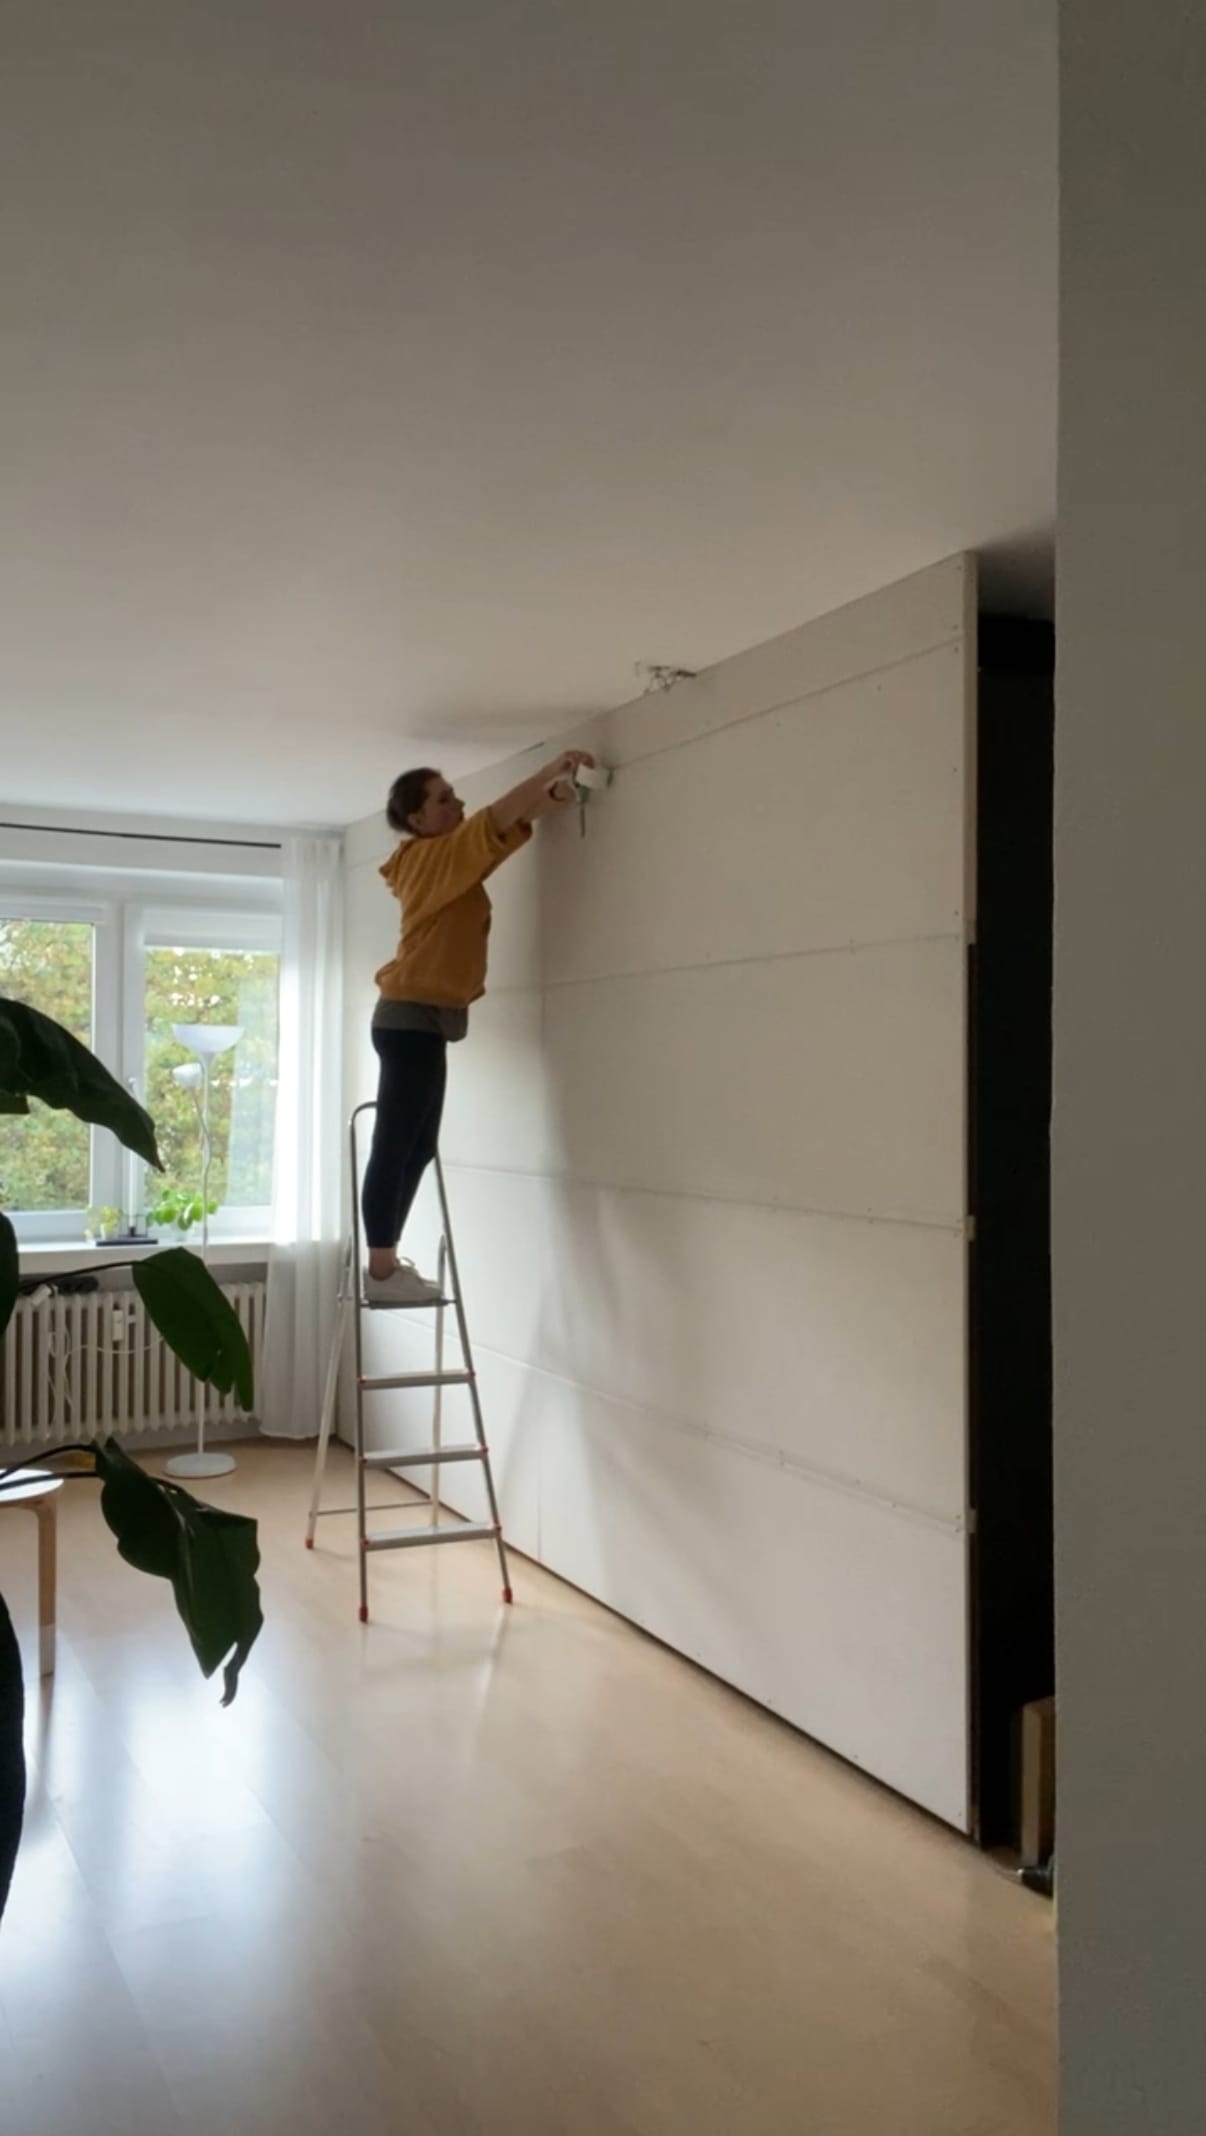
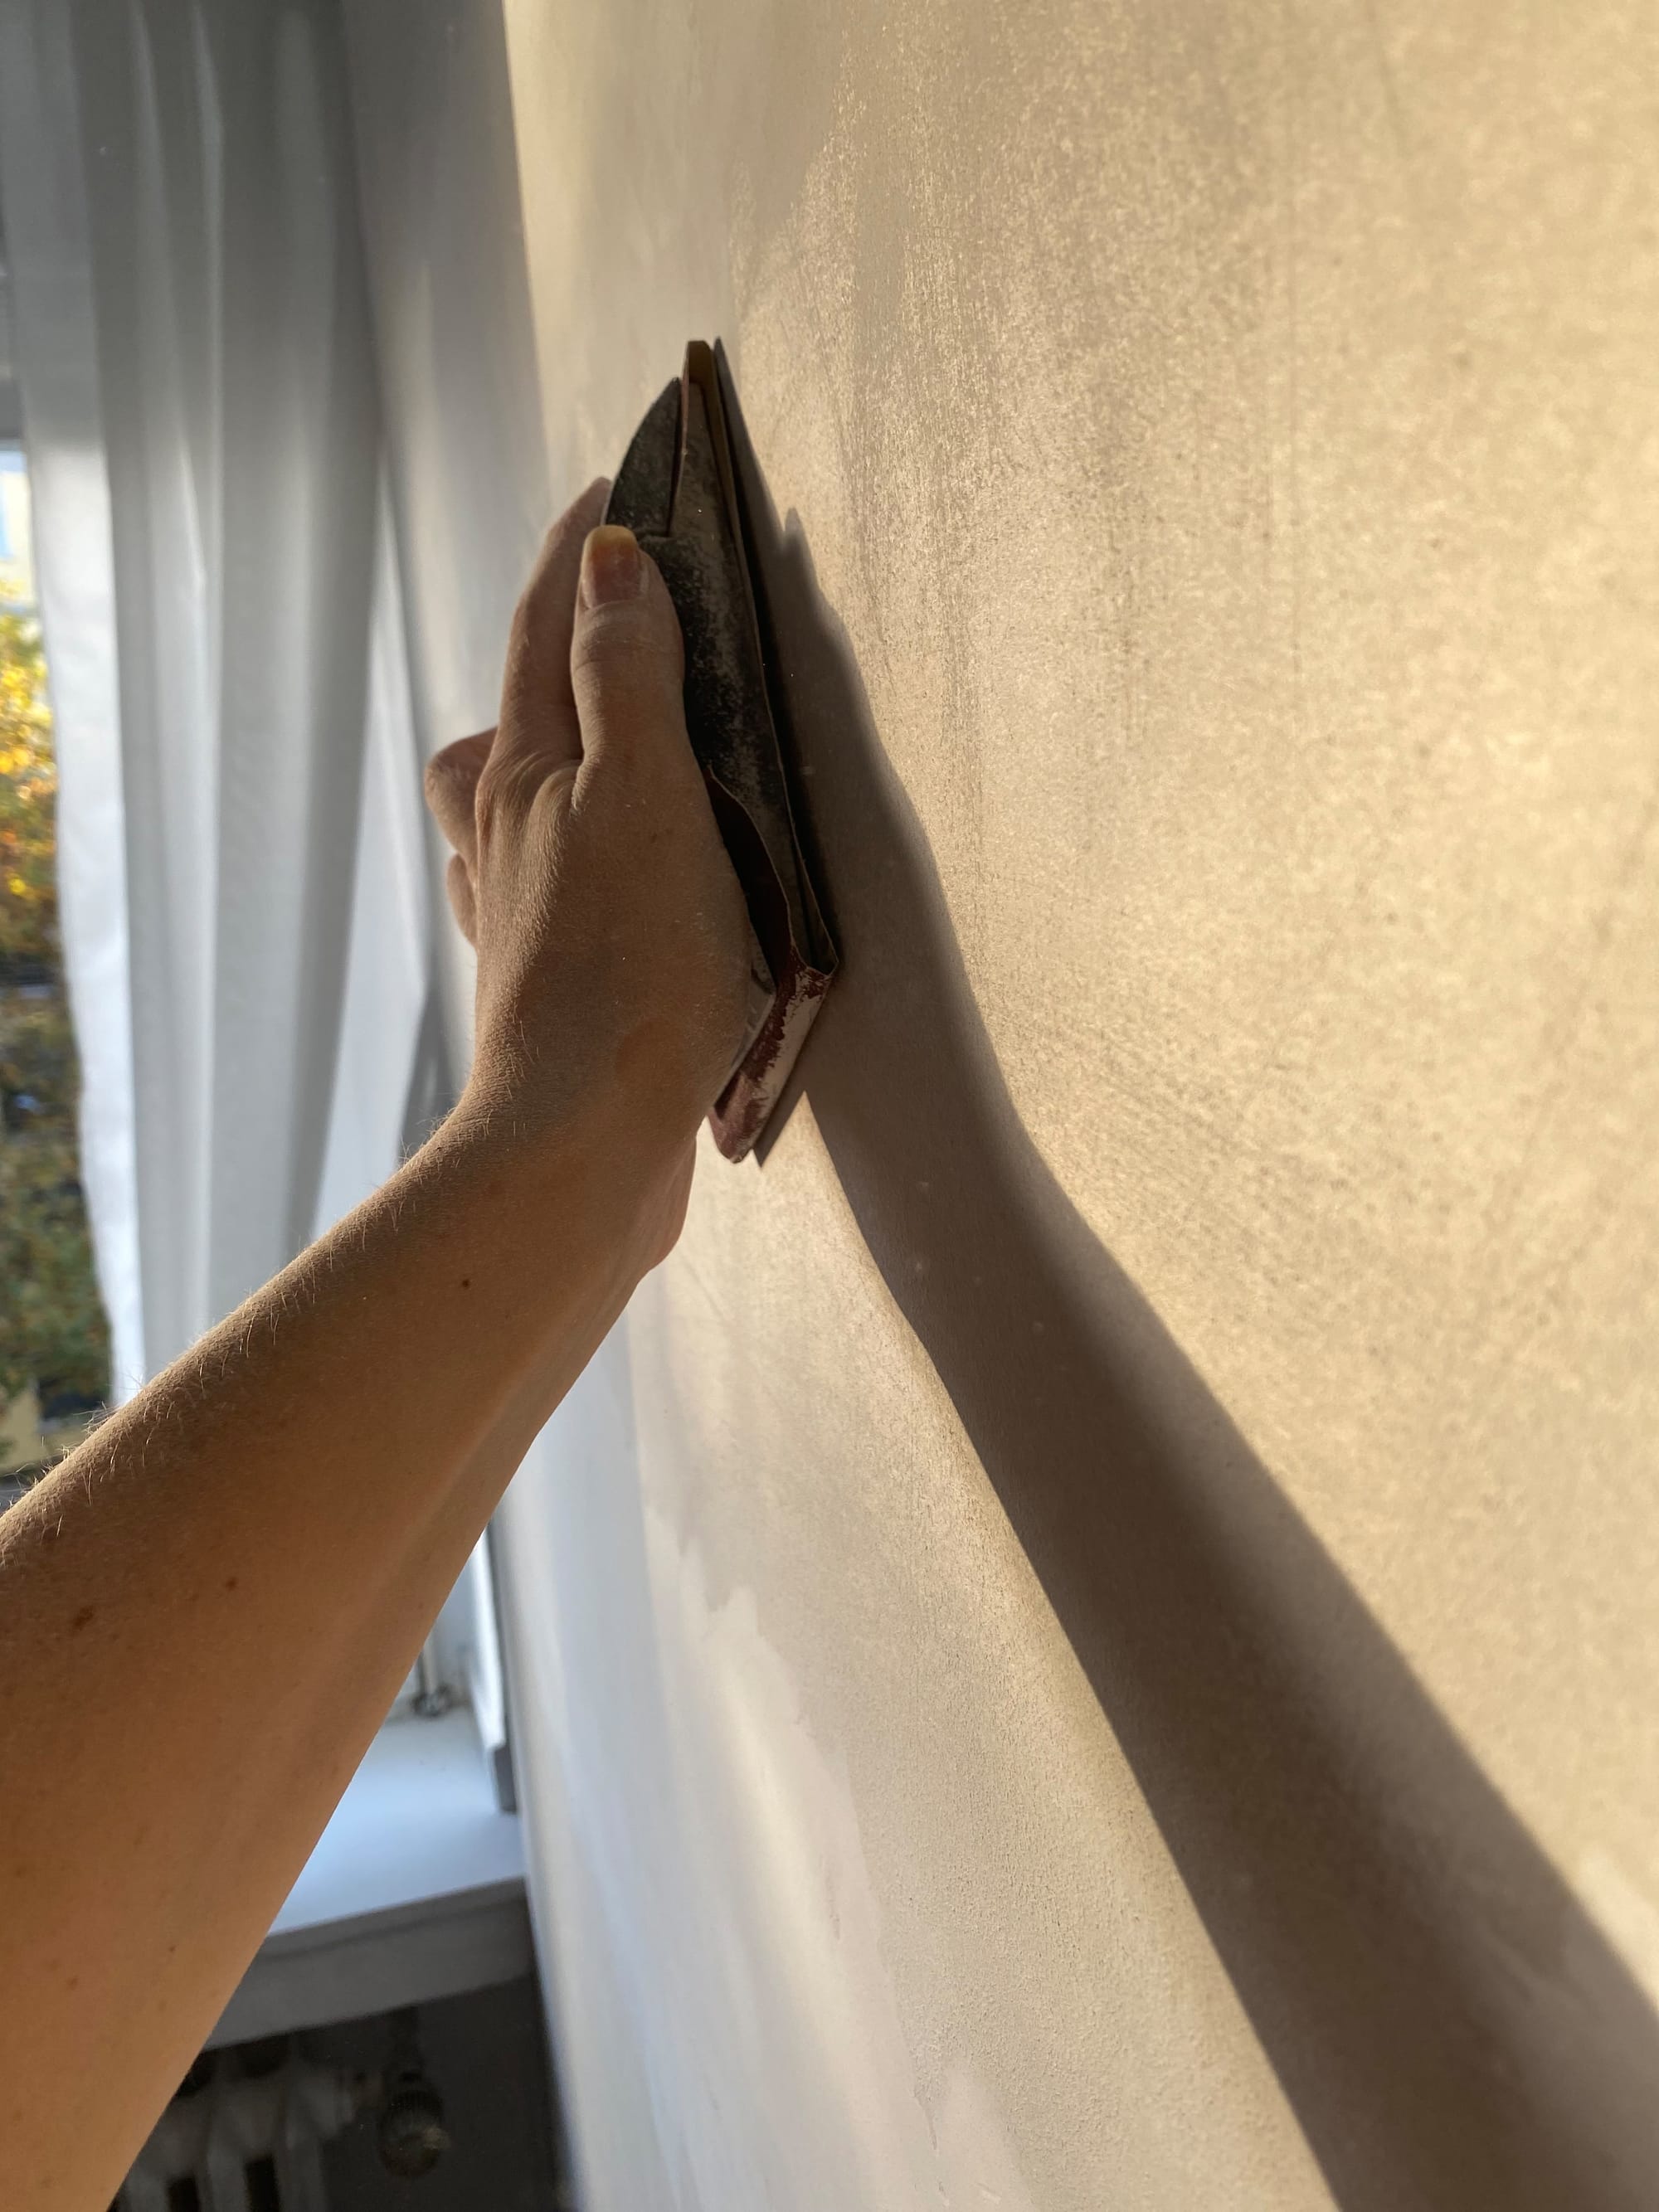
Step 4: Sand for a Flawless Finish
Once the filler is dry, sand down the joints carefully. The more even your surface, the better your final paint job will look. Take your time to avoid any visible imperfections.
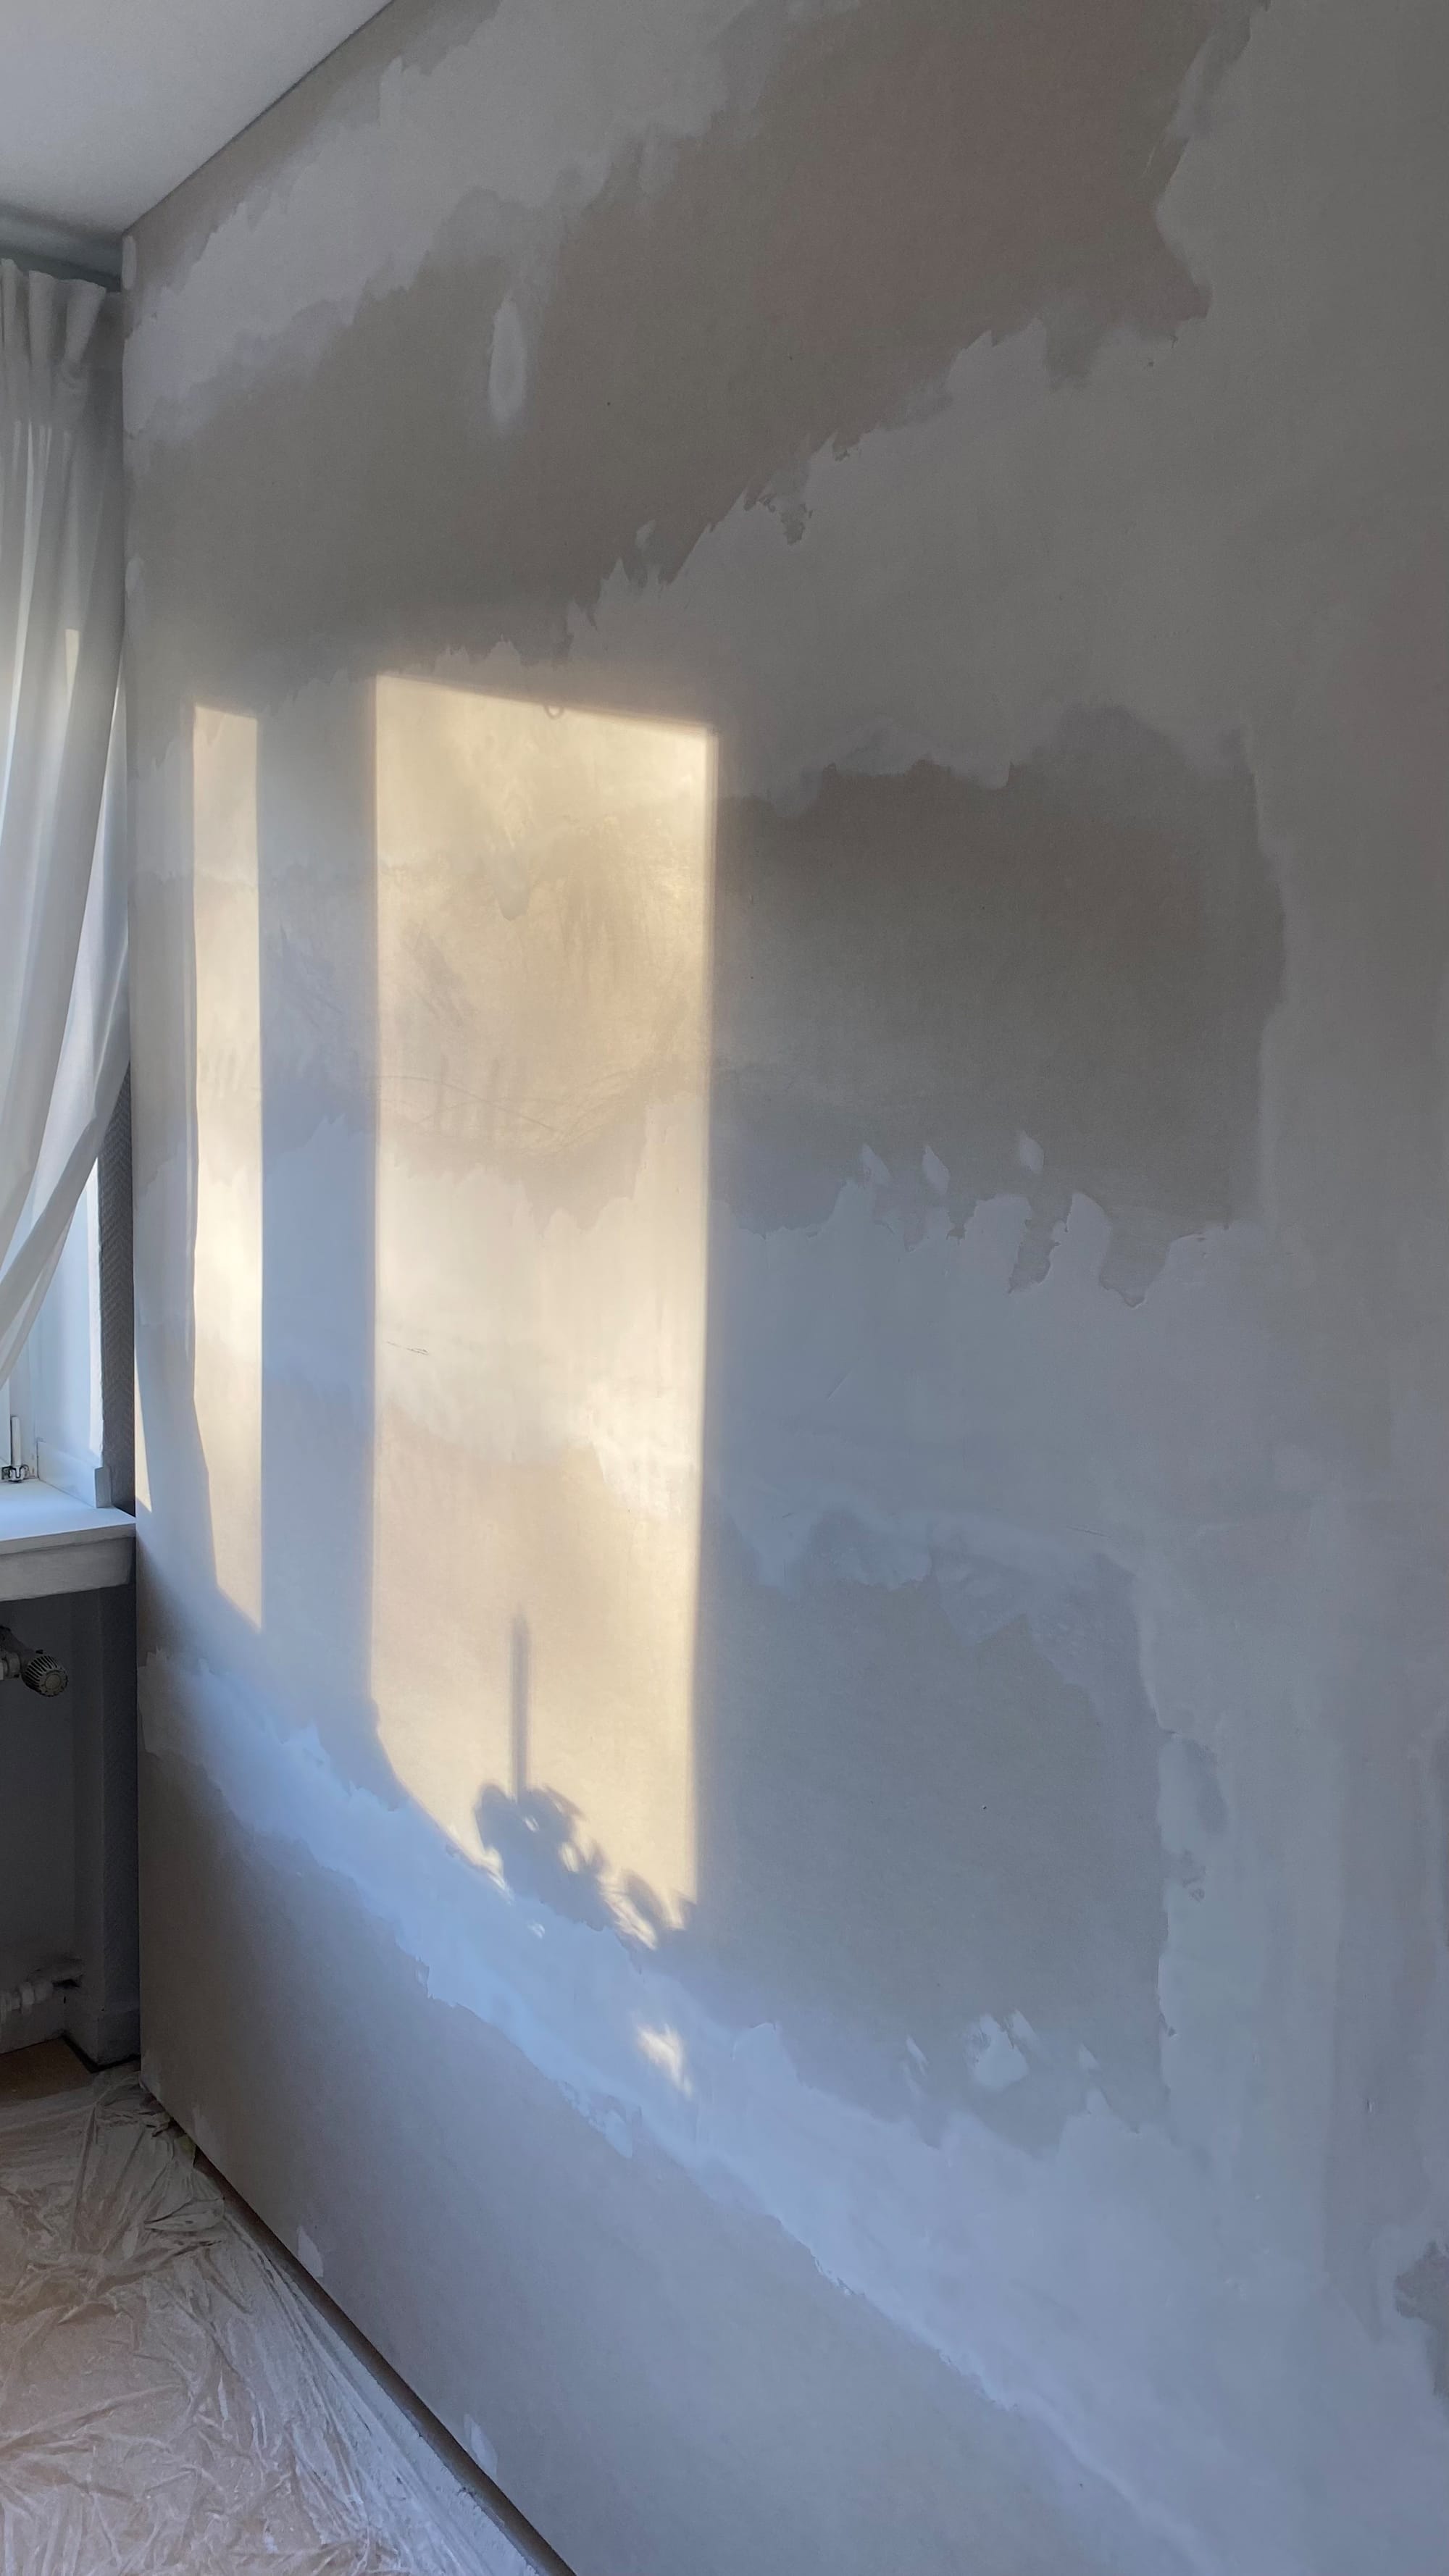
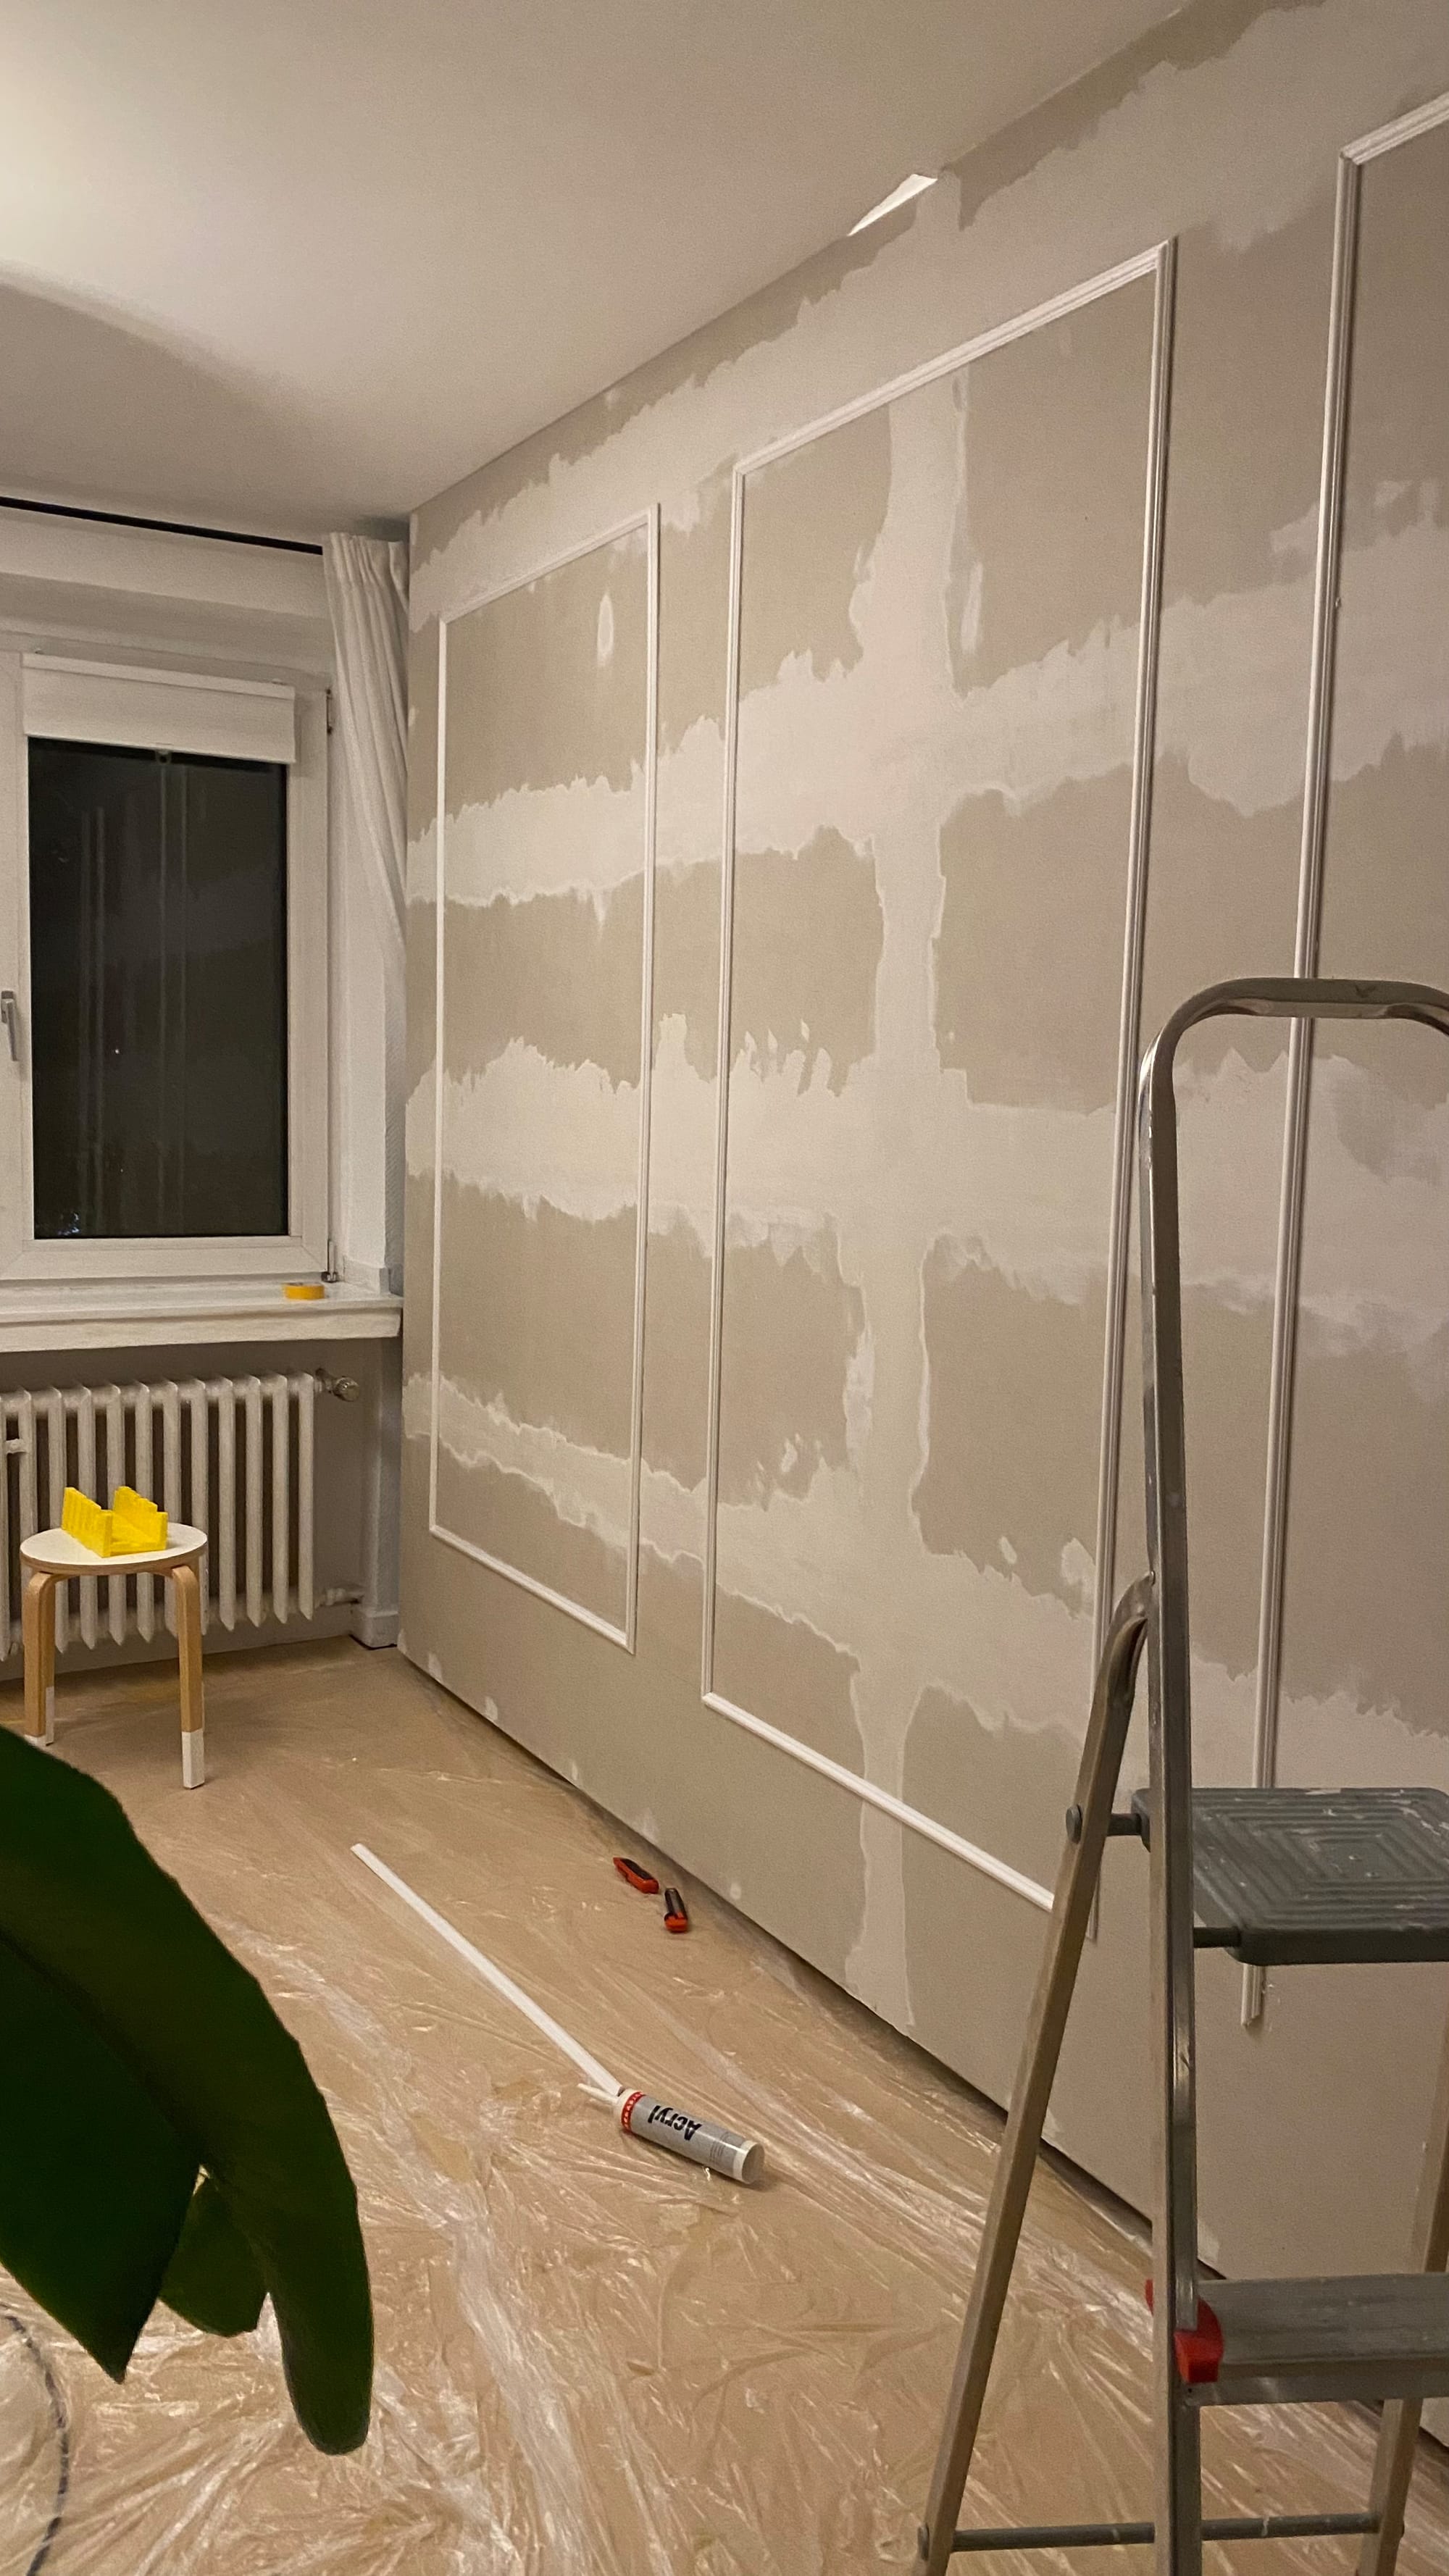
Step 5: Prime the Surface
Apply a deep penetration primer over the entire structure. This helps the paint adhere properly and ensures a long-lasting, even finish.
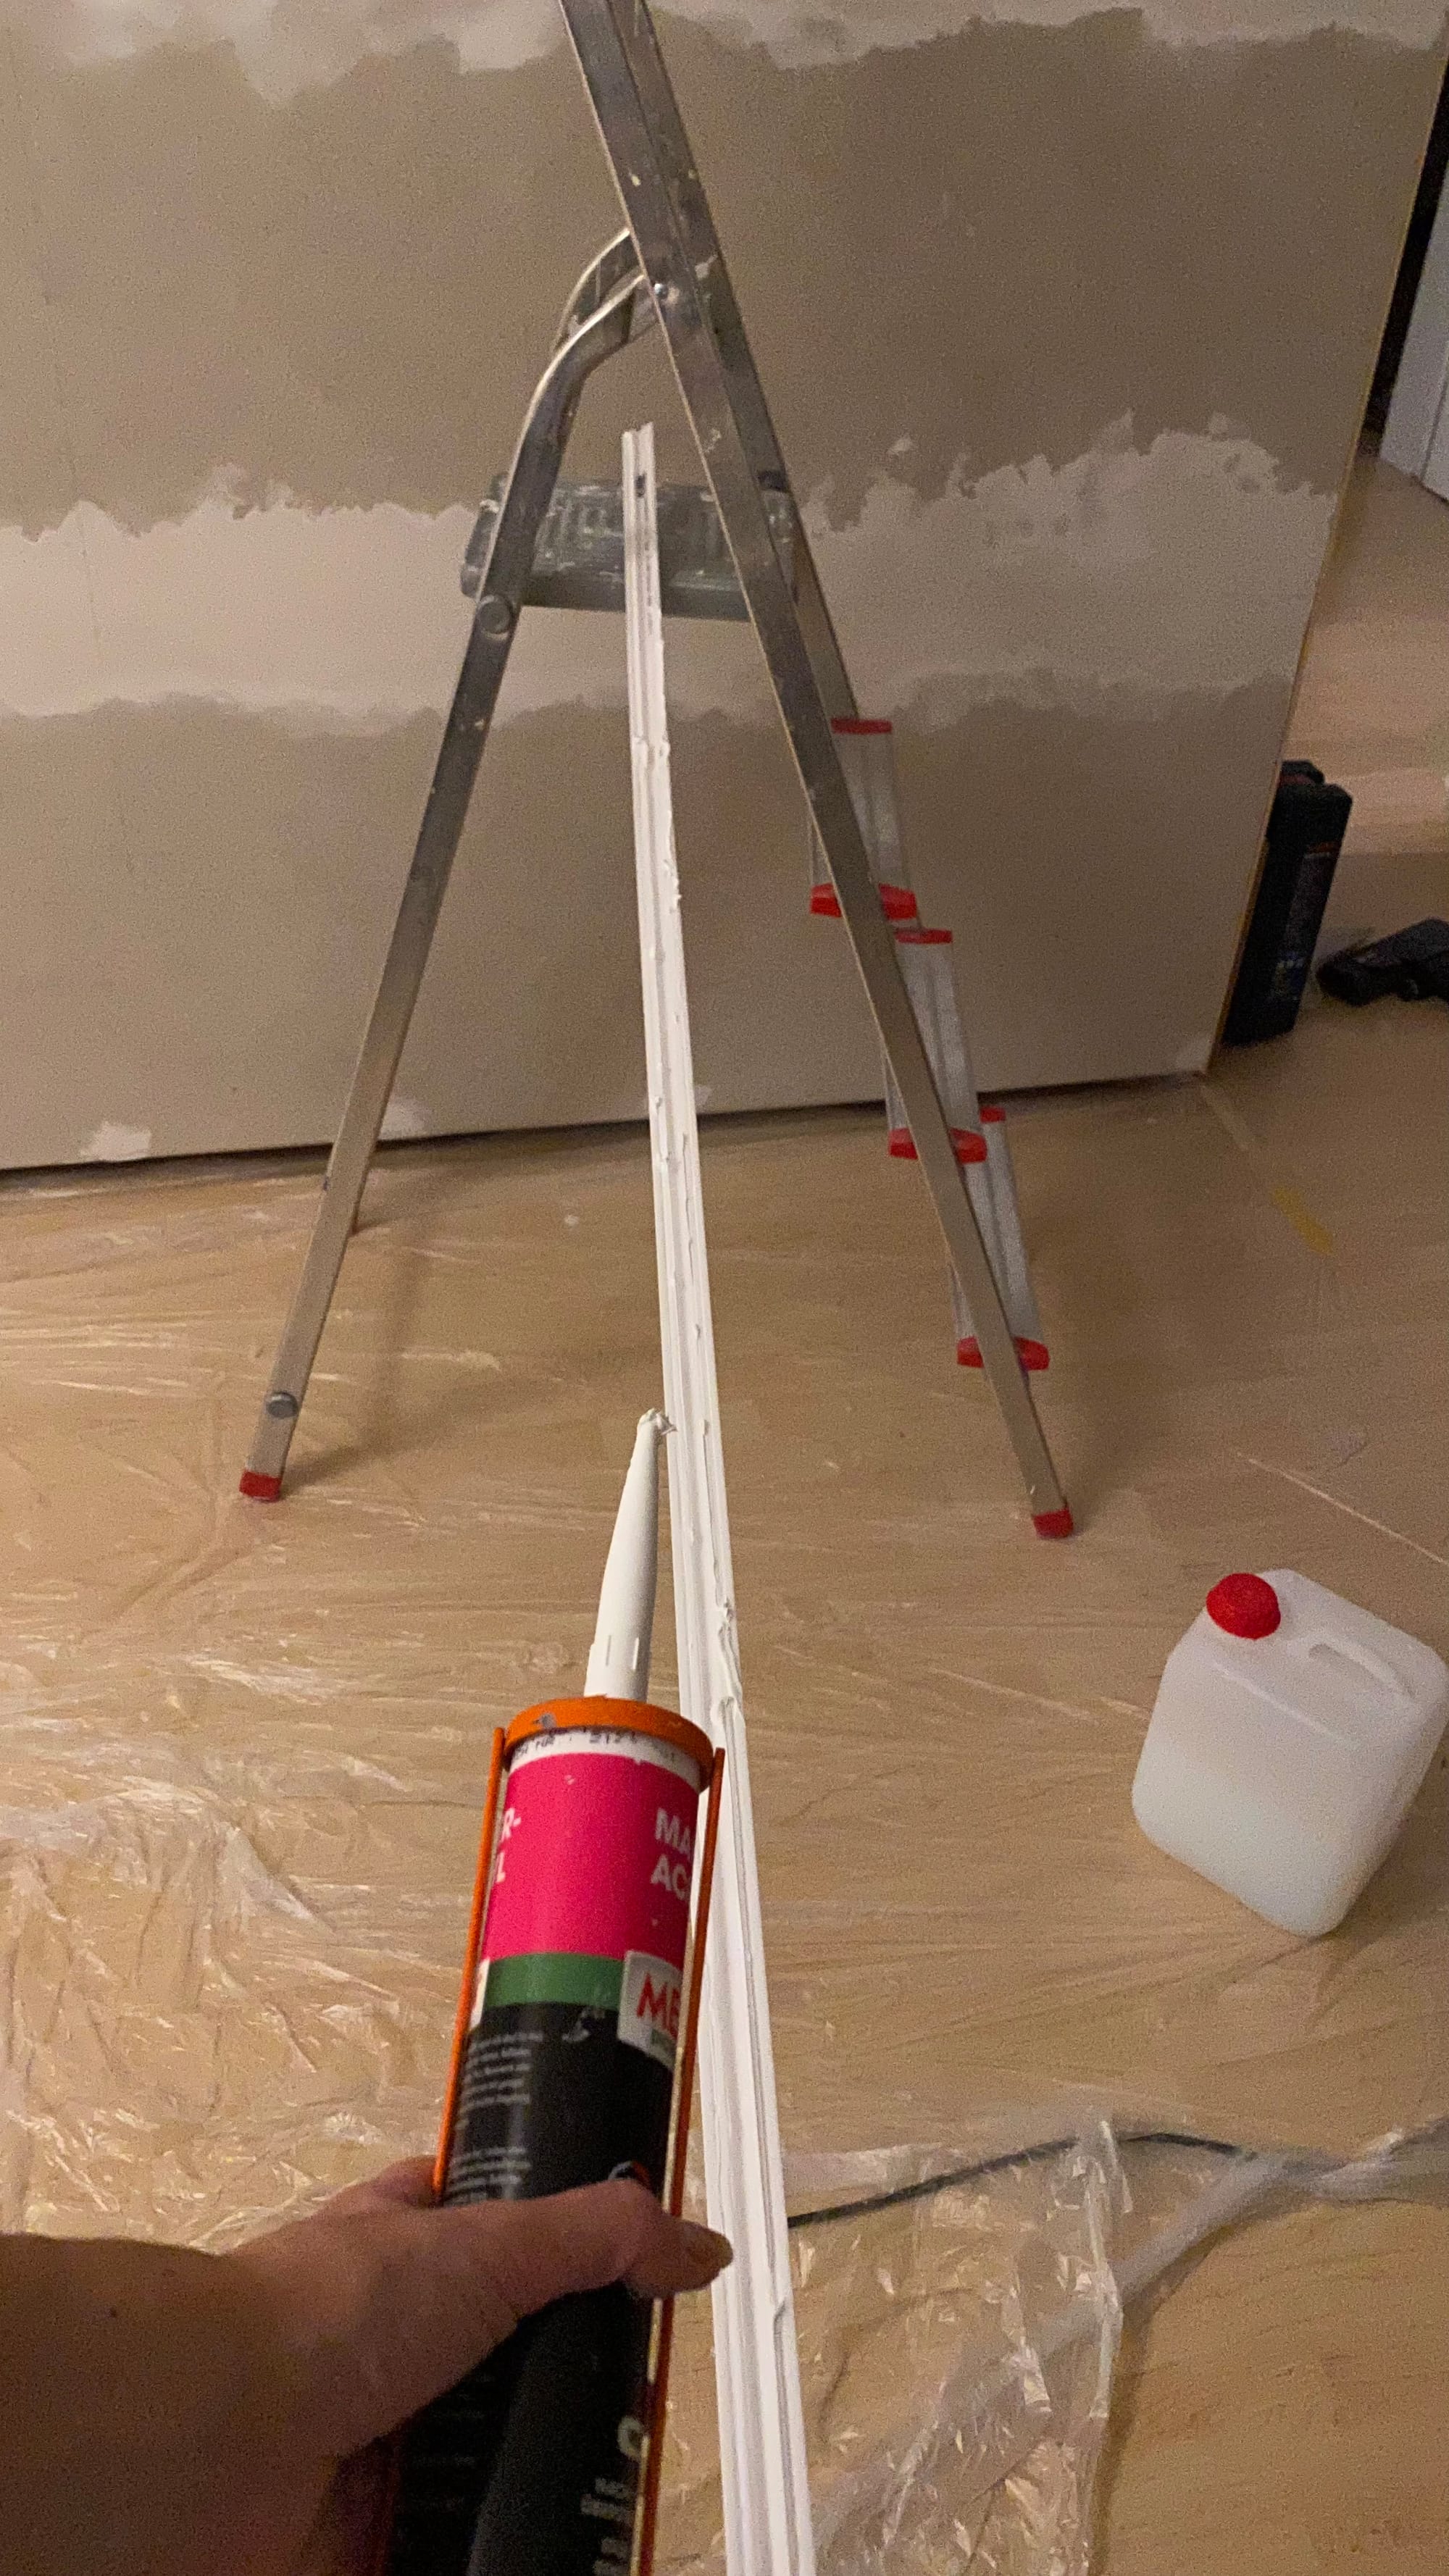
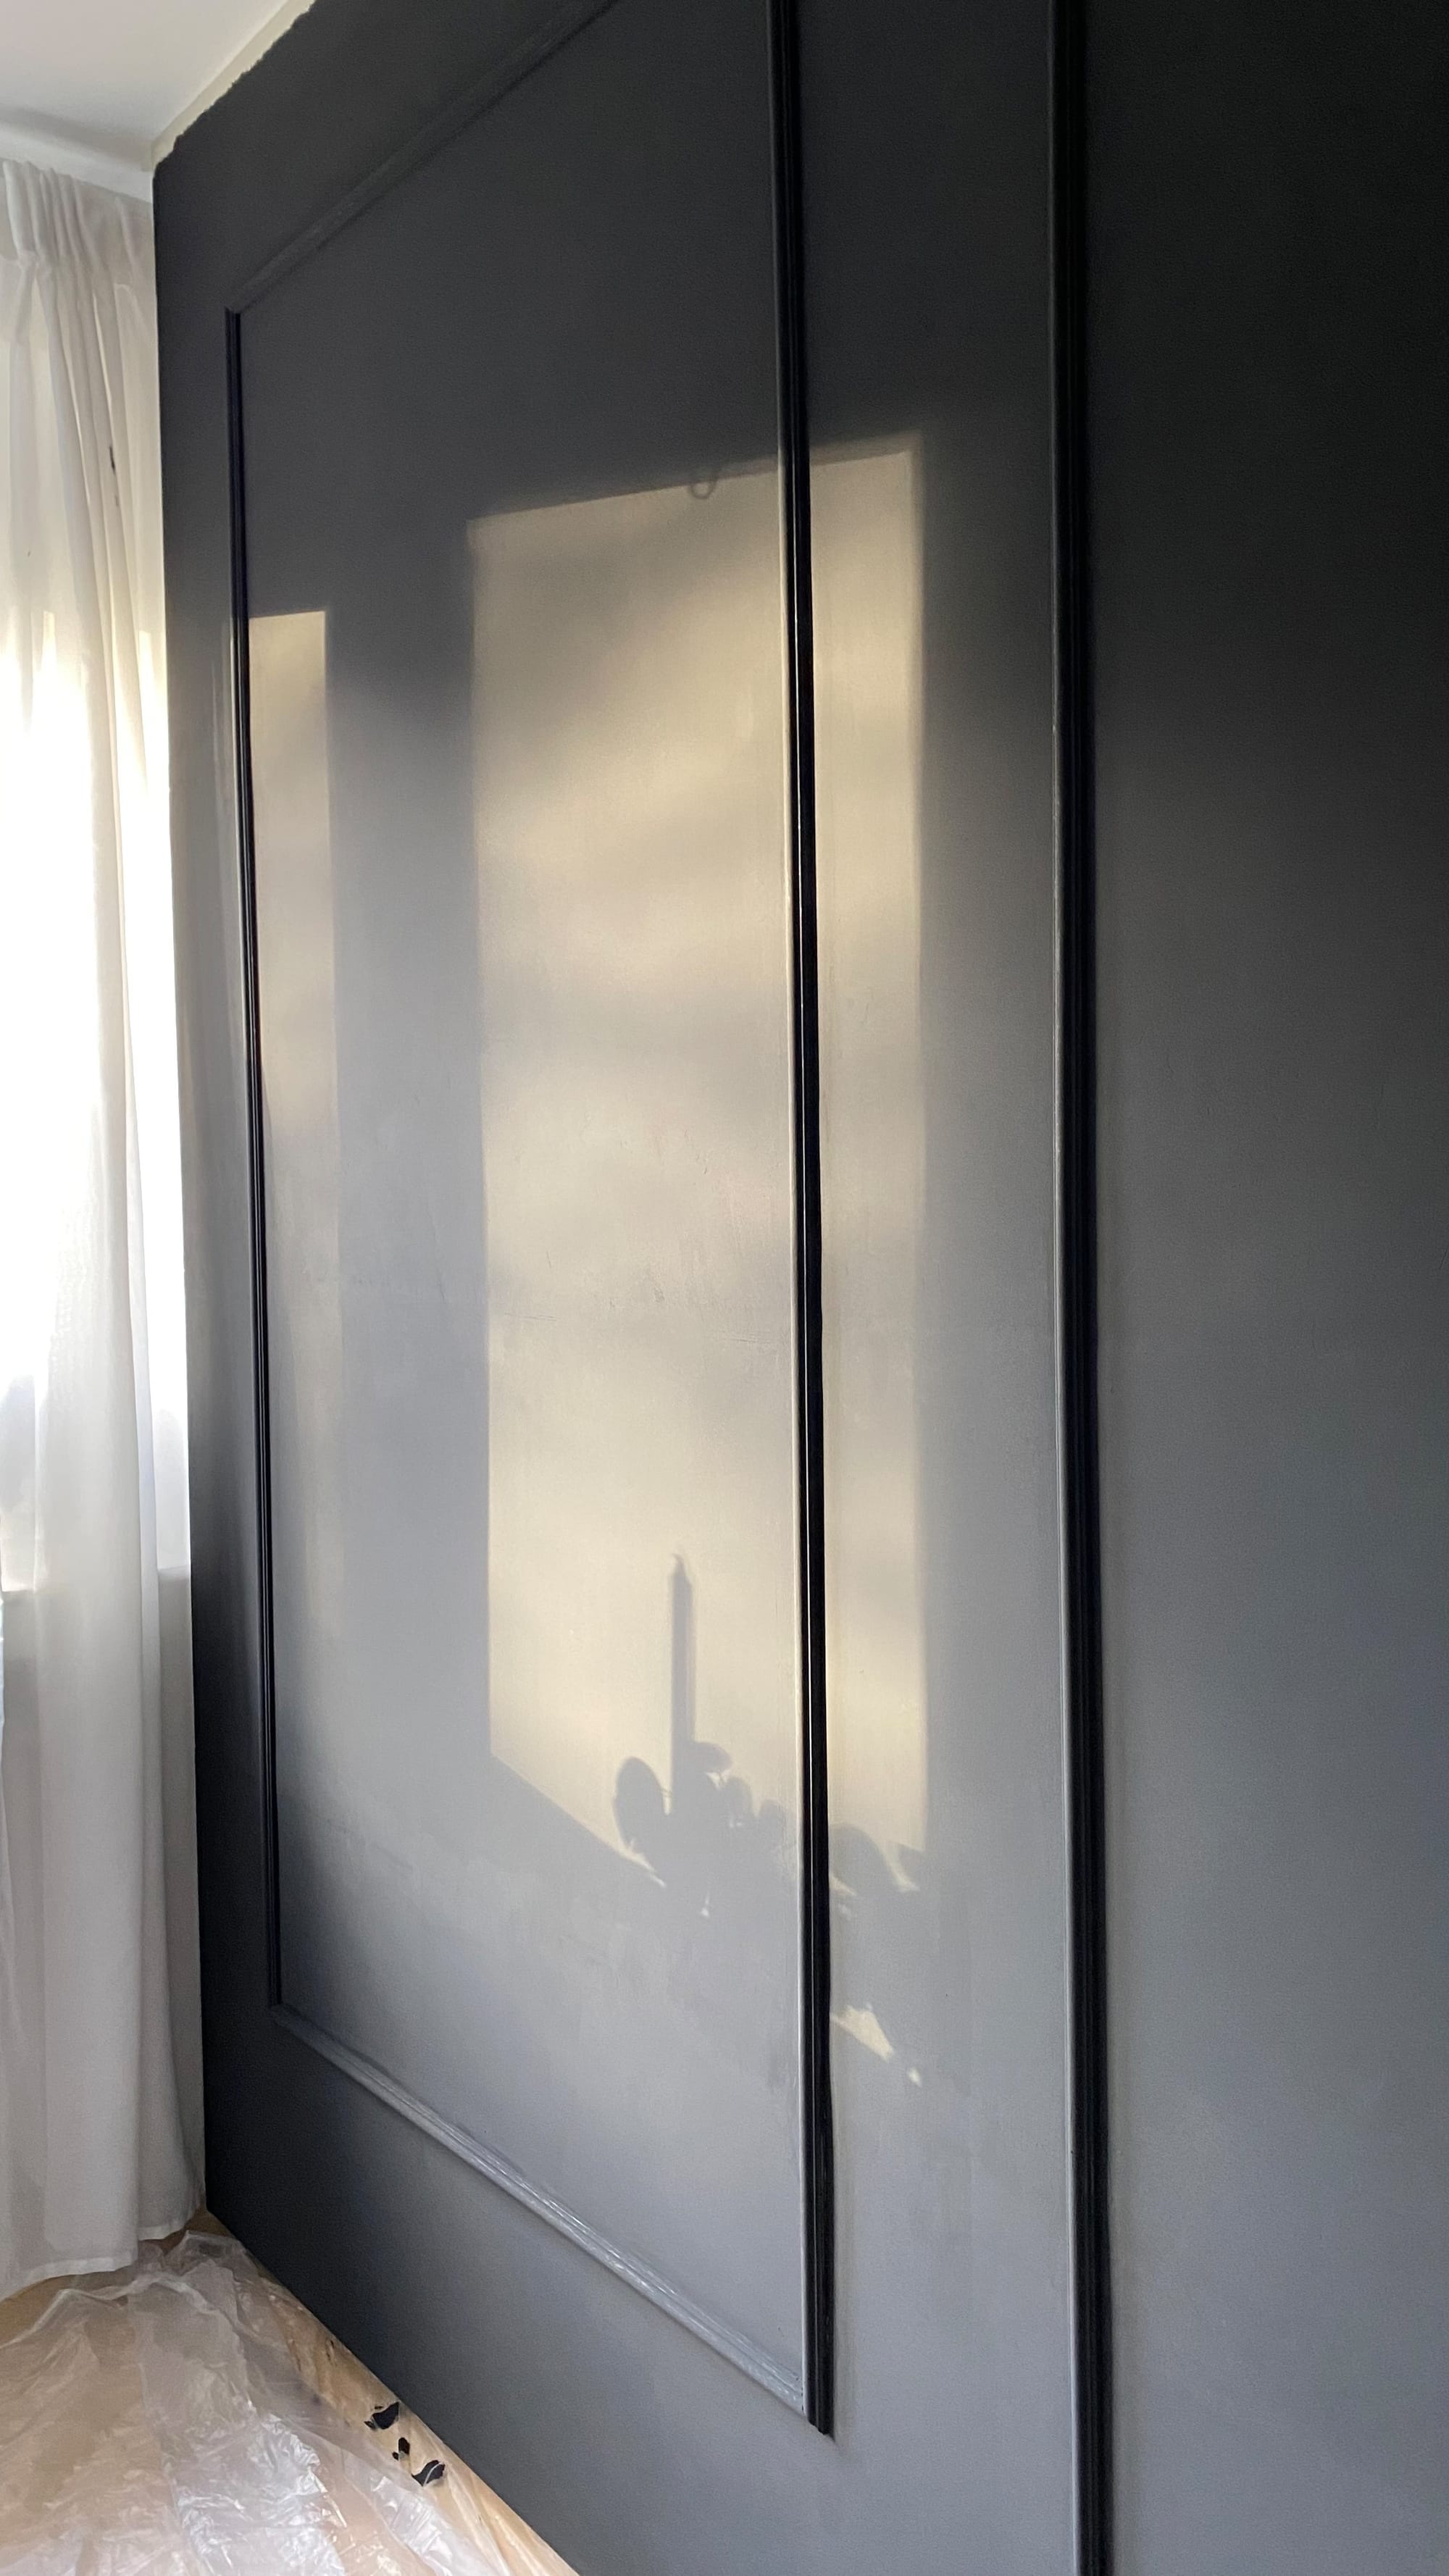
Step 6: Add Decorative Mouldings
To enhance the built-in effect, cut decorative mouldings to size and attach them using adhesive. This small detail makes a huge difference, giving your wardrobe a high-end, custom appearance.
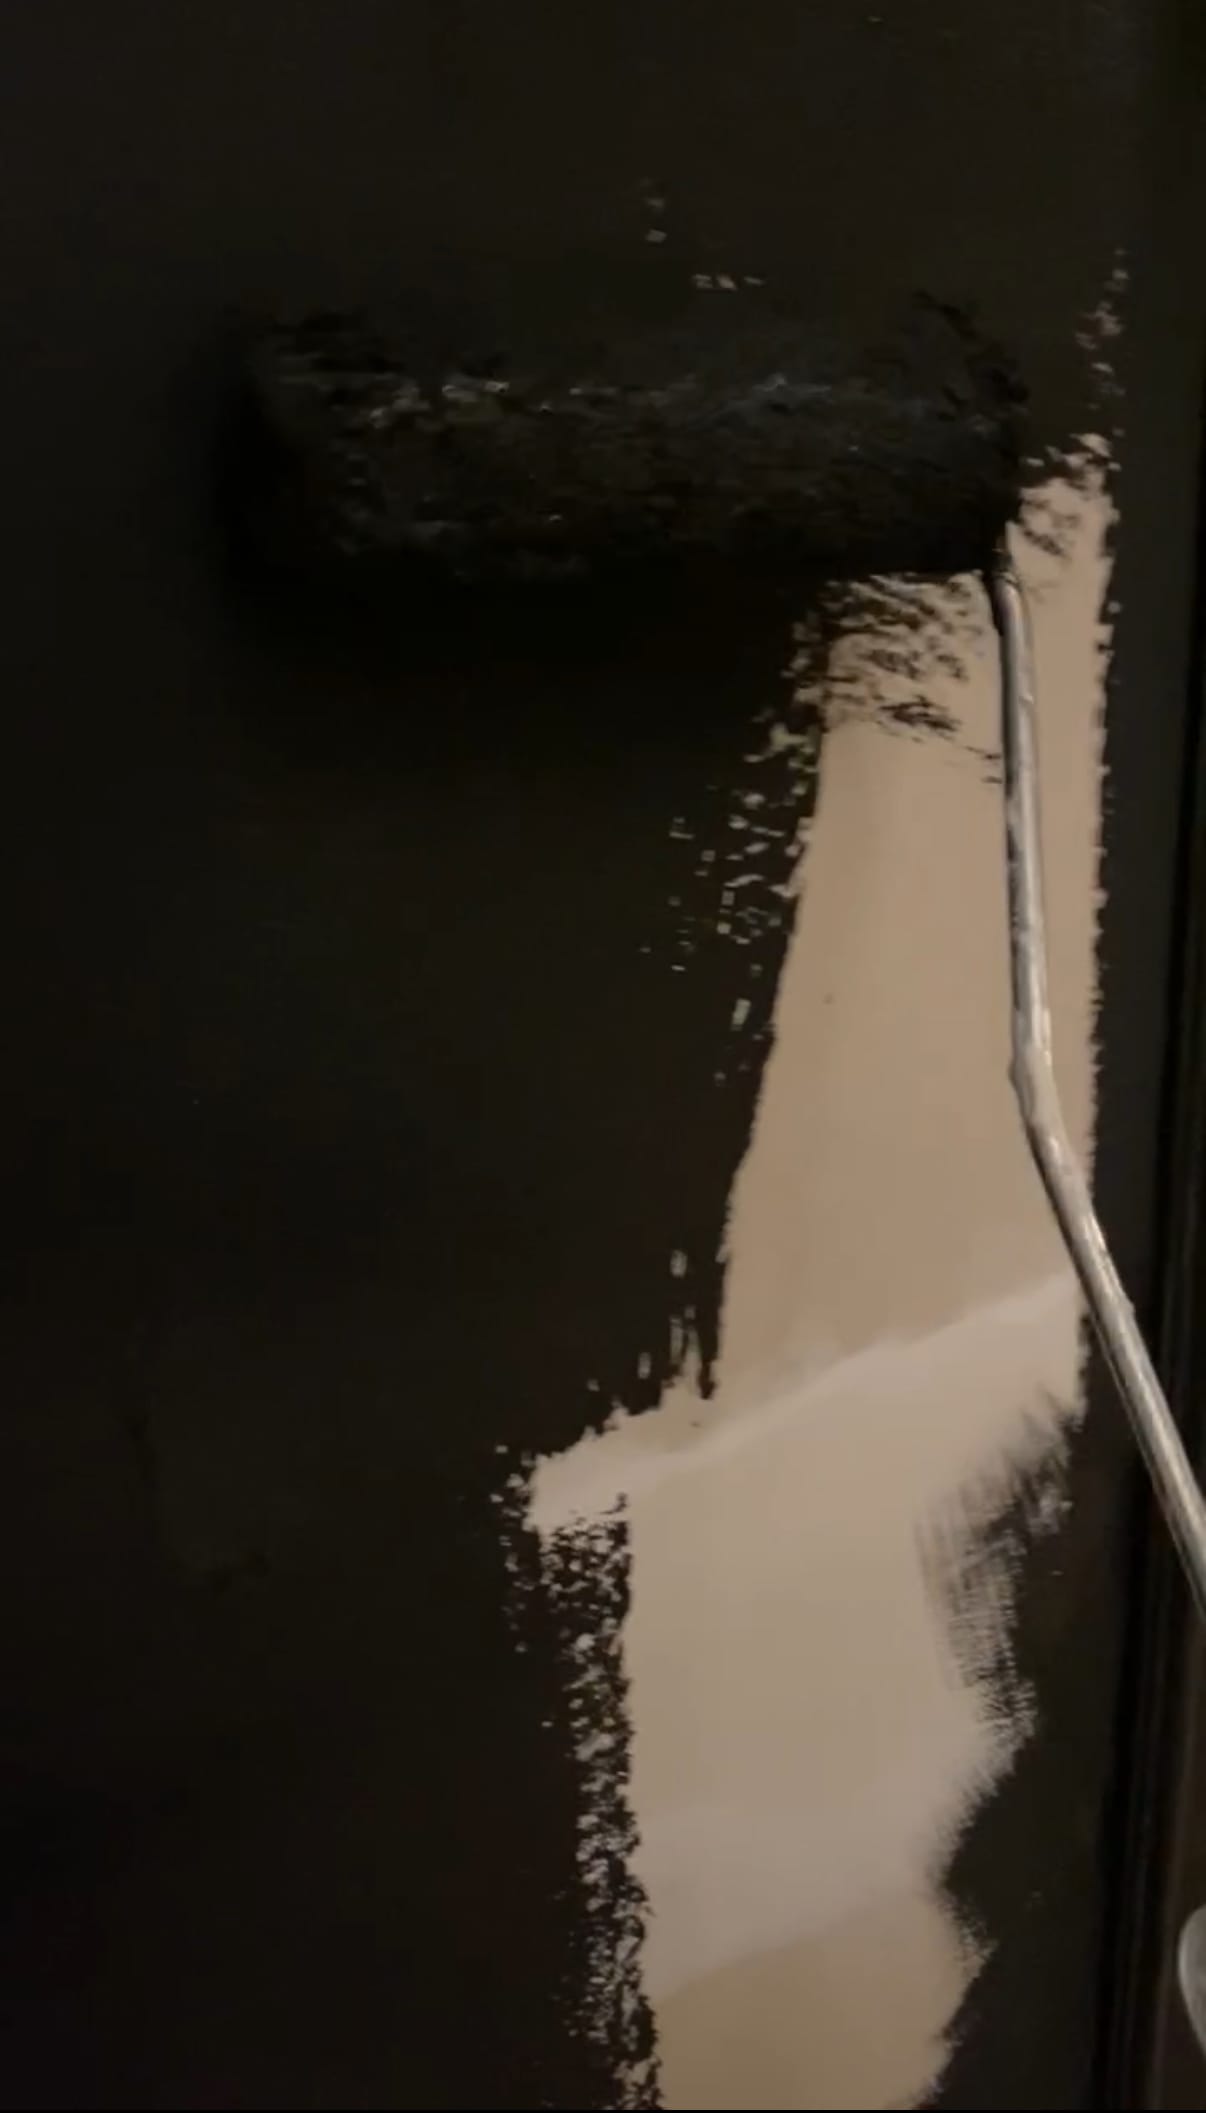
Step 7: Paint and Enjoy!
The final step is painting! Choose a color that blends with your walls for a seamless, built-in look. Be sure to allow enough drying time between coats.
This project took about two weeks to complete while balancing a full-time job, but the end result was absolutely worth it! The wardrobe now looks like a custom-built feature rather than a simple IKEA unit, and at the same time acts as a room divider, creating the perfect area for my new home office!. If you’re looking for a budget-friendly way to elevate your space, this DIY is a great solution.
Let us know if you give this project a try! We’d love to see your transformations. Happy DIY-ing!
Creator: Joanna
Instagram: @eine.etage.tiefer