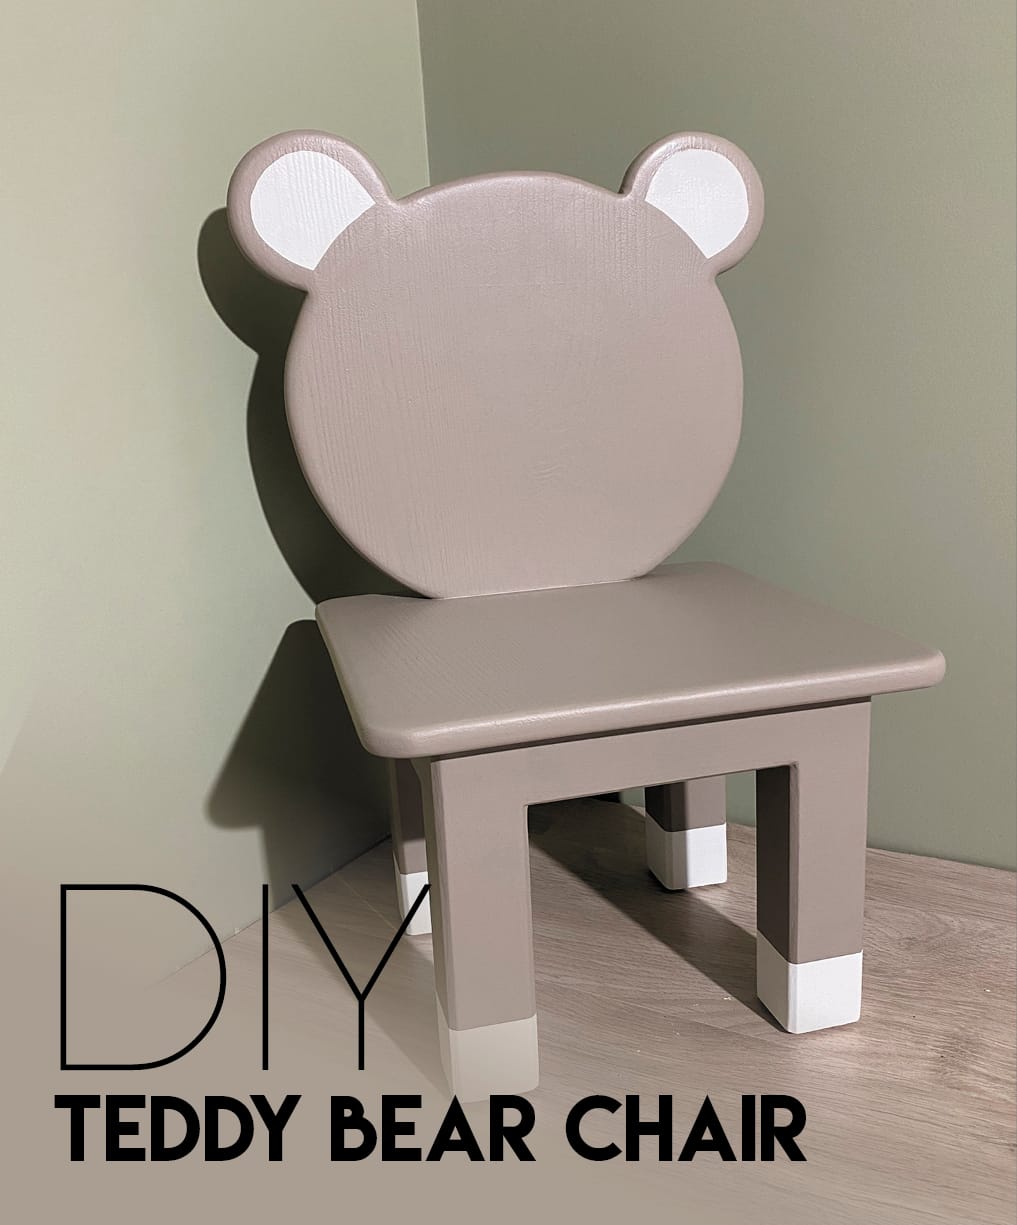
For my niece's christening, I wanted to make a gift that she could have for many years and that was a nice piece of furniture. Is there anything cuter than children's furniture?
So I started by googling what I was supposed to make and completely fell for a teddy bear. I used a hobby board that I cut to size.
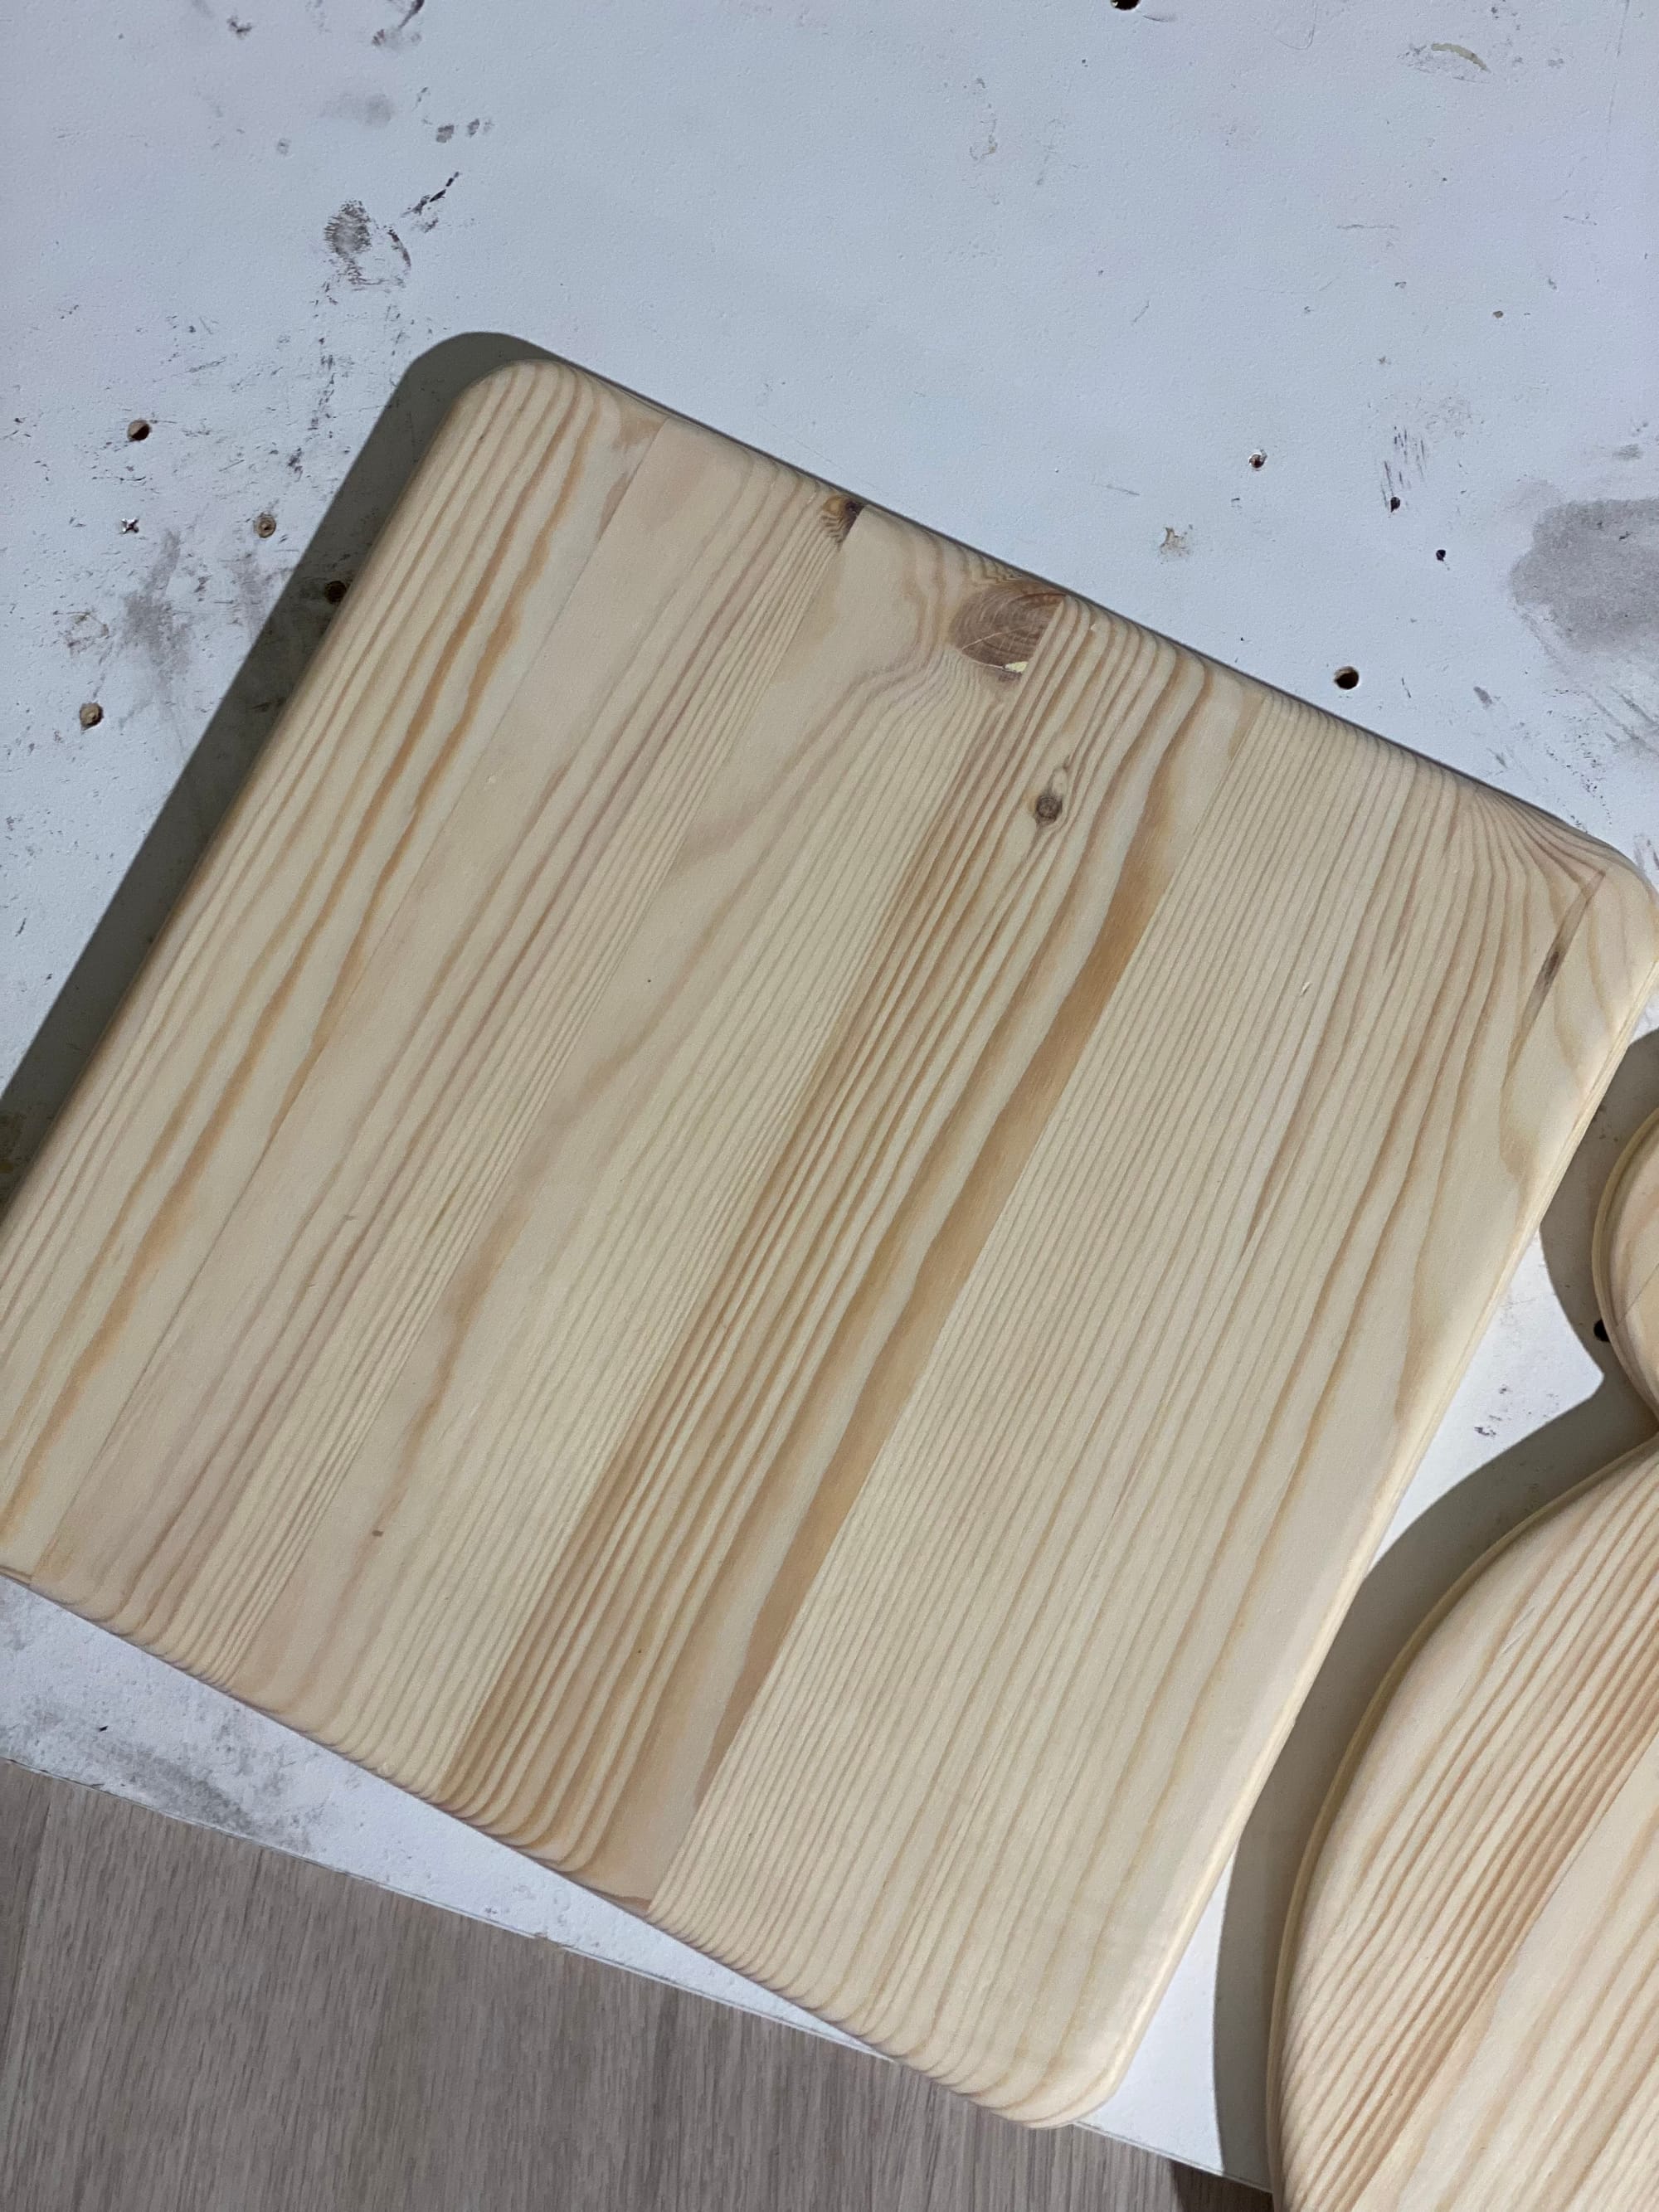
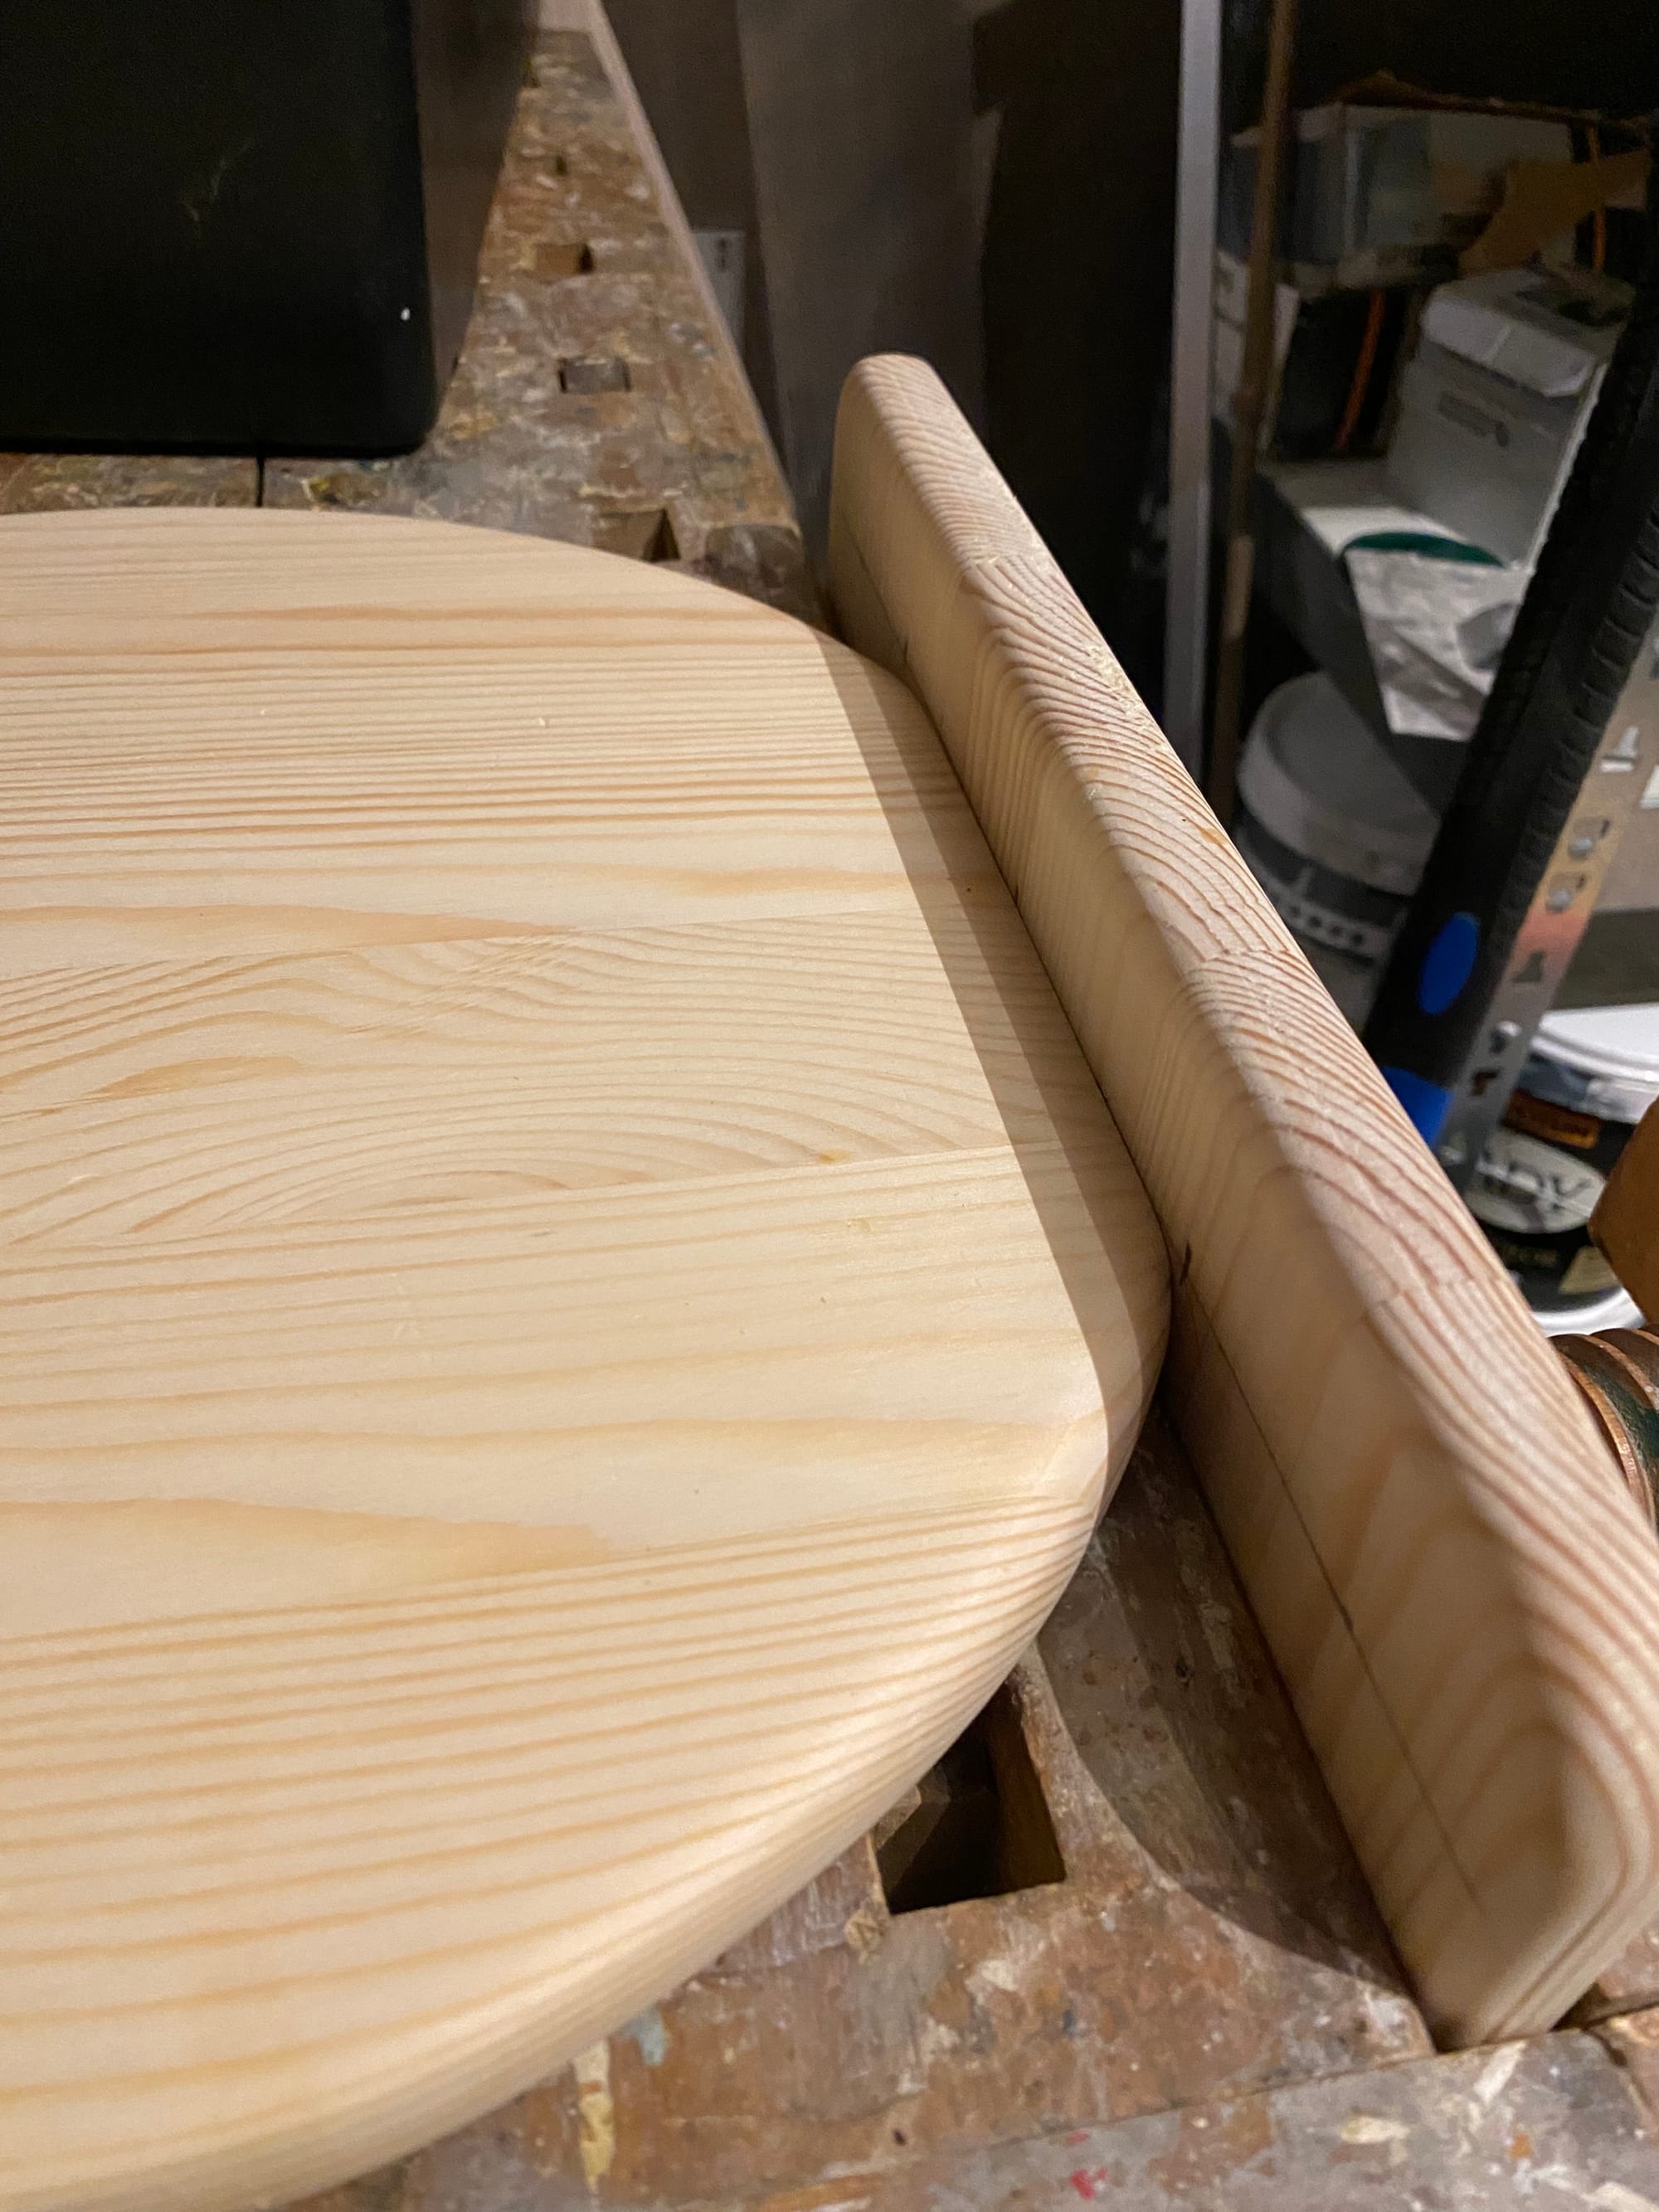
First I made a square that was 30cm x 30cm. Cut the corners round. Here you can use an overhand router if you want, you get slightly rounder edges.
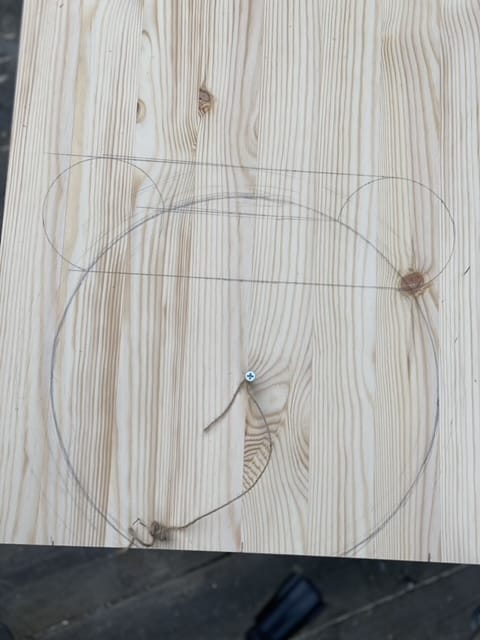
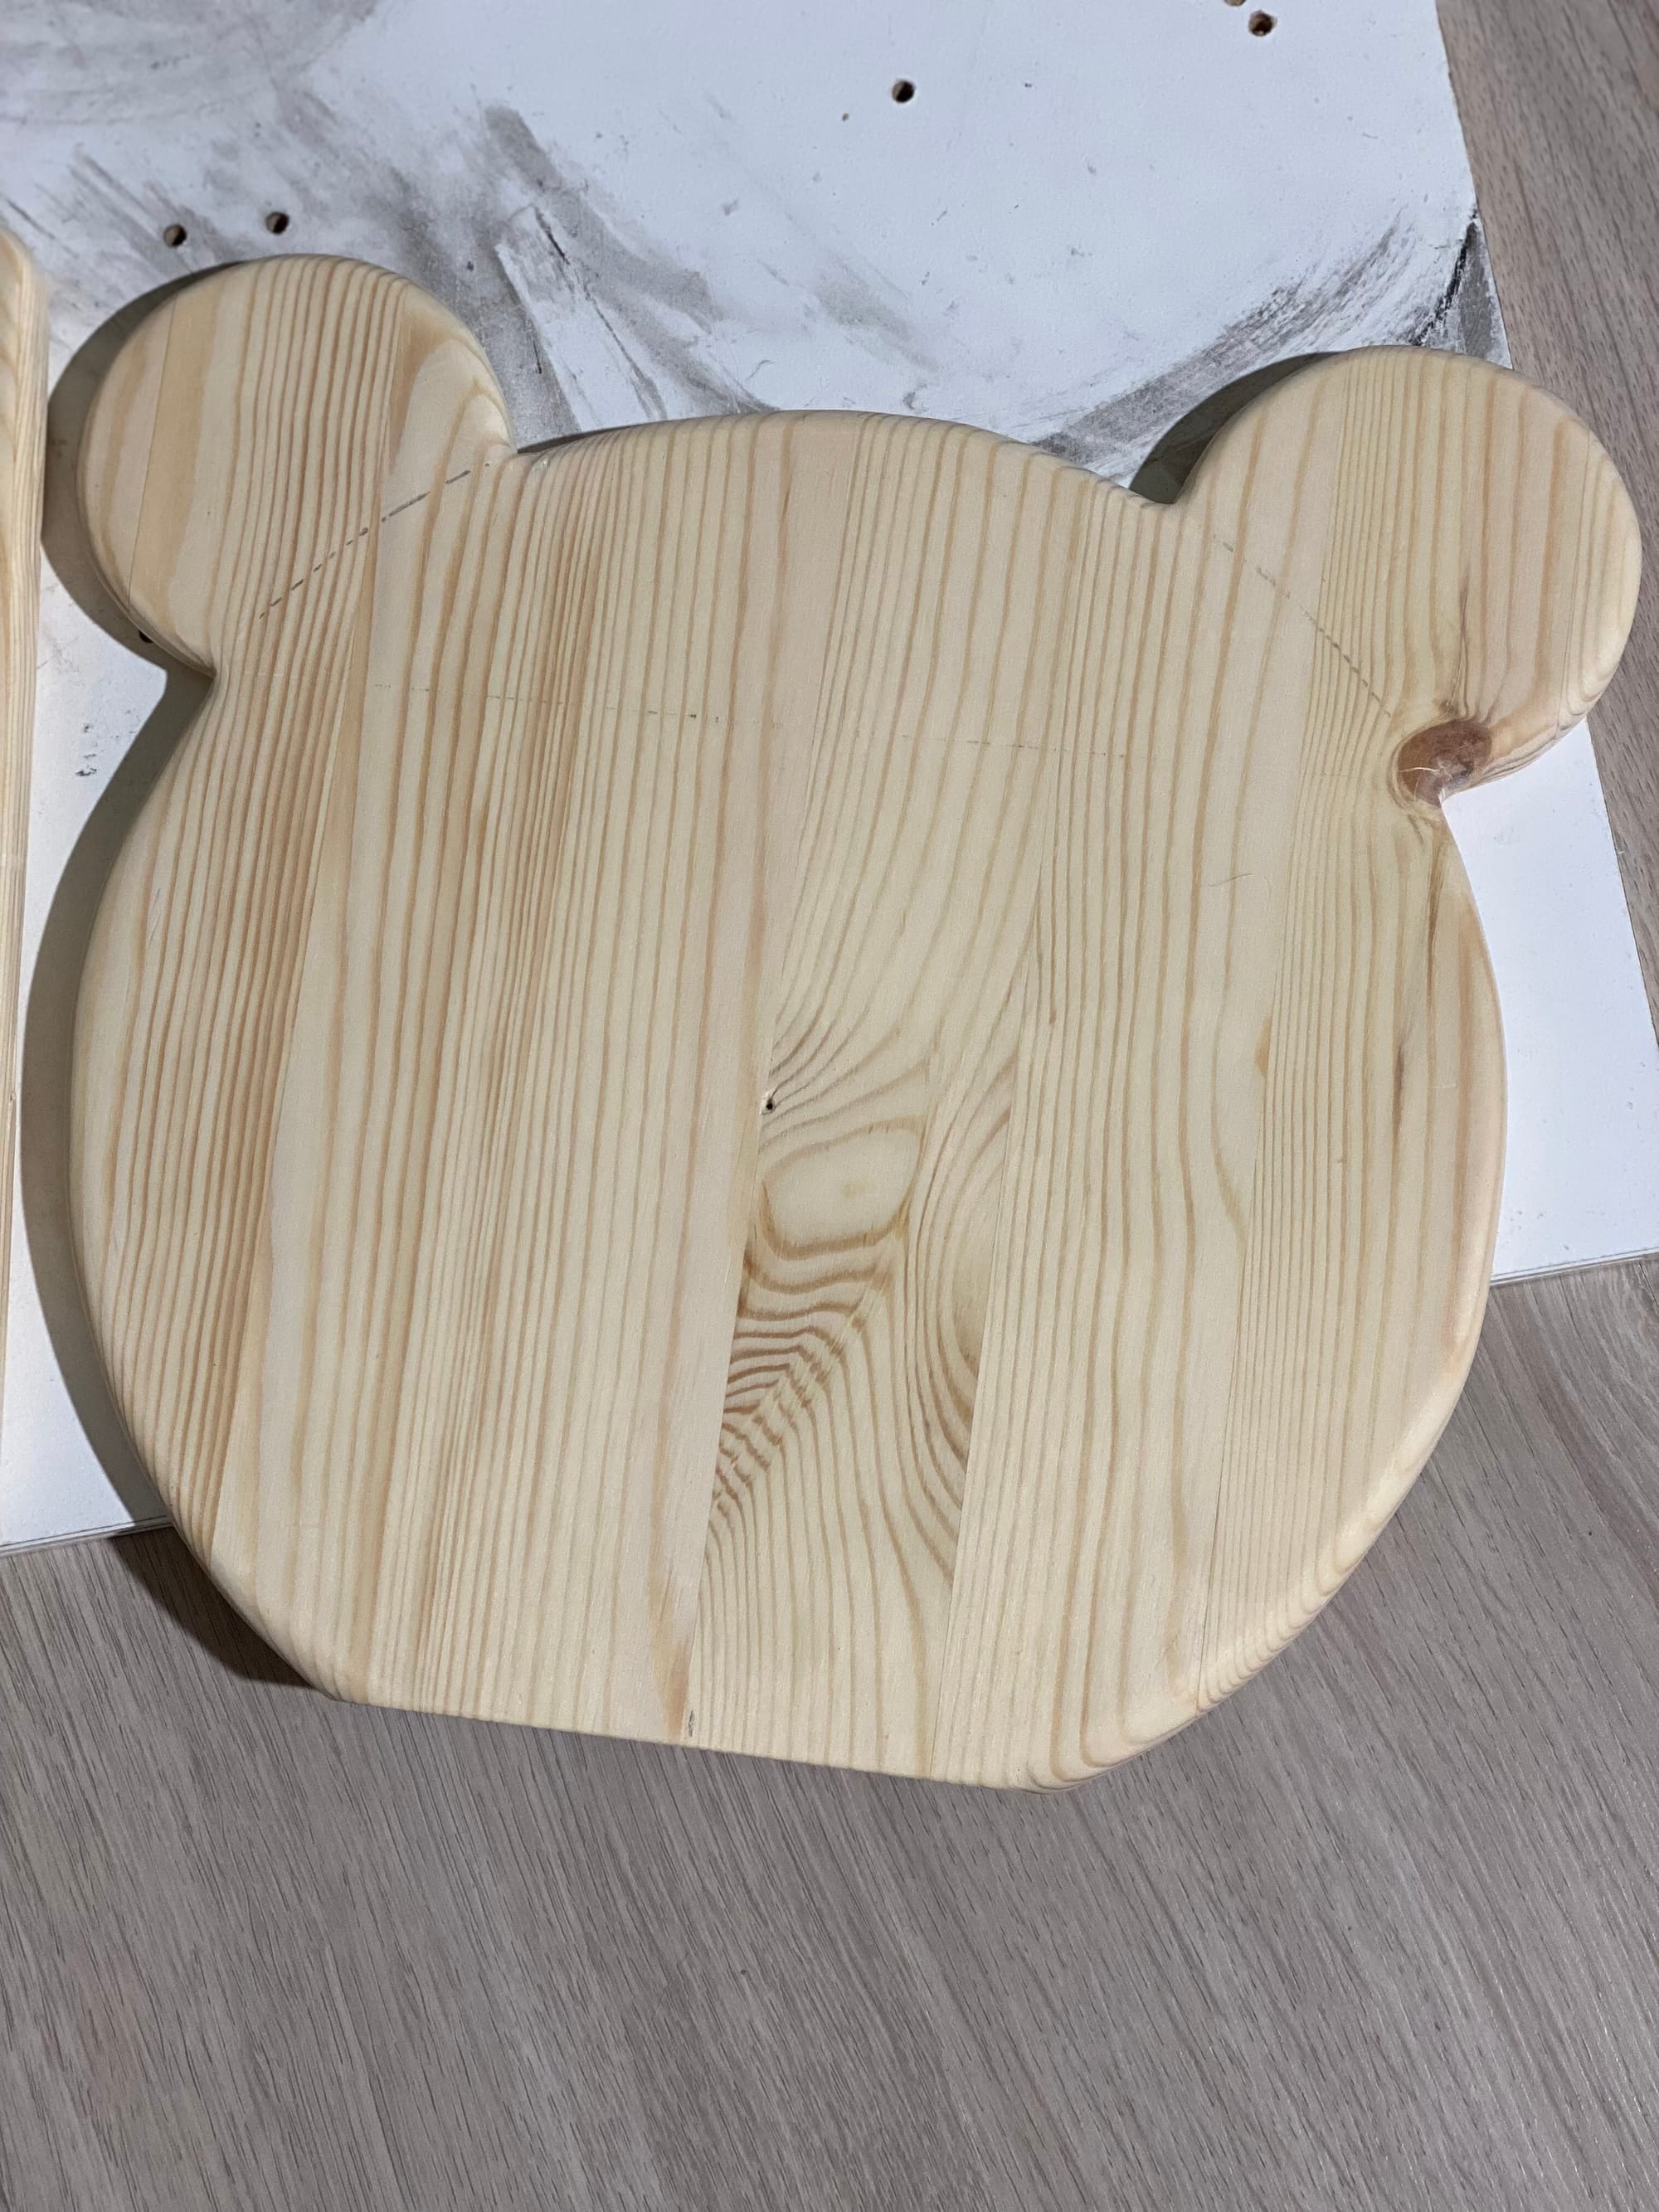
Then there was the head. Here I screwed a screw in the middle with a thread. Then just draw a circle as best you can. To make ears I used a small paint cap. Measure up so you get them on the same line.
Cut it out and plaster well.

Here you can see how the edges look after using an overhand router.
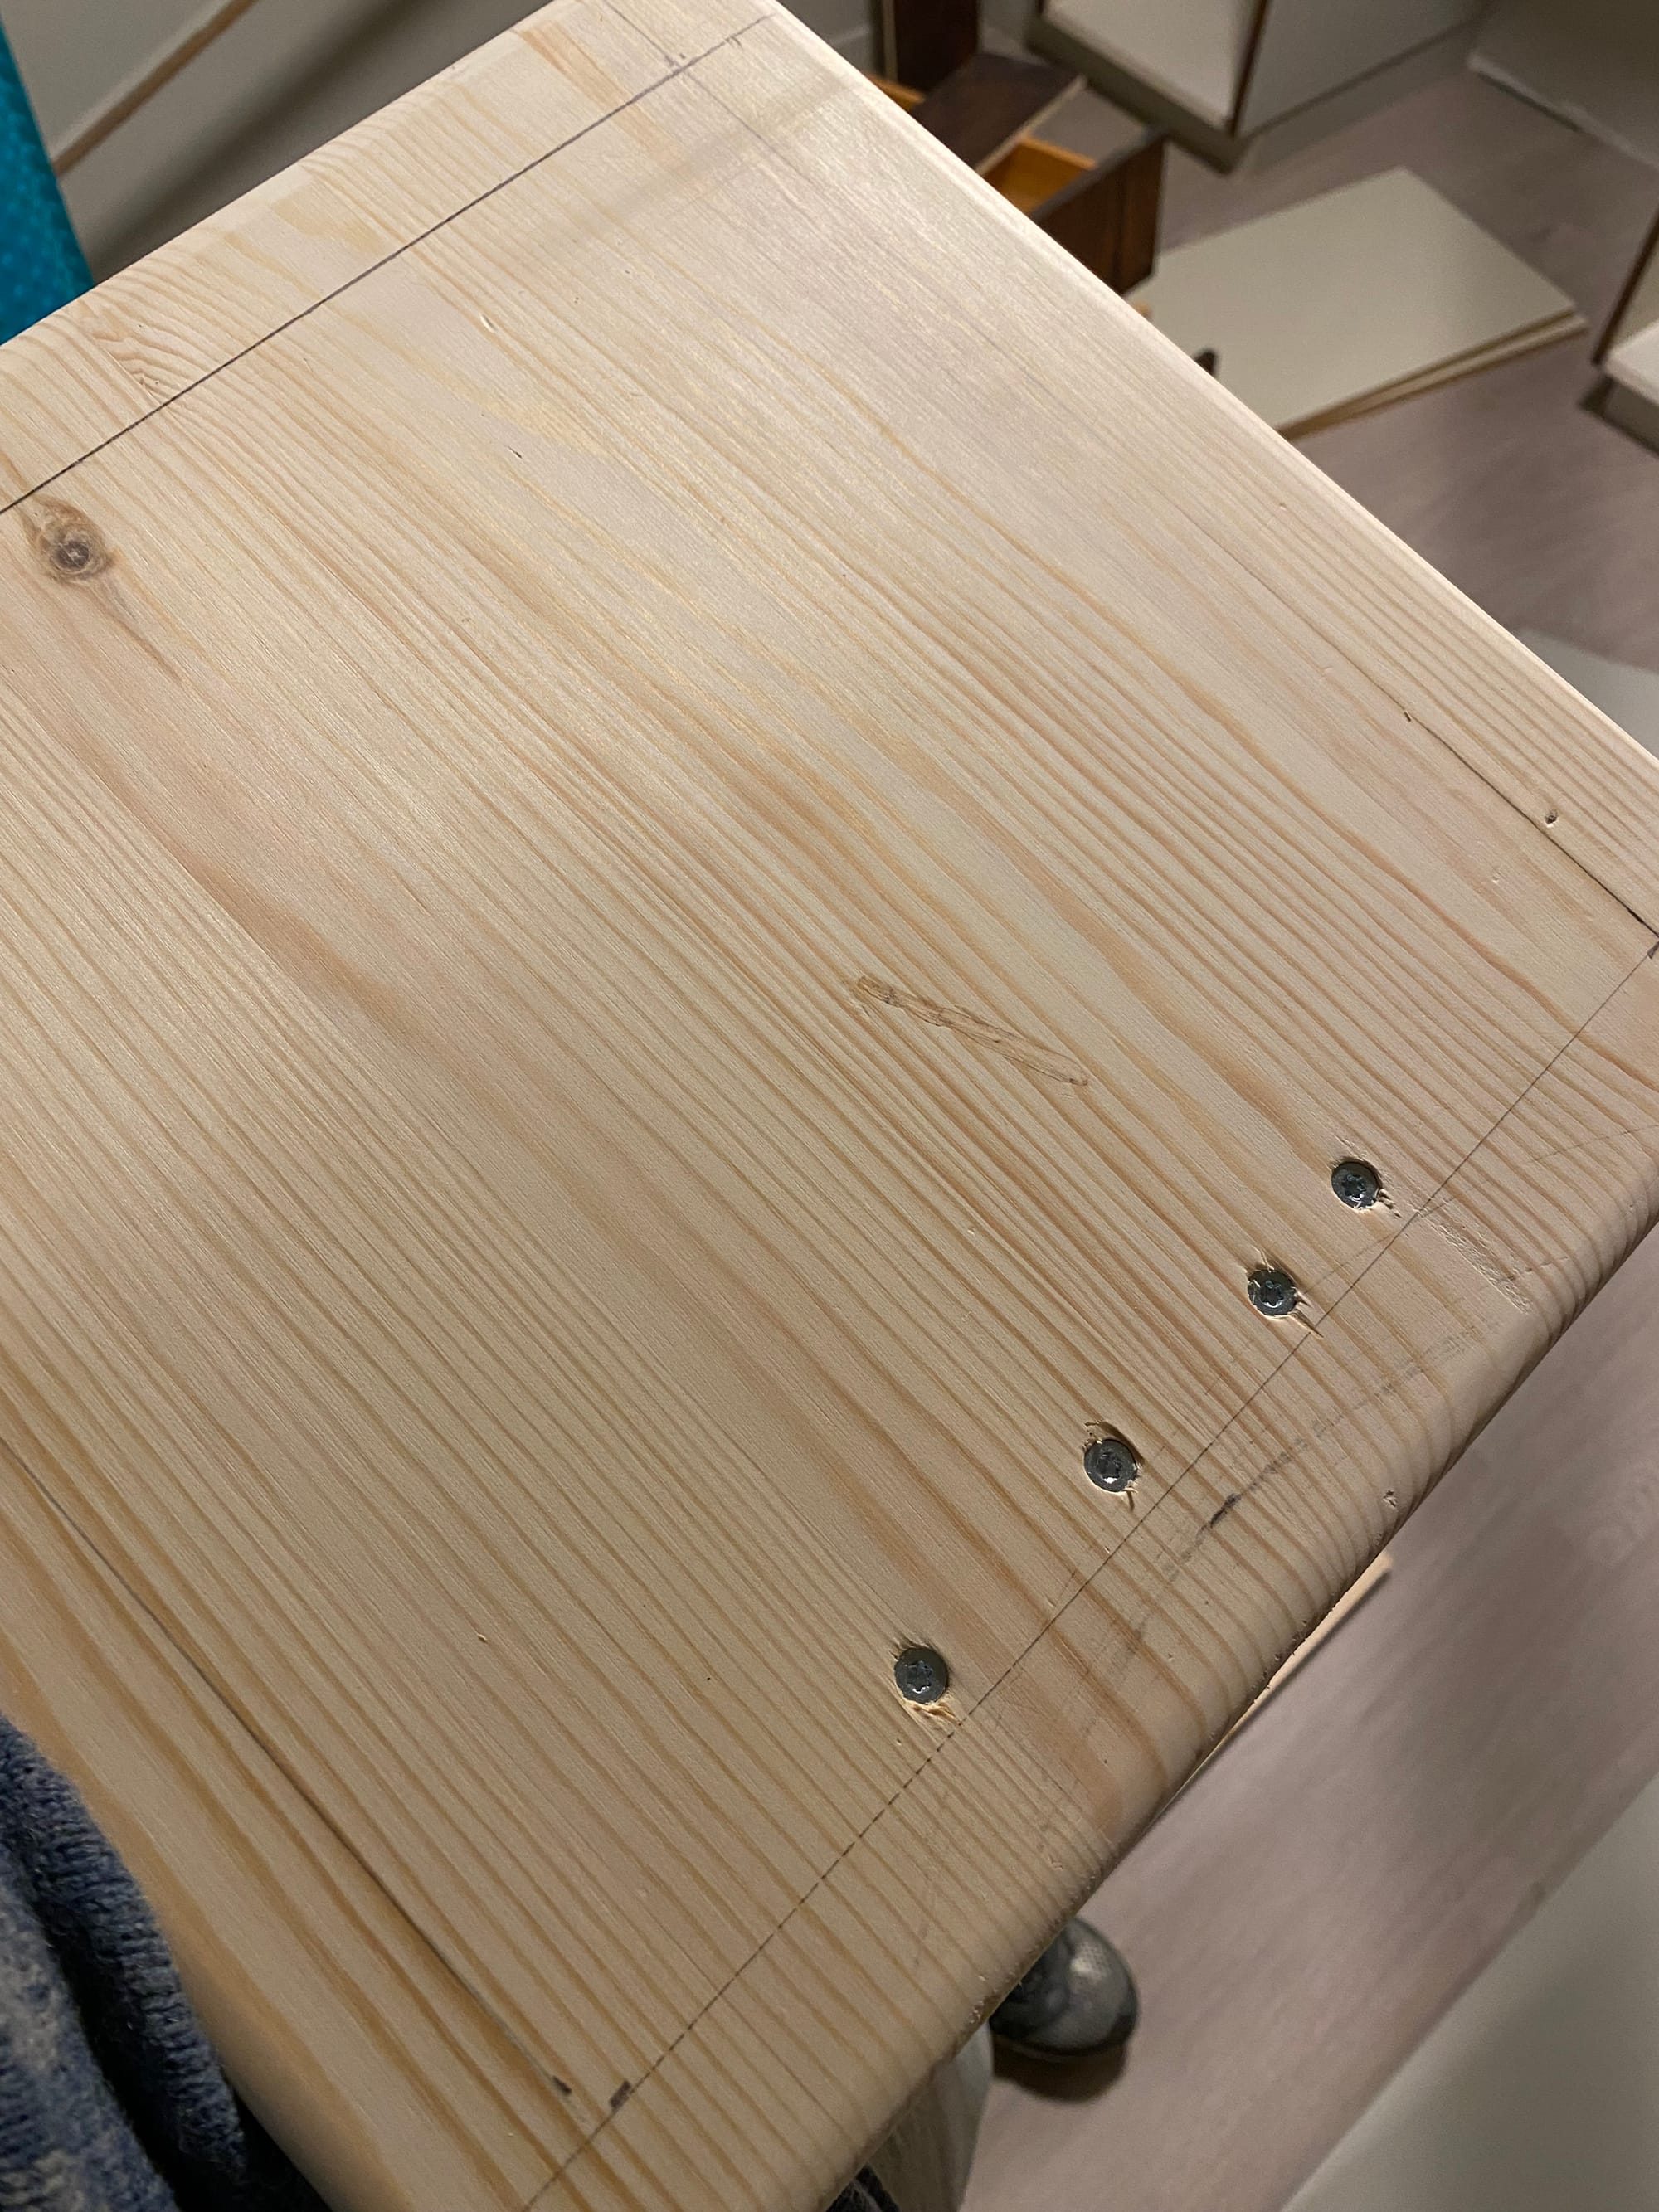
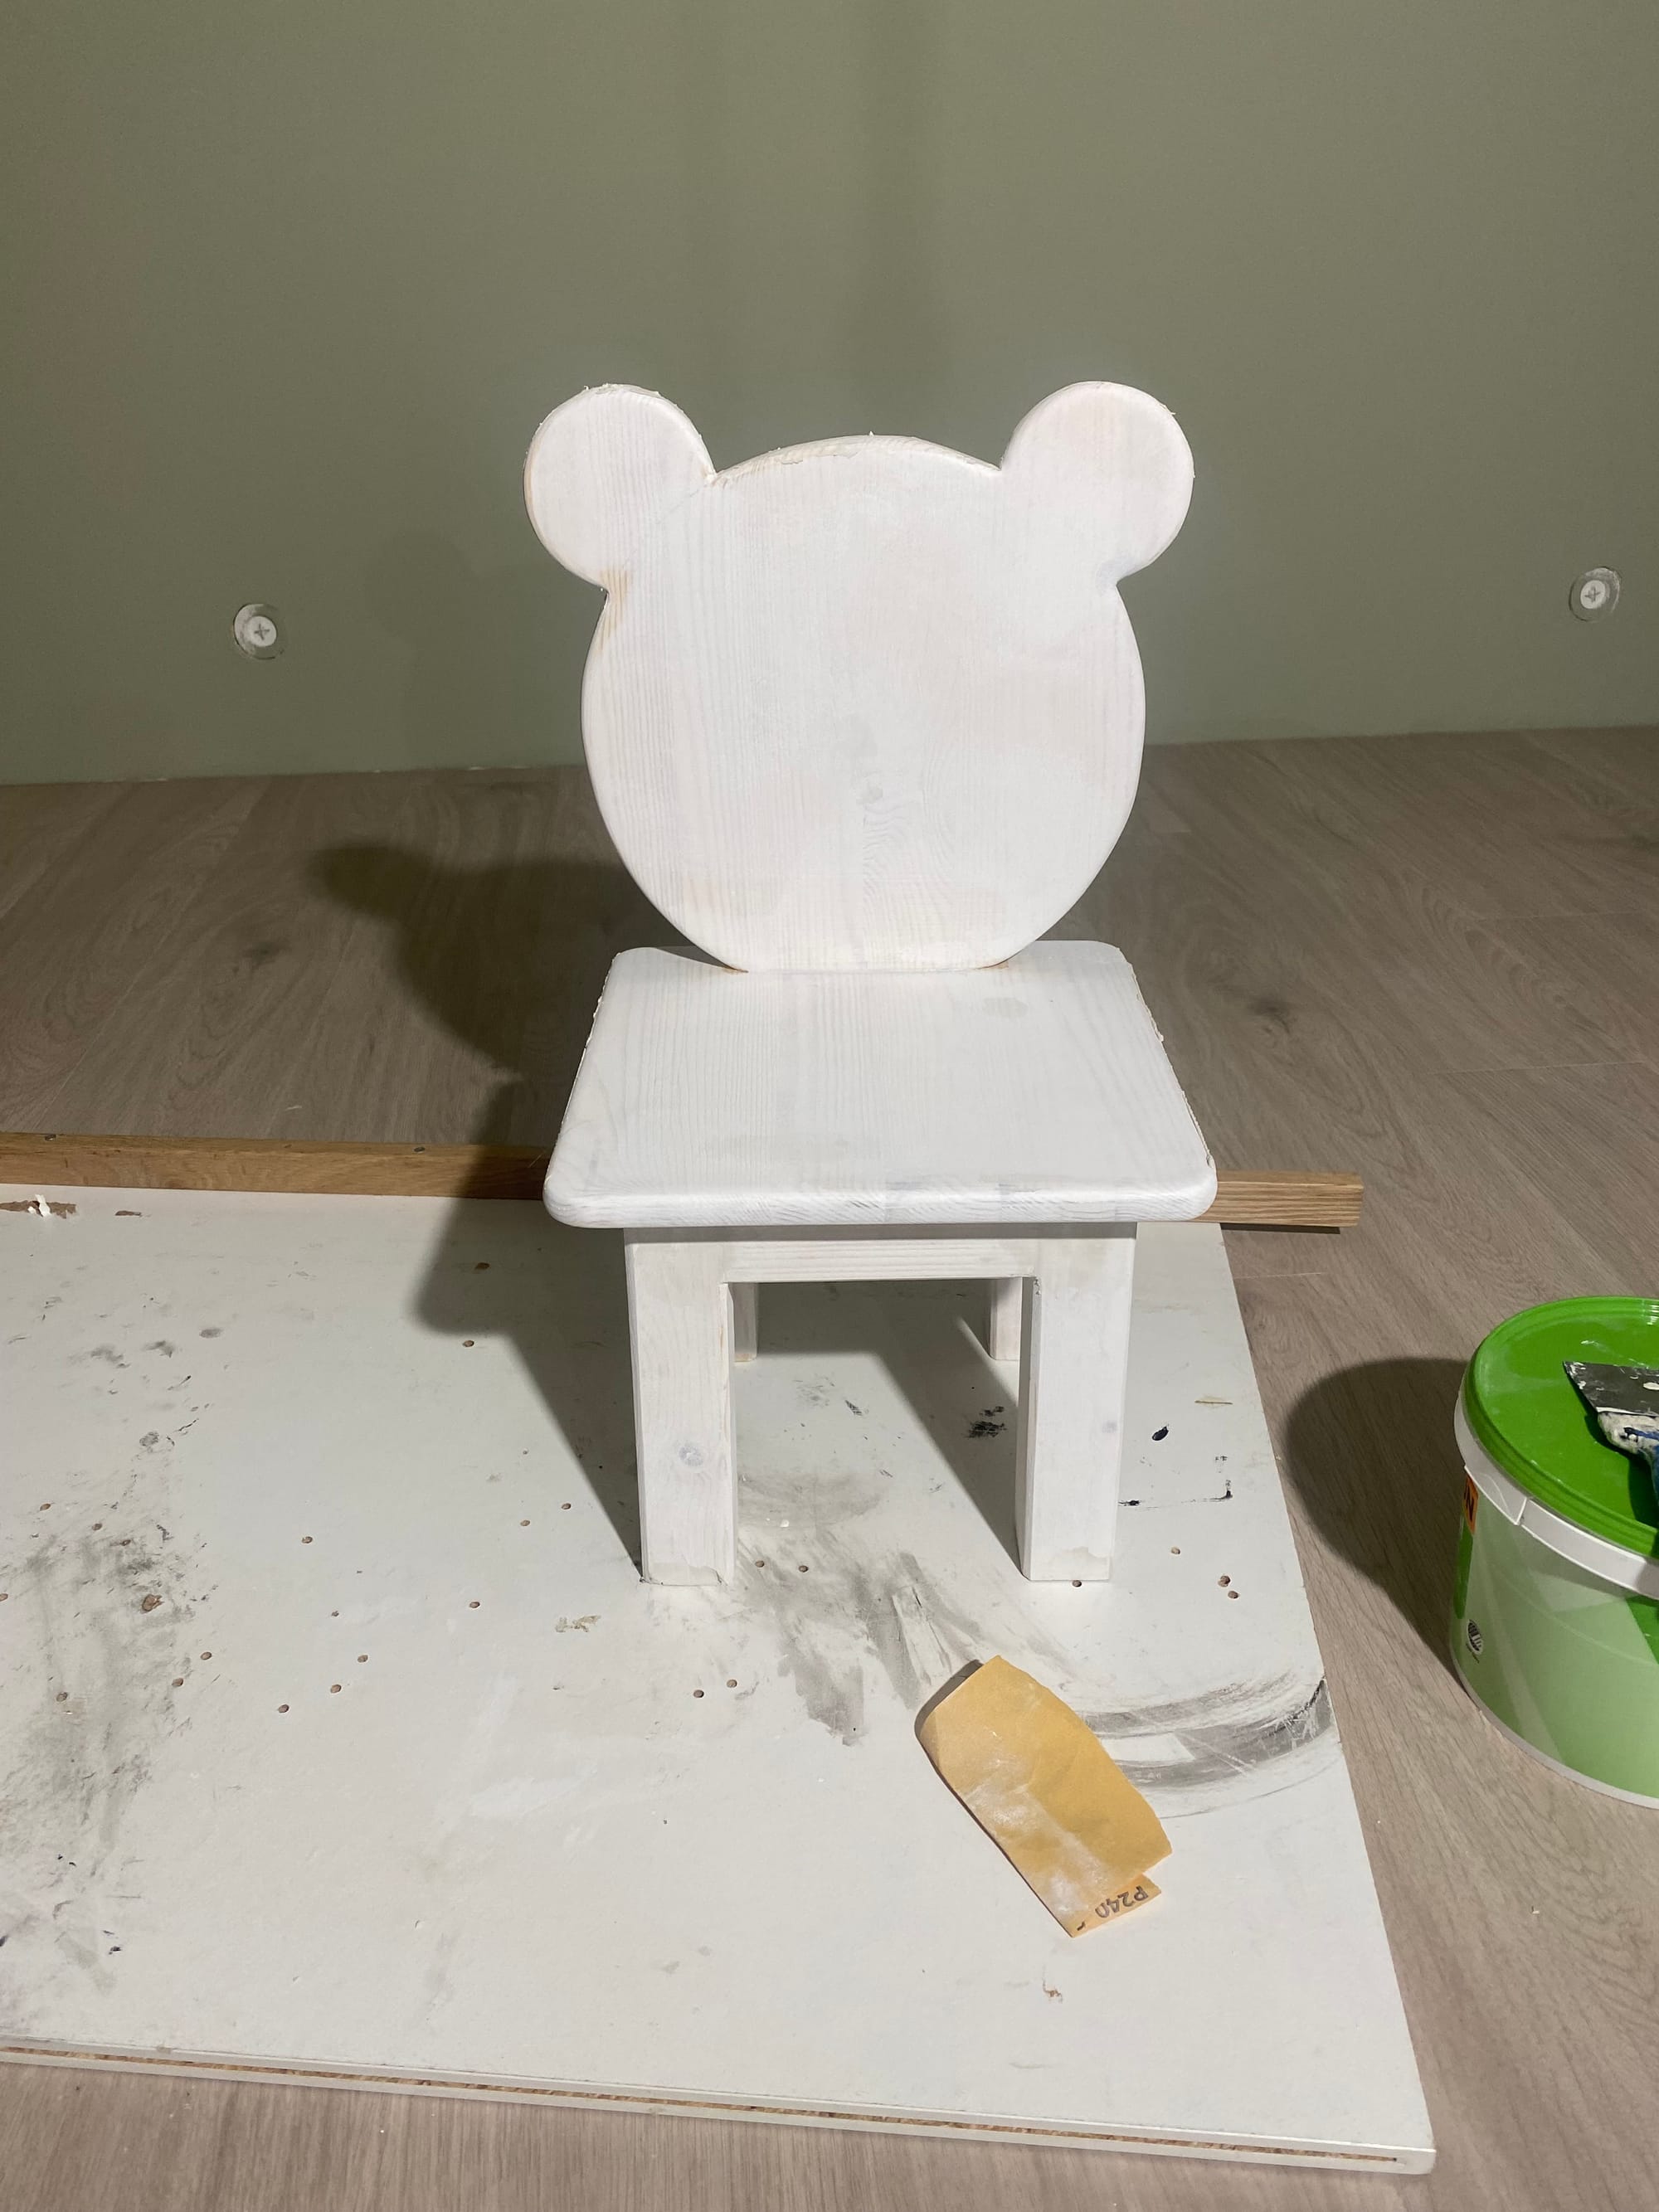
Then it was time to screw together the bottom plate and the back. I did this by screwing screws into the underside. Here it helps to draw where you want it and, not least, to fix it to a workbench. then you have more control. Feel free to use glue when screwing together.
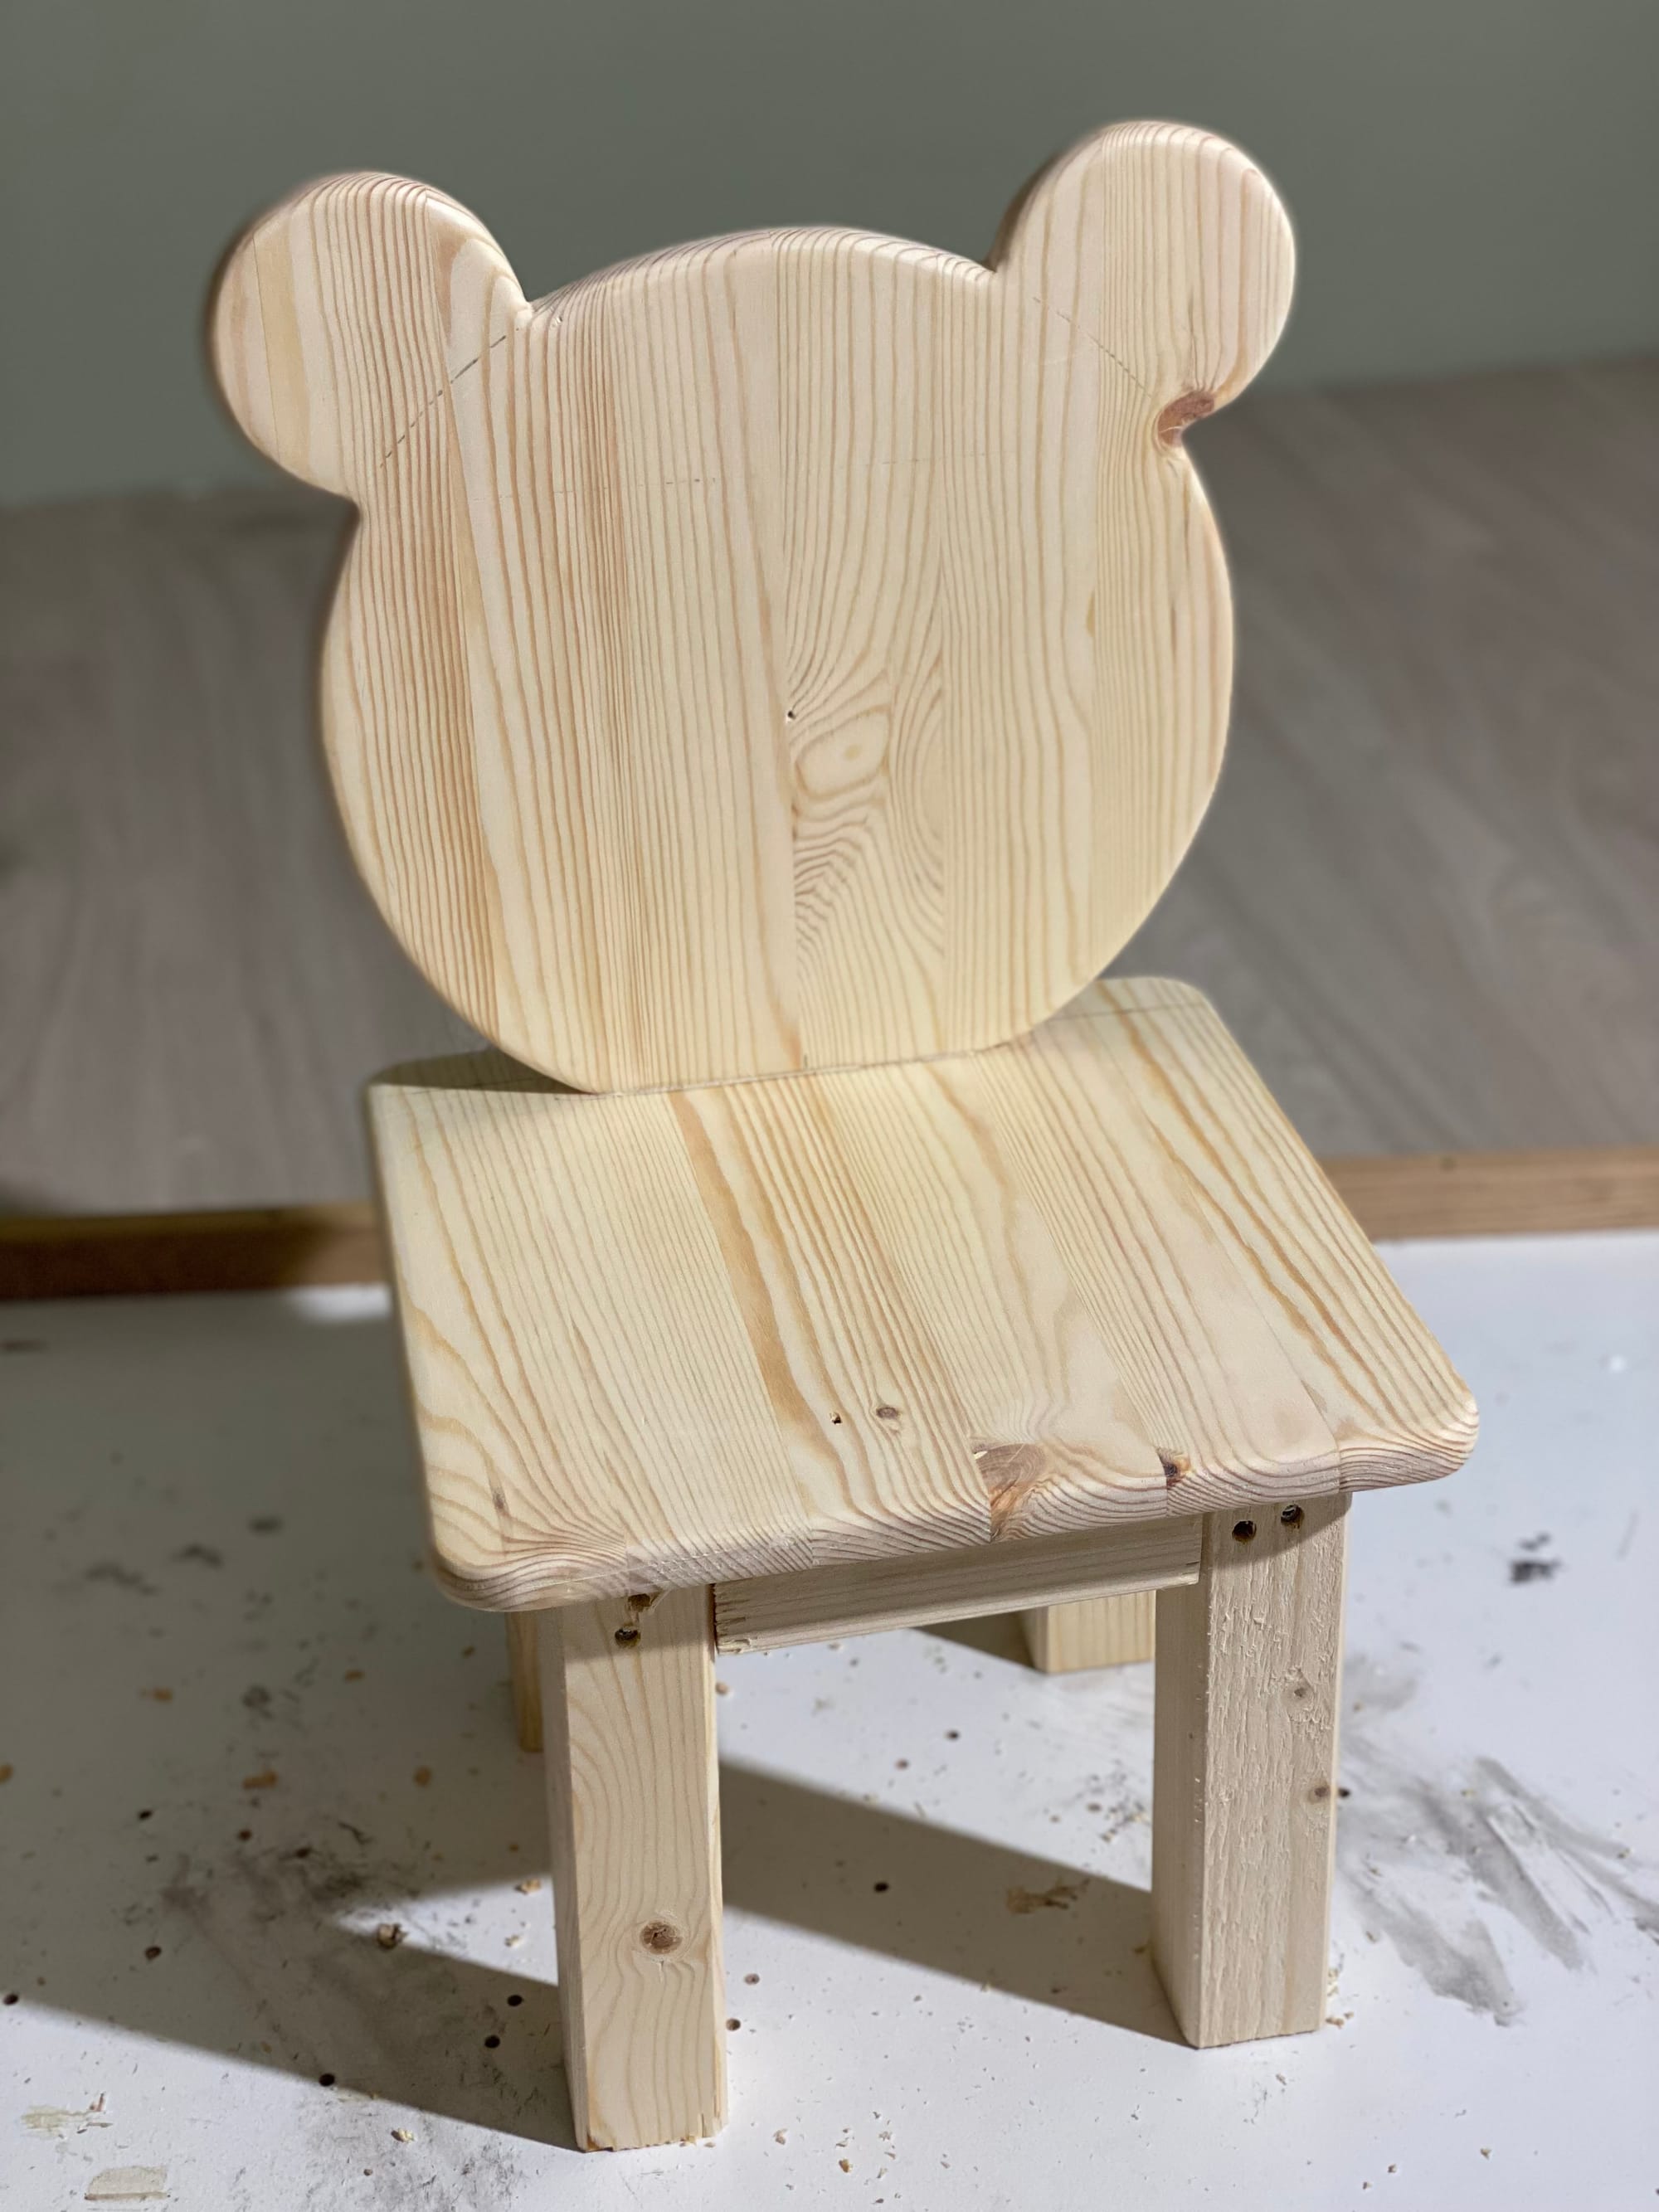
To make the legs I used 4.8 cm x 4.8 cm. Cut to 4 legs and 4 plank pieces that you can use to fasten the legs together. You have to choose the height yourself, but I went for 25 cm.
Screw the legs into the base plate. Screw from the underside so that the screws are not visible.
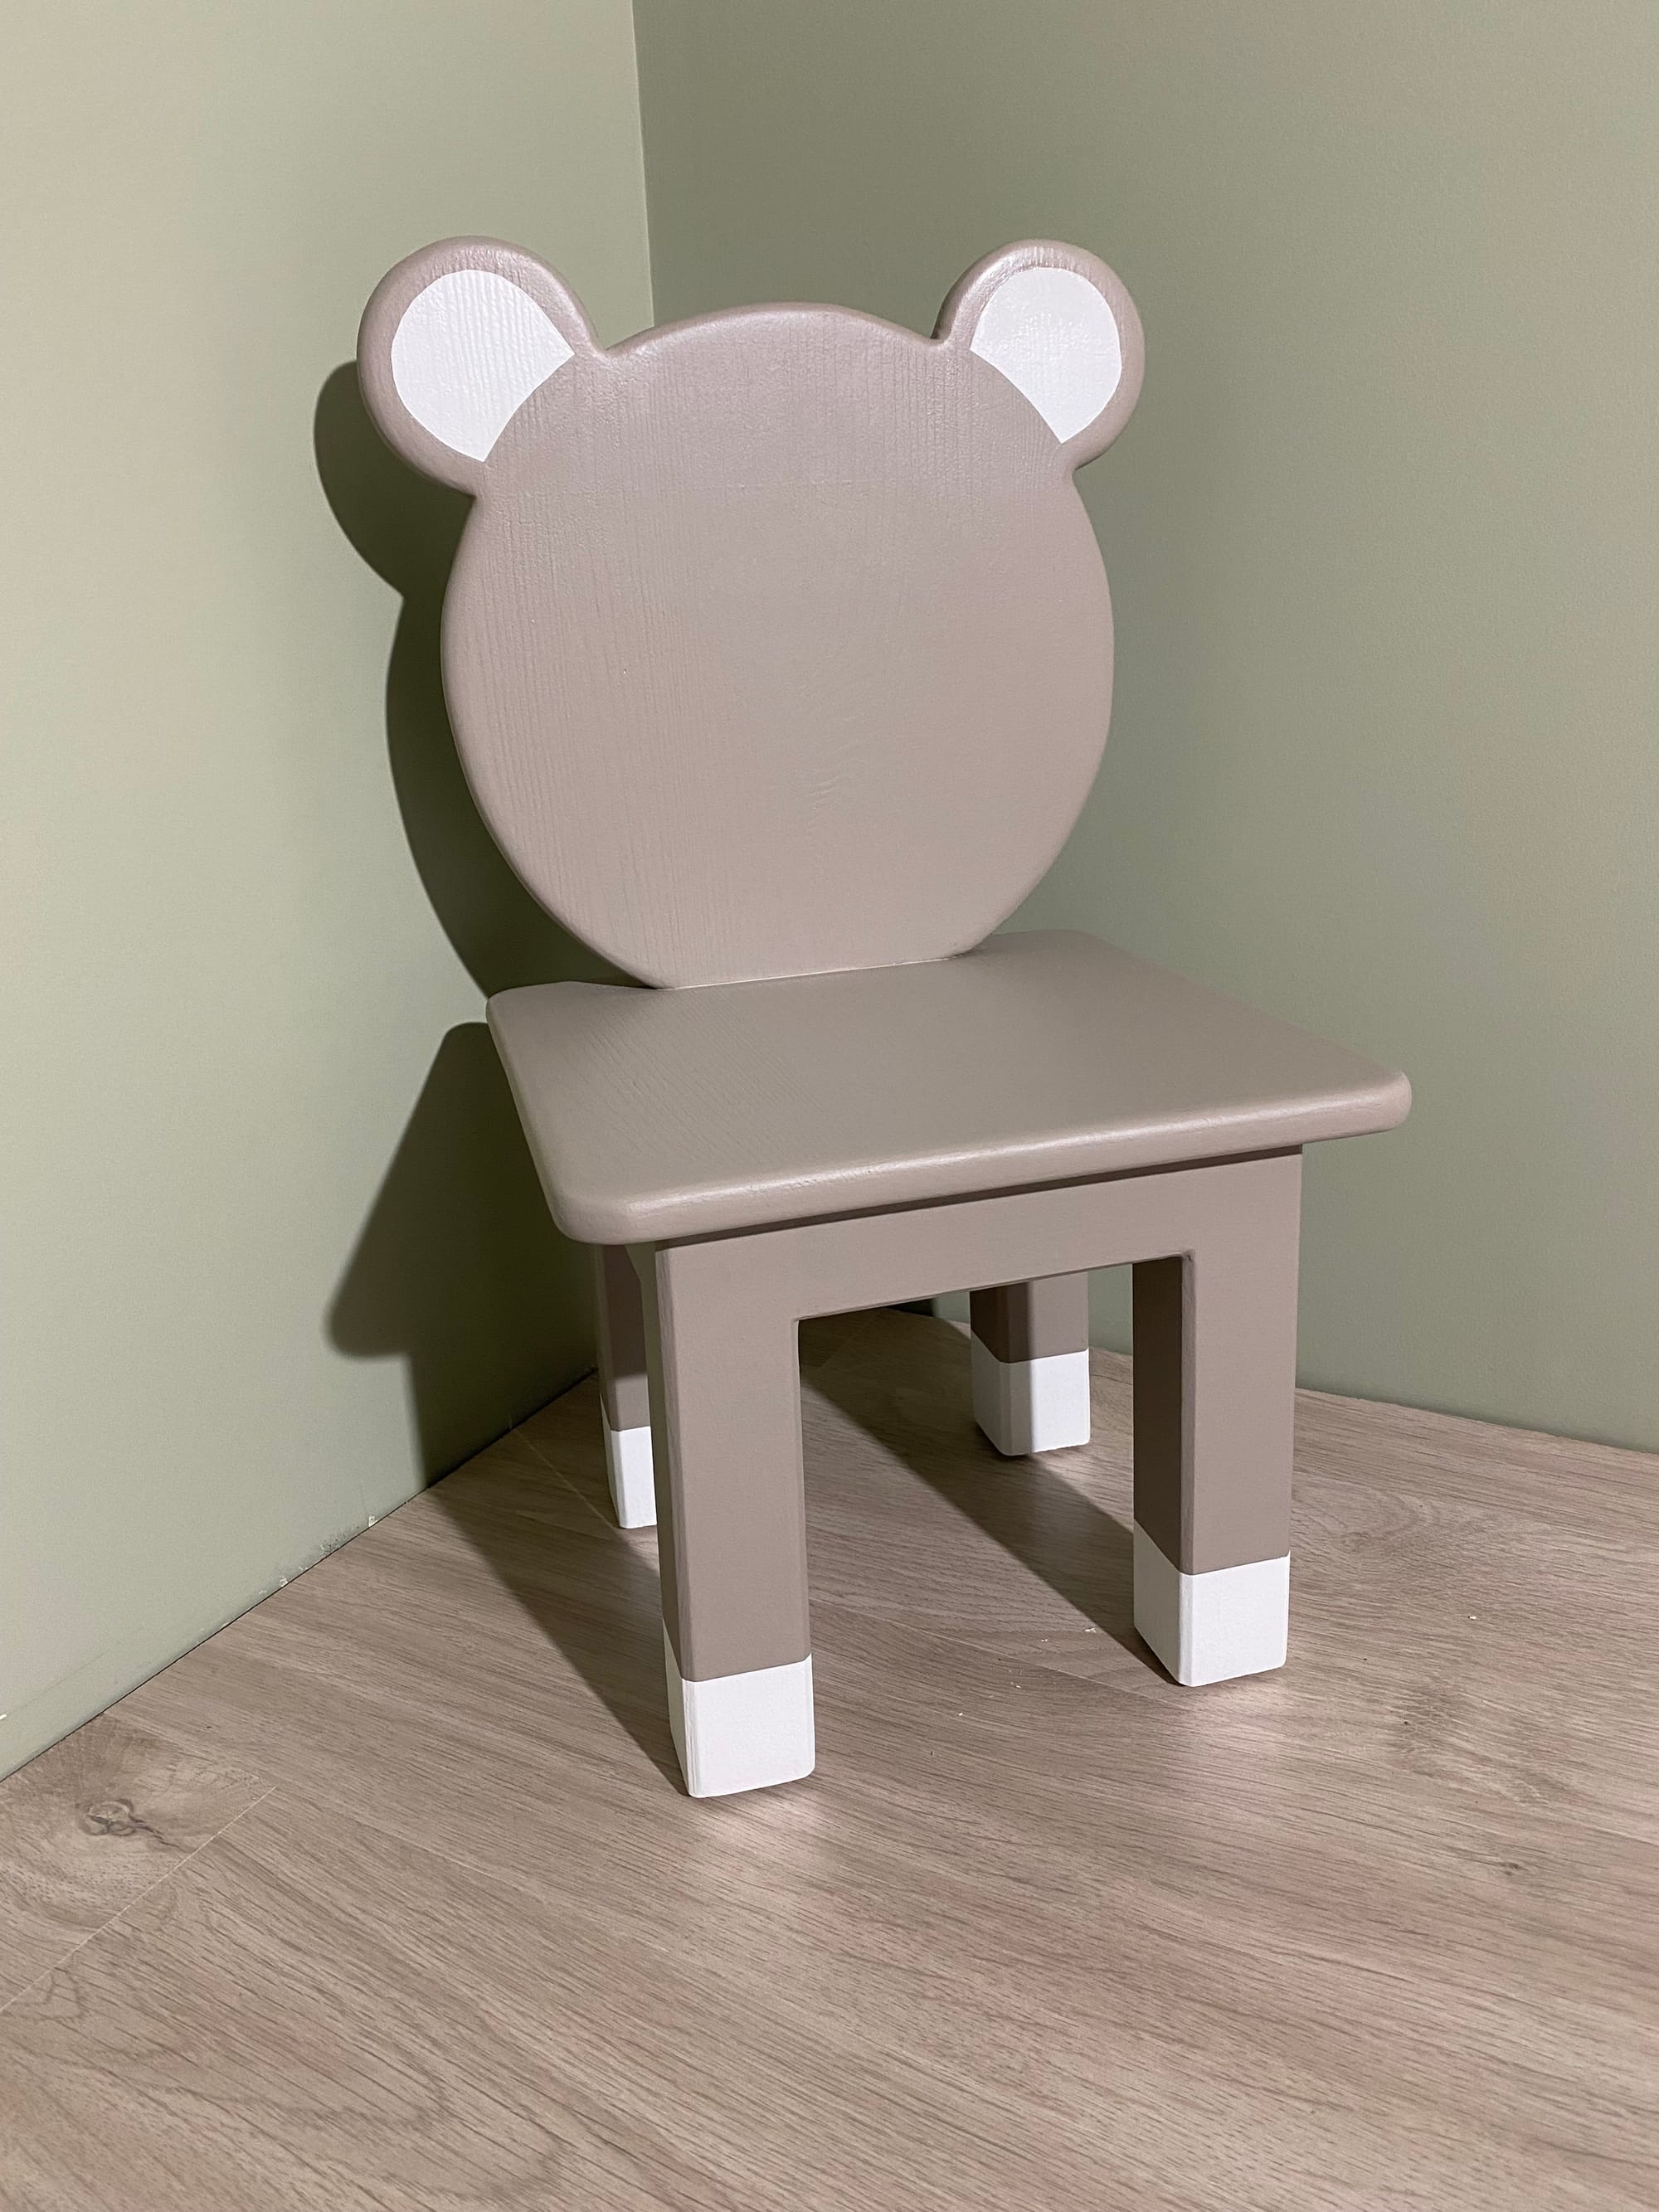
After that I sanded all holes and cracks in the wood. After that, it's priming before I used matt gloss floor paint. To make the chair a little sweeter, I painted 5 cm up on the leg so that it looks like paws.
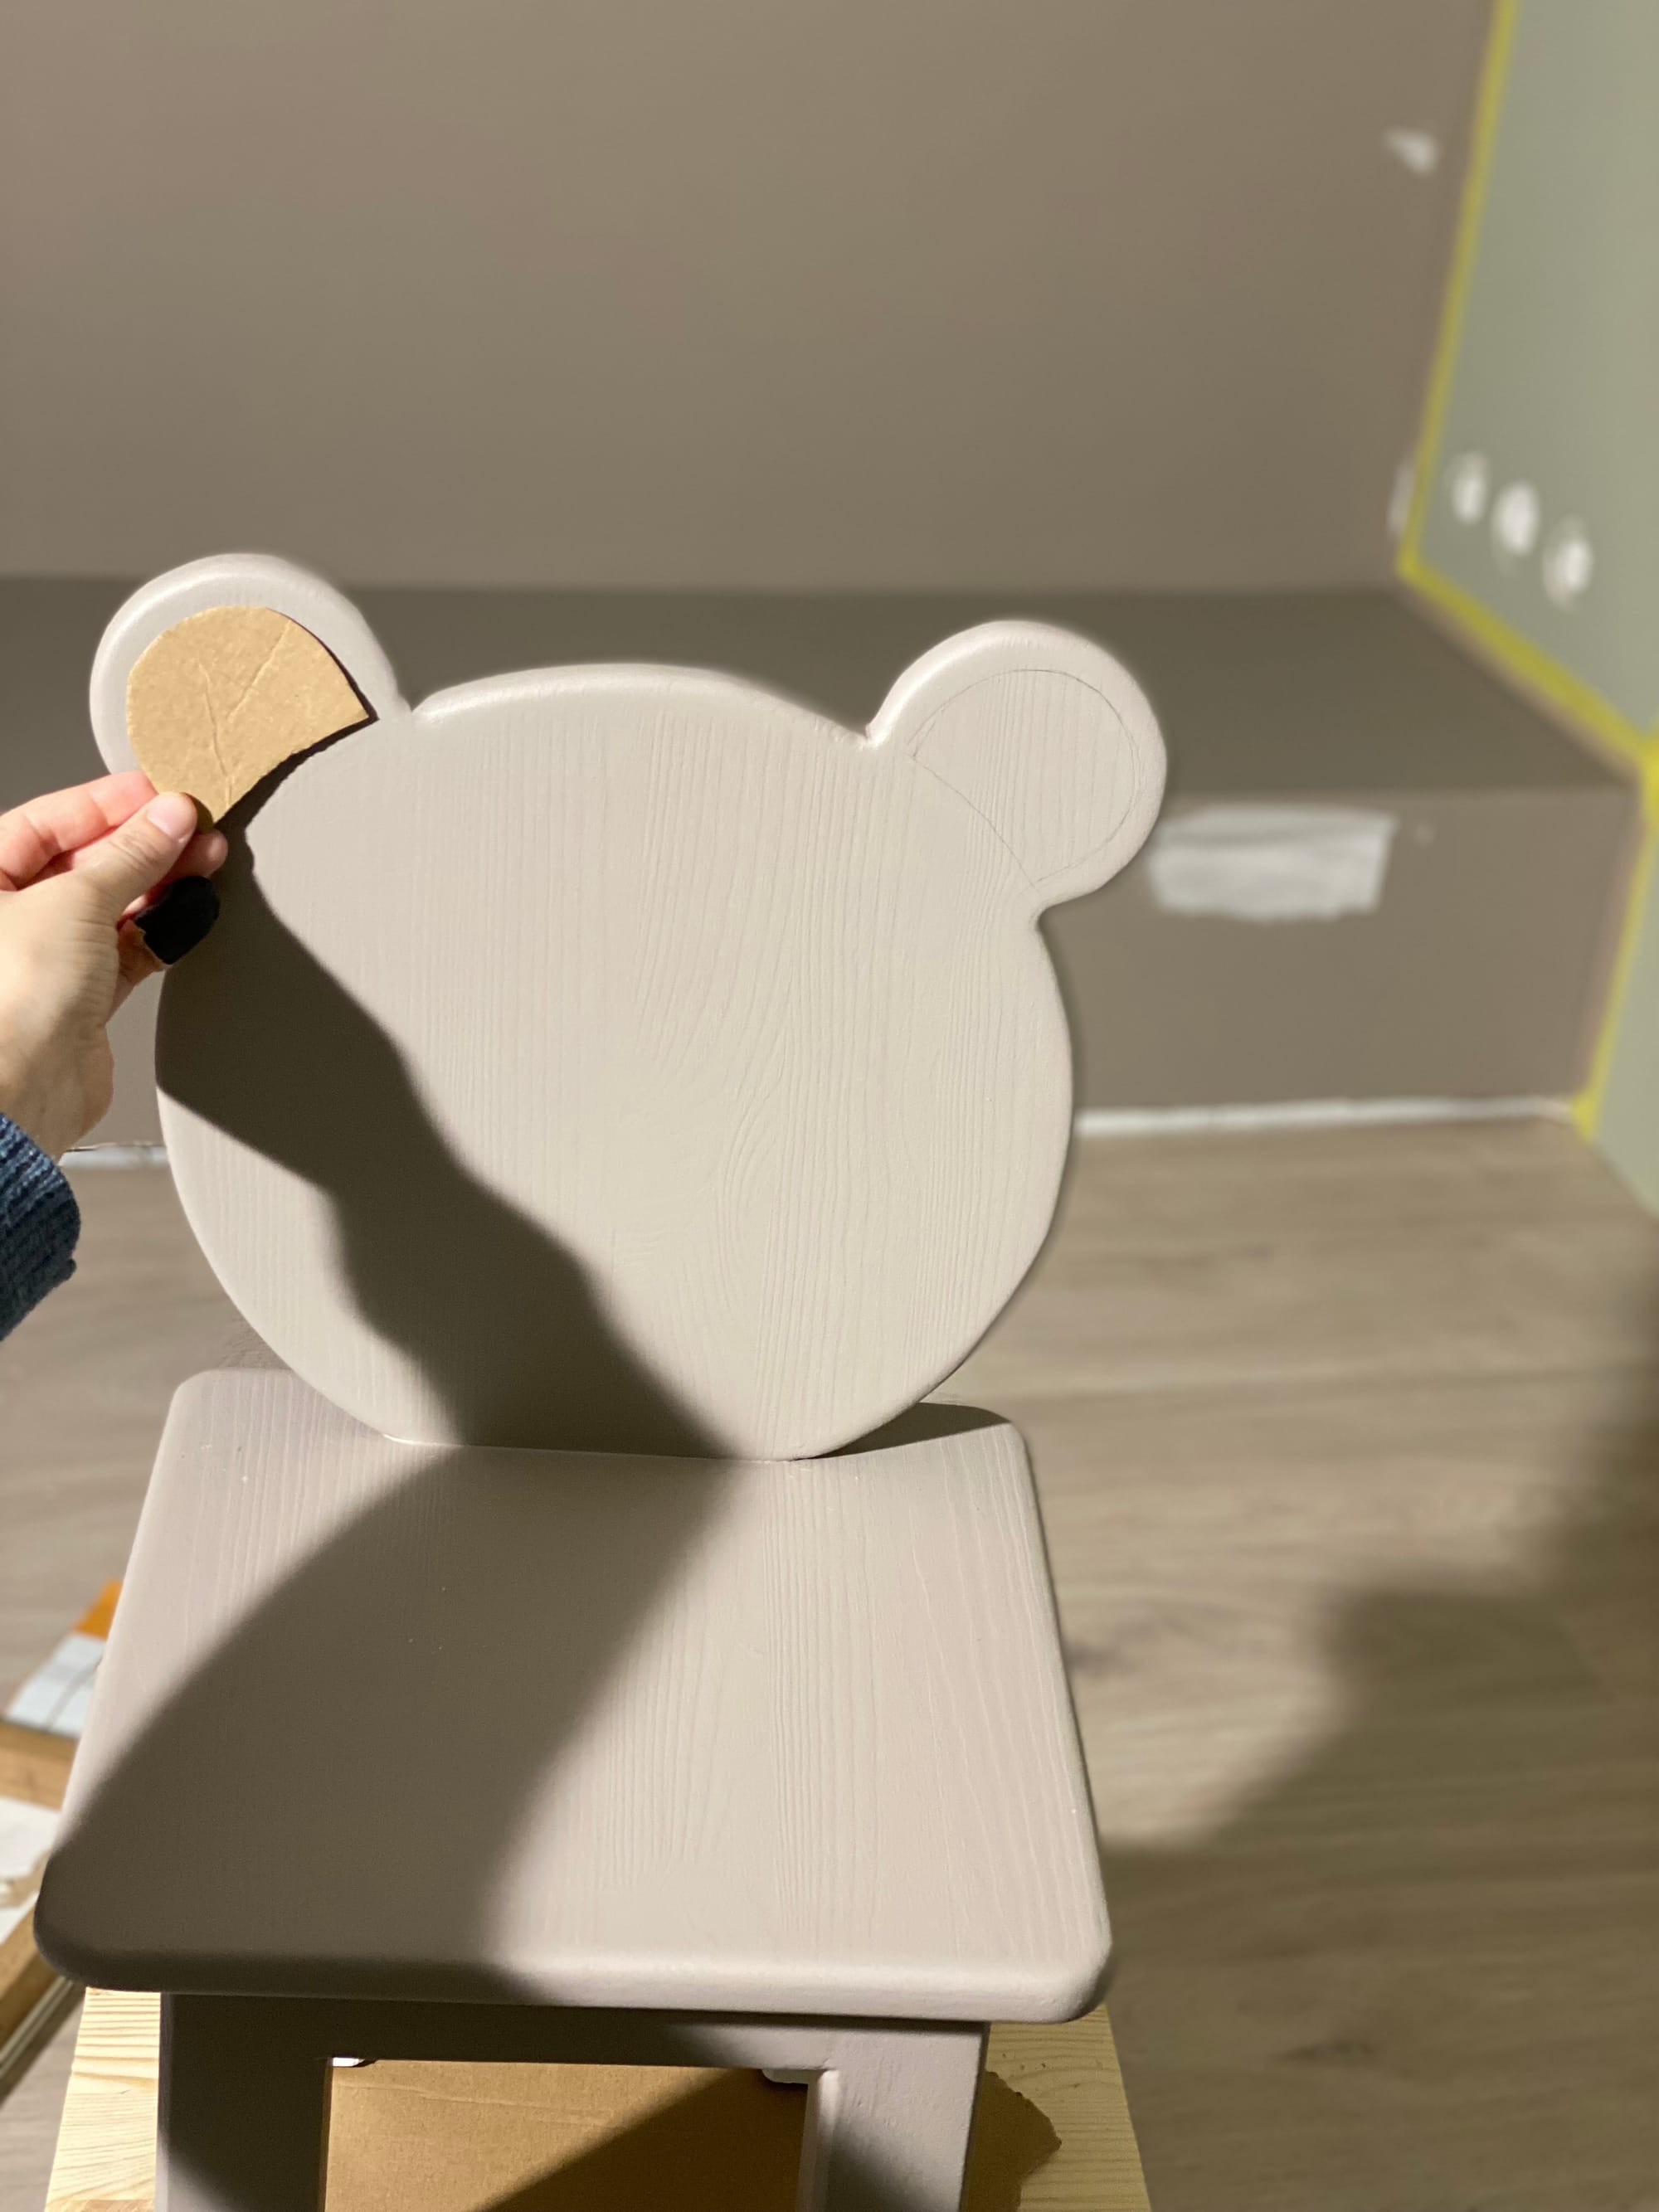
Then comes the hard part. Make the ear. Here I cut a piece of cardboard and drew around it. Used a lot of masking tape, lots of small pieces. I apply the final touches by hand with a small brush.
What do you think?
Of course, I have also signed the chair.